SOLUTIONS
Building Checkout App using Next.js and Conductor

Riza Farheen
Developer Advocate
Last updated: January 13, 2023
January 13, 2023
9 min read


Join thousands of developers building the future with Orkes.
In the past few years, have you ever had a day without using an application? Most probably, your answer would be ‘No’. In today’s world, we rely on mobile applications for everything, right from getting a cab, booking travel tickets, paying bills, purchasing things, and much more. And the process of purchasing/ordering things online definitely goes through a checkout process.
Yes! You heard it right. You can build an app with Conductor in 10 minutes. In this blog, I’ll walk you through the process of creating a Checkout app with Next.js and Conductor. Conductor is a platform for building distributed applications in any language of your choice. However, this article details how to build a checkout application with Next.js and Conductor.
You need to ensure that the device on which the application is built meets the following requirements.
The Conductor server can be set up locally on your device, or you can set up the Orkes Cloud version or even test out the Conductor in Developer Edition, a free tool from Orkes for testing your application in real-time.
In order to run your application against a server, you need to extract the access keys from your Conductor server. The access key includes two parts; Key ID and Key Secret.
So, let’s obtain the Access Keys from the Conductor Server.
You need to create an application inside your Conductor server, from where the Key ID and Secret are to be obtained. Ensure that you have provided the worker role for the application and then generate the access key. These access keys would be shown only once, so ensure to copy and keep them securely.
Now, export your variables as below;
# set the KEY and SECRET values with the one obtained from the Conductor UI after creating an application
export KEY=
export SECRET=
# replace CONDUCTOR_SERVER with the actual hostname, the URL must end with /api
export SERVER_URL=http://CONDUCTOR_SERVER/api
# Optional checkout workflow name defaults to MyCheckout2
export CHECKOUT_WF_NAME=MyCheckout2
Once you have verified this, let’s move on to the next step in building your Next.js application.
Checkout the application code from:
https://github.com/orkes-io/conductor-nextjs-example
You need to install the dependencies initially.
yarn
yarn seedWf
Now start the app in development mode.
yarn dev
In order to use the app in the browser, open https://localhost:3456/
On your browser, the application will look like this:
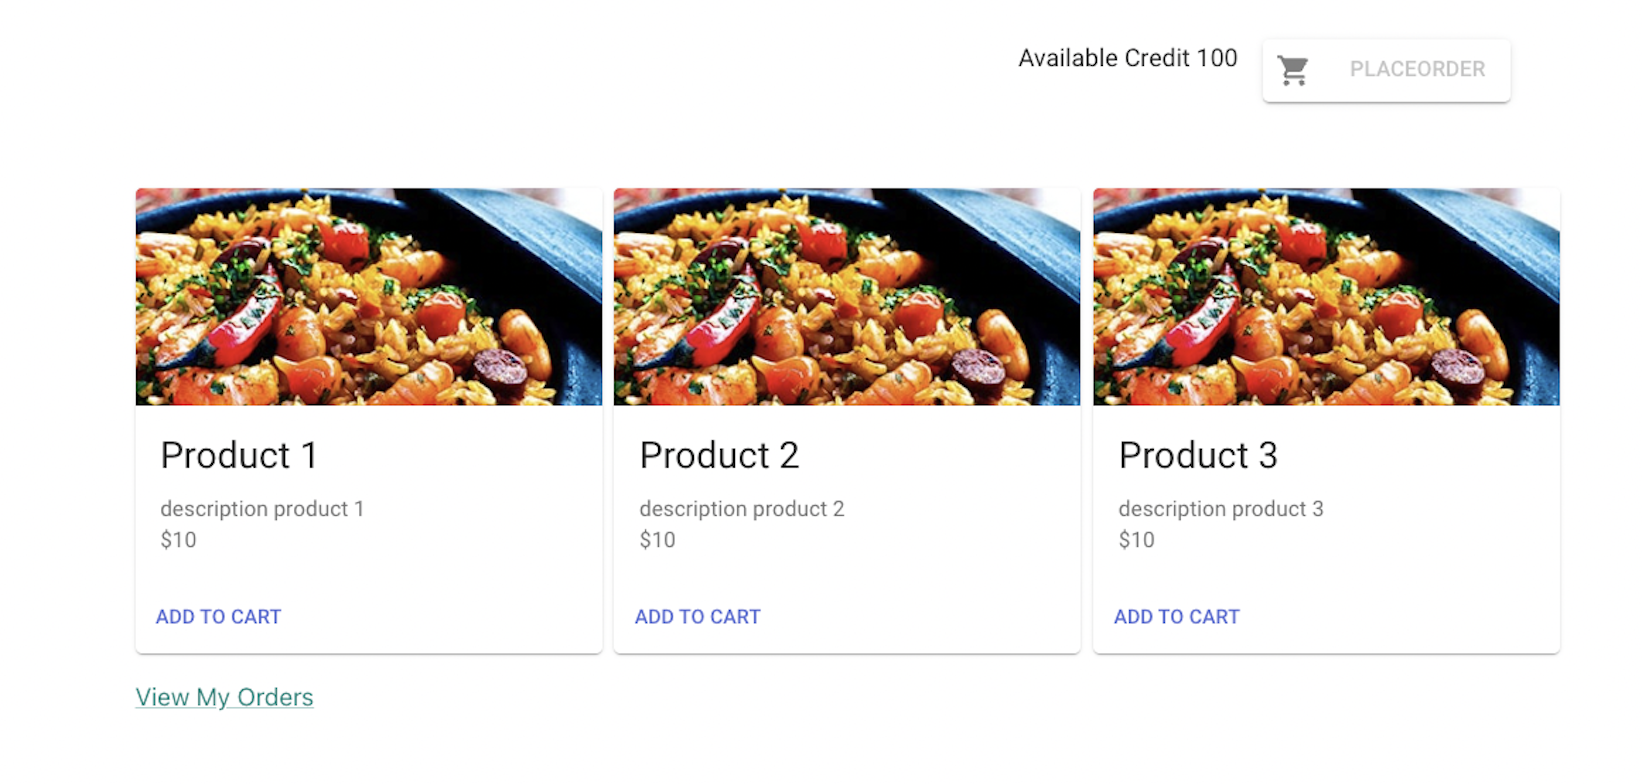
You can choose the products and add them to the cart. Once the cart is ready and when the user clicks on the PLACE ORDER button, the Conductor workflow begins.
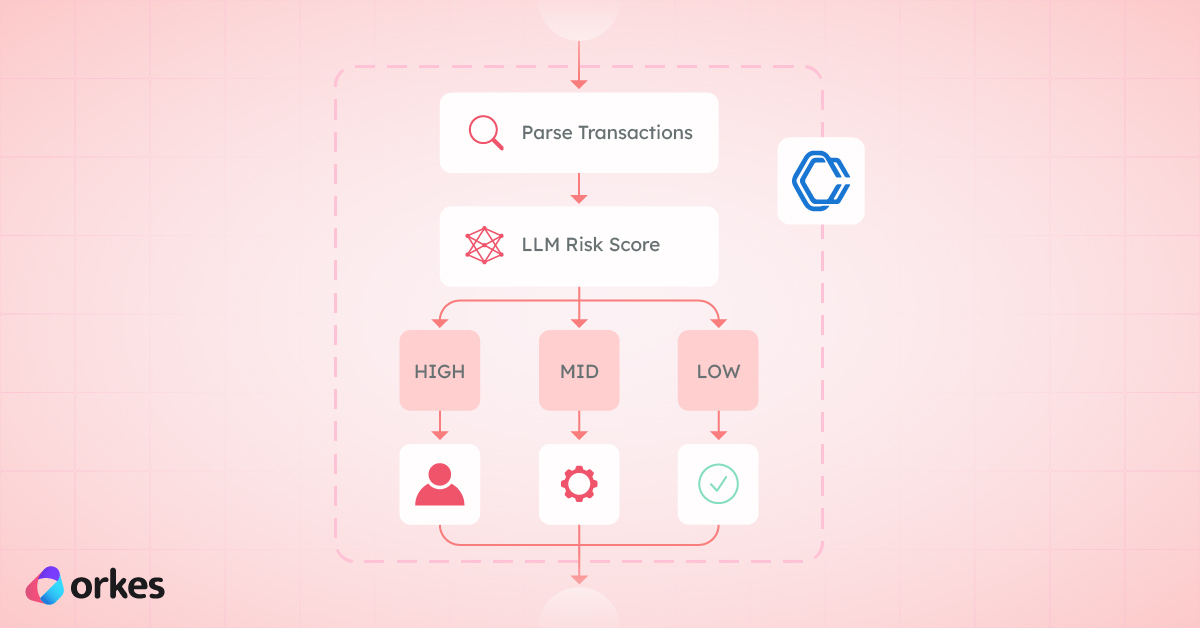
When you put your orders in the cart and proceed to the checkout, the application needs to calculate the total credit with the available credit and check whether the user has a credit. To do this, you can make use of a workflow in Conductor.
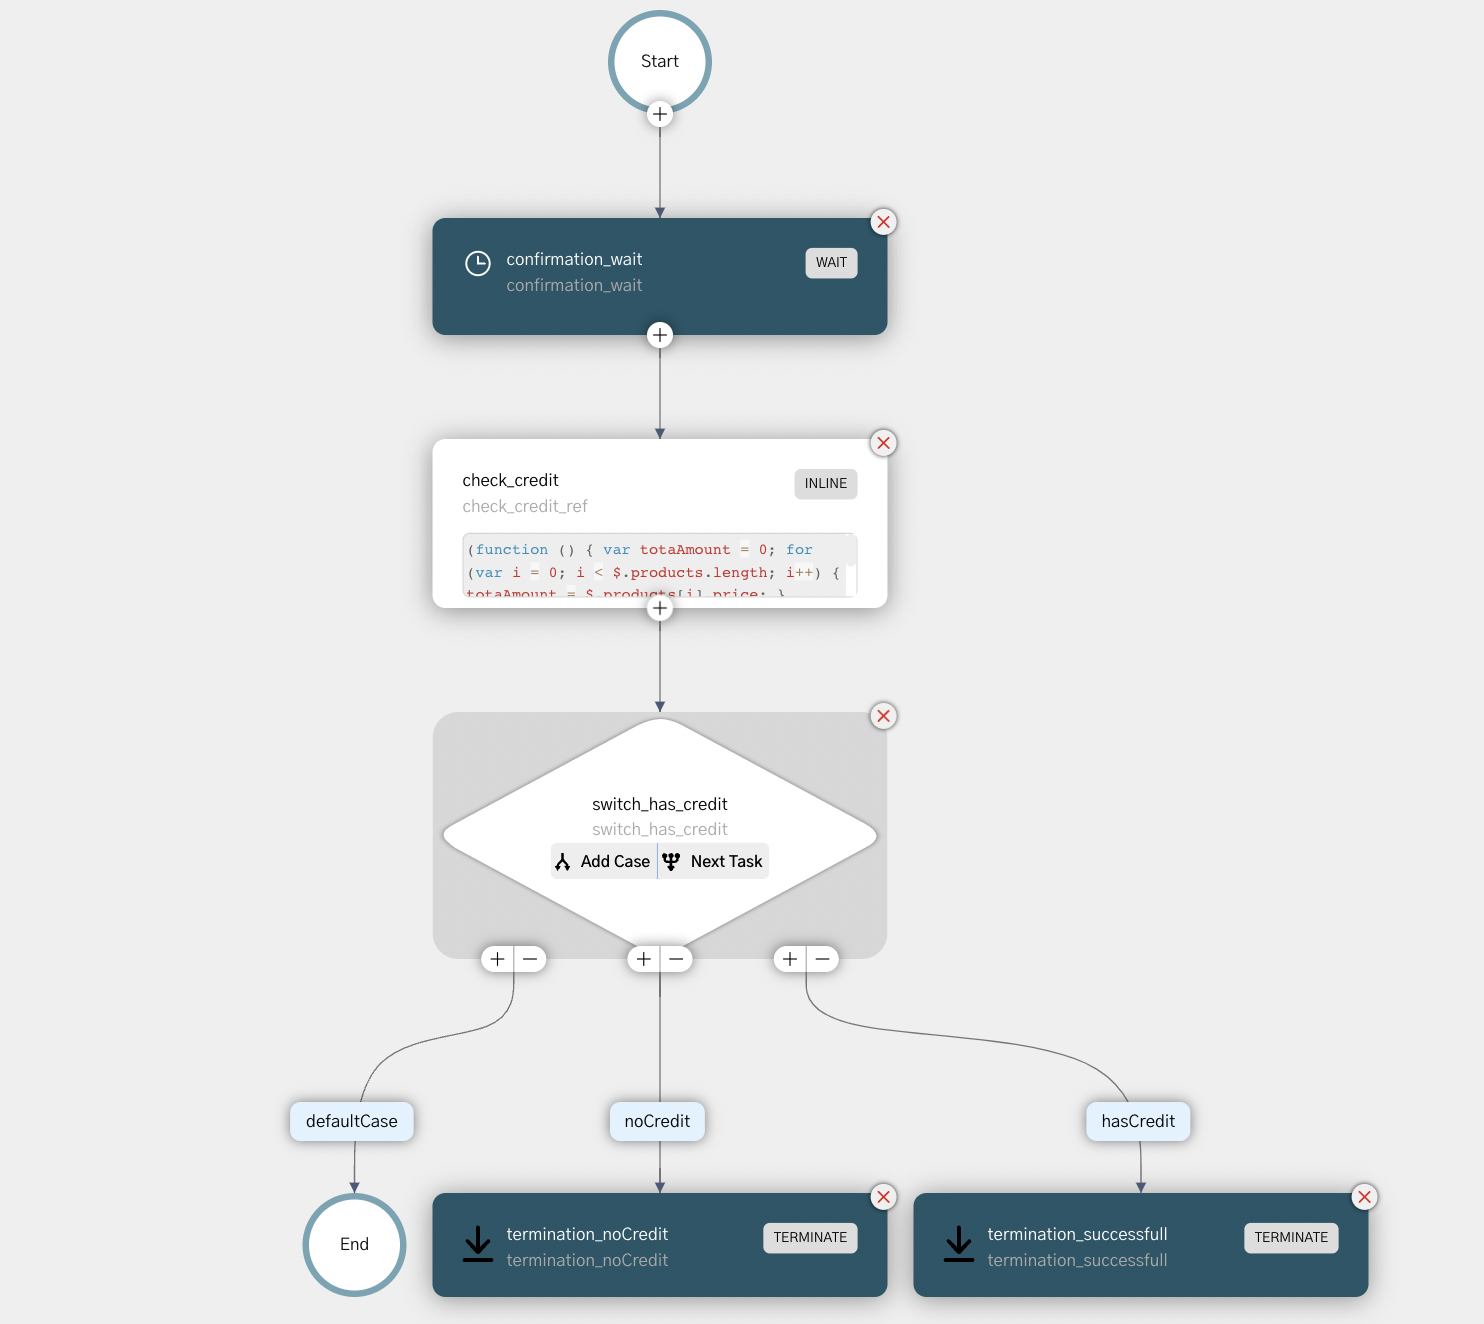
Let’s consider a simple workflow of a Checkout Application. The applications are built using Workflows in Conductor. Workflows are a combination of several building blocks known as tasks. These tasks orchestrate in a specified order to complete the workflow and provide durability across the flow, so even if the system goes down or there are temporary failures, the process is guaranteed to be complete - without having to write any extra code or logic!
As you move the system into production, these three tasks can be implemented to run real production code or mocked up when running tests, all without changing your NextJS application code.
Not only that, for the folks who are monitoring the checkout application in production (think operations/customer support), they know exactly what is going on with each order.
Here is the snippet of the workflow code used:
const createCheckoutWorkflow = () =>
  workflow(`${process.env.CHECKOUT_WF_NAME || "MyCheckout2"}`, [
    waitTaskDuration("confirmation_wait", "30 seconds"),
    generateInlineTask({
      name: "check_credit",
      inputParameters: {
        products: "${workflow.input.products}",
        totalCredit: "${workflow.input.availableCredit}",
        expression: function ($) {
          return function () {
            var totaAmount = 0;
            for (var i = 0; i < $.products.length; i++) {
              totaAmount = $.products[i].price;
            }
            return totaAmount > $.totalCredit ? "noCredit" : "hasCredit";
          };
        },
      },
    }),
    switchTask("switch_has_credit", "${check_credit_ref.output.result}", {
      noCredit: [
        terminateTask(
          "termination_noCredit",
          "FAILED",
          "User has no credit to complete"
        ),
      ],
      hasCredit: [
        terminateTask(
          "termination_successful",
          "COMPLETED",
          "User completed checkout successfully"
        ),
      ],
    }),
  ]);
For the complete working code, see the code here.
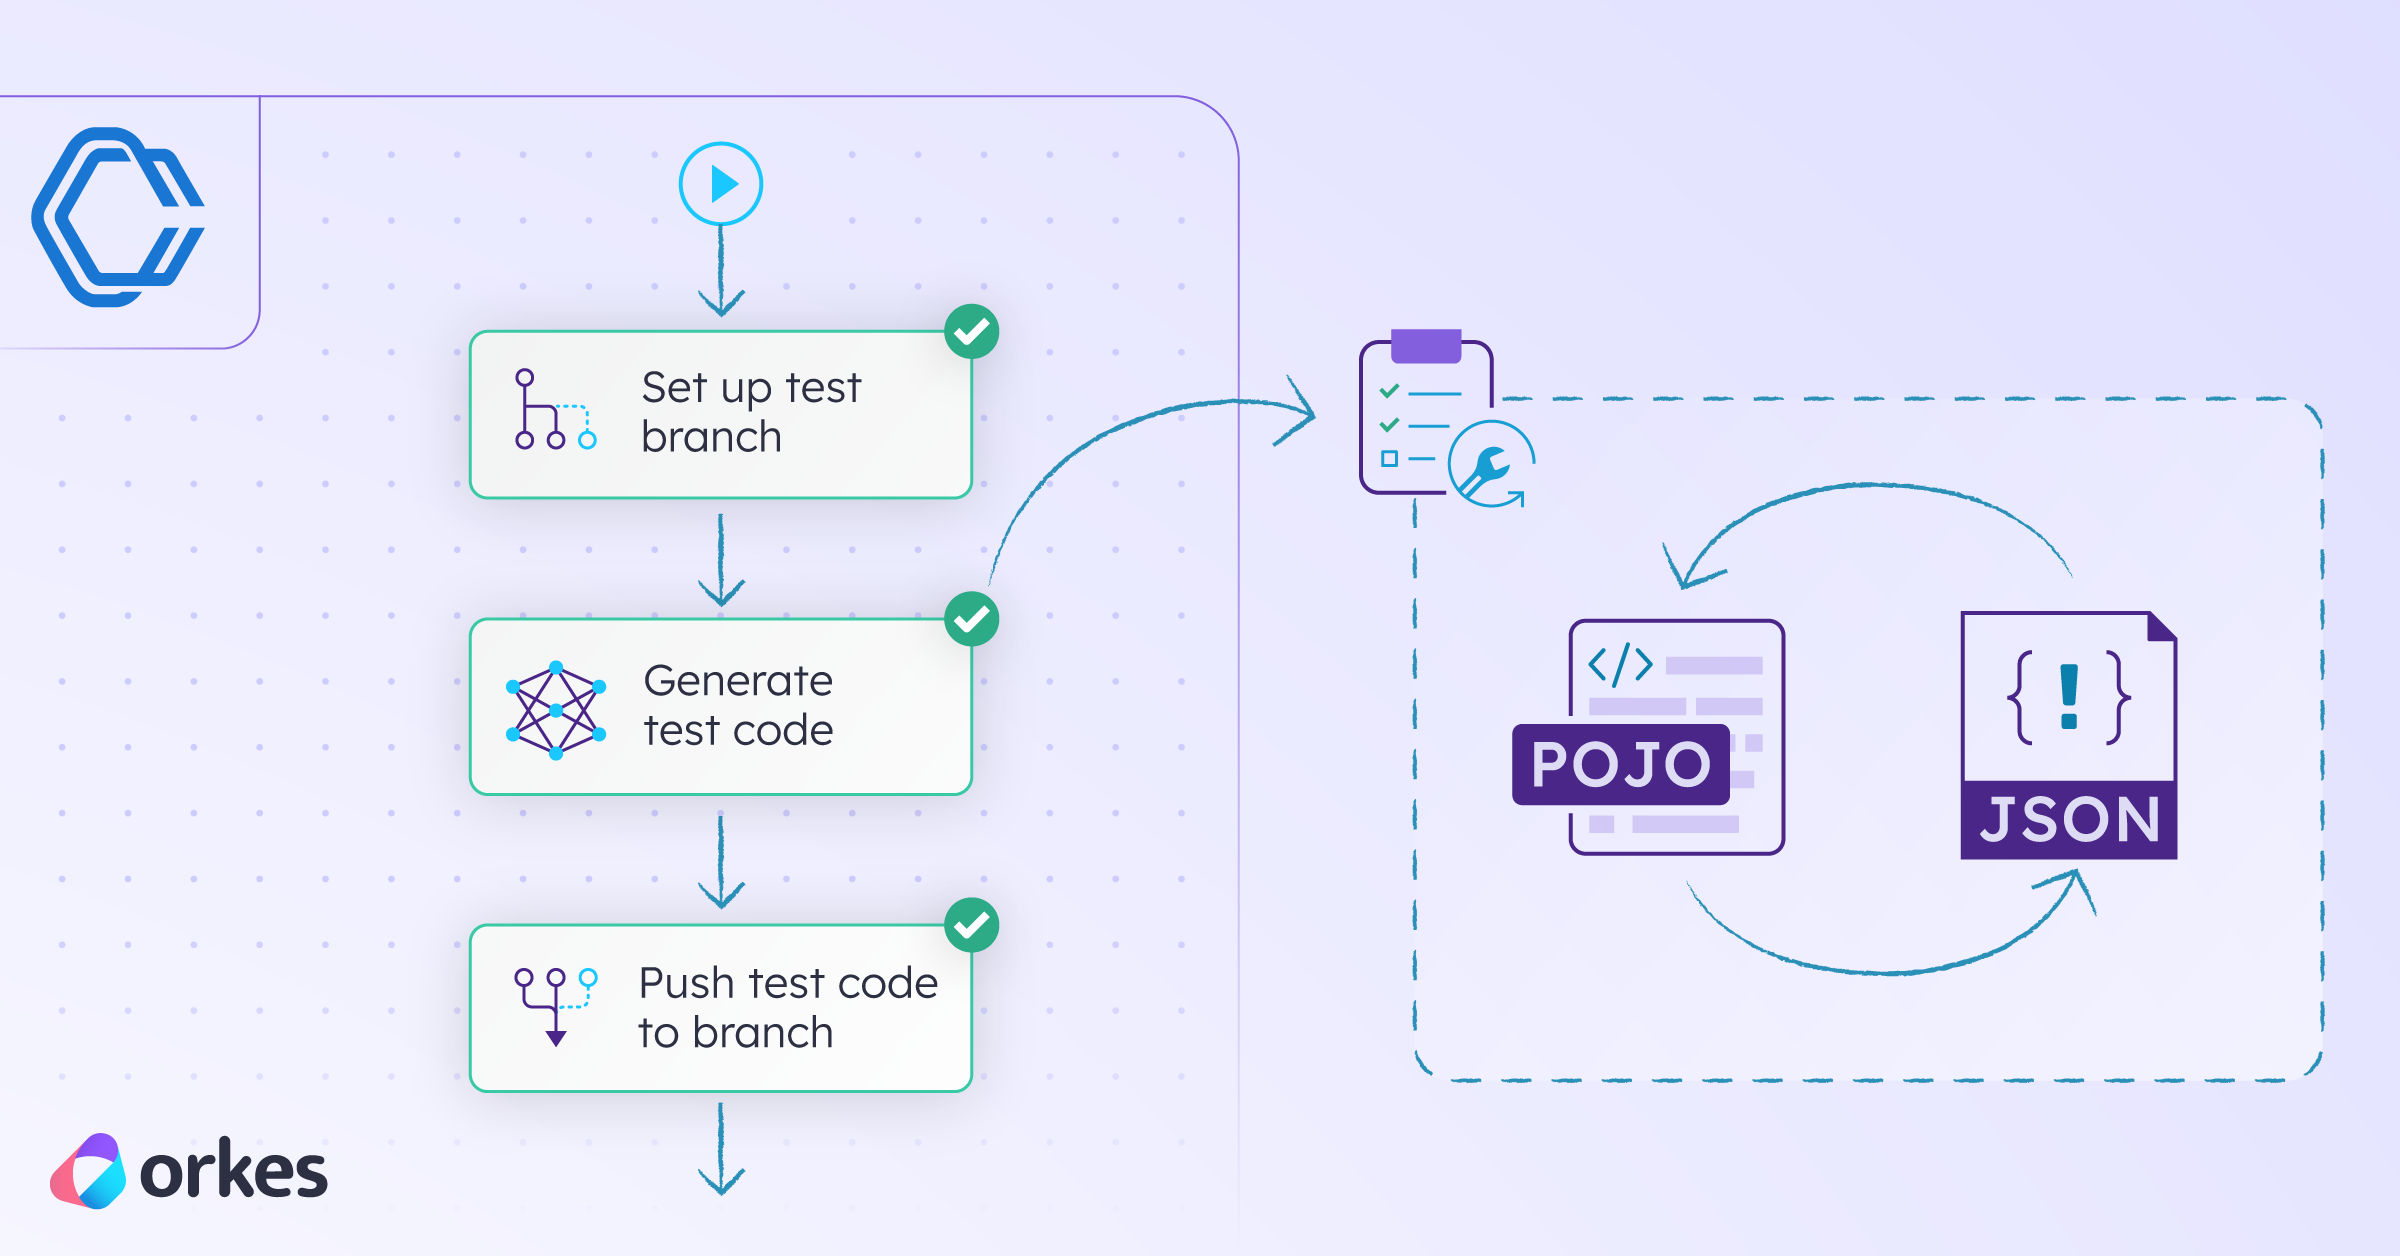
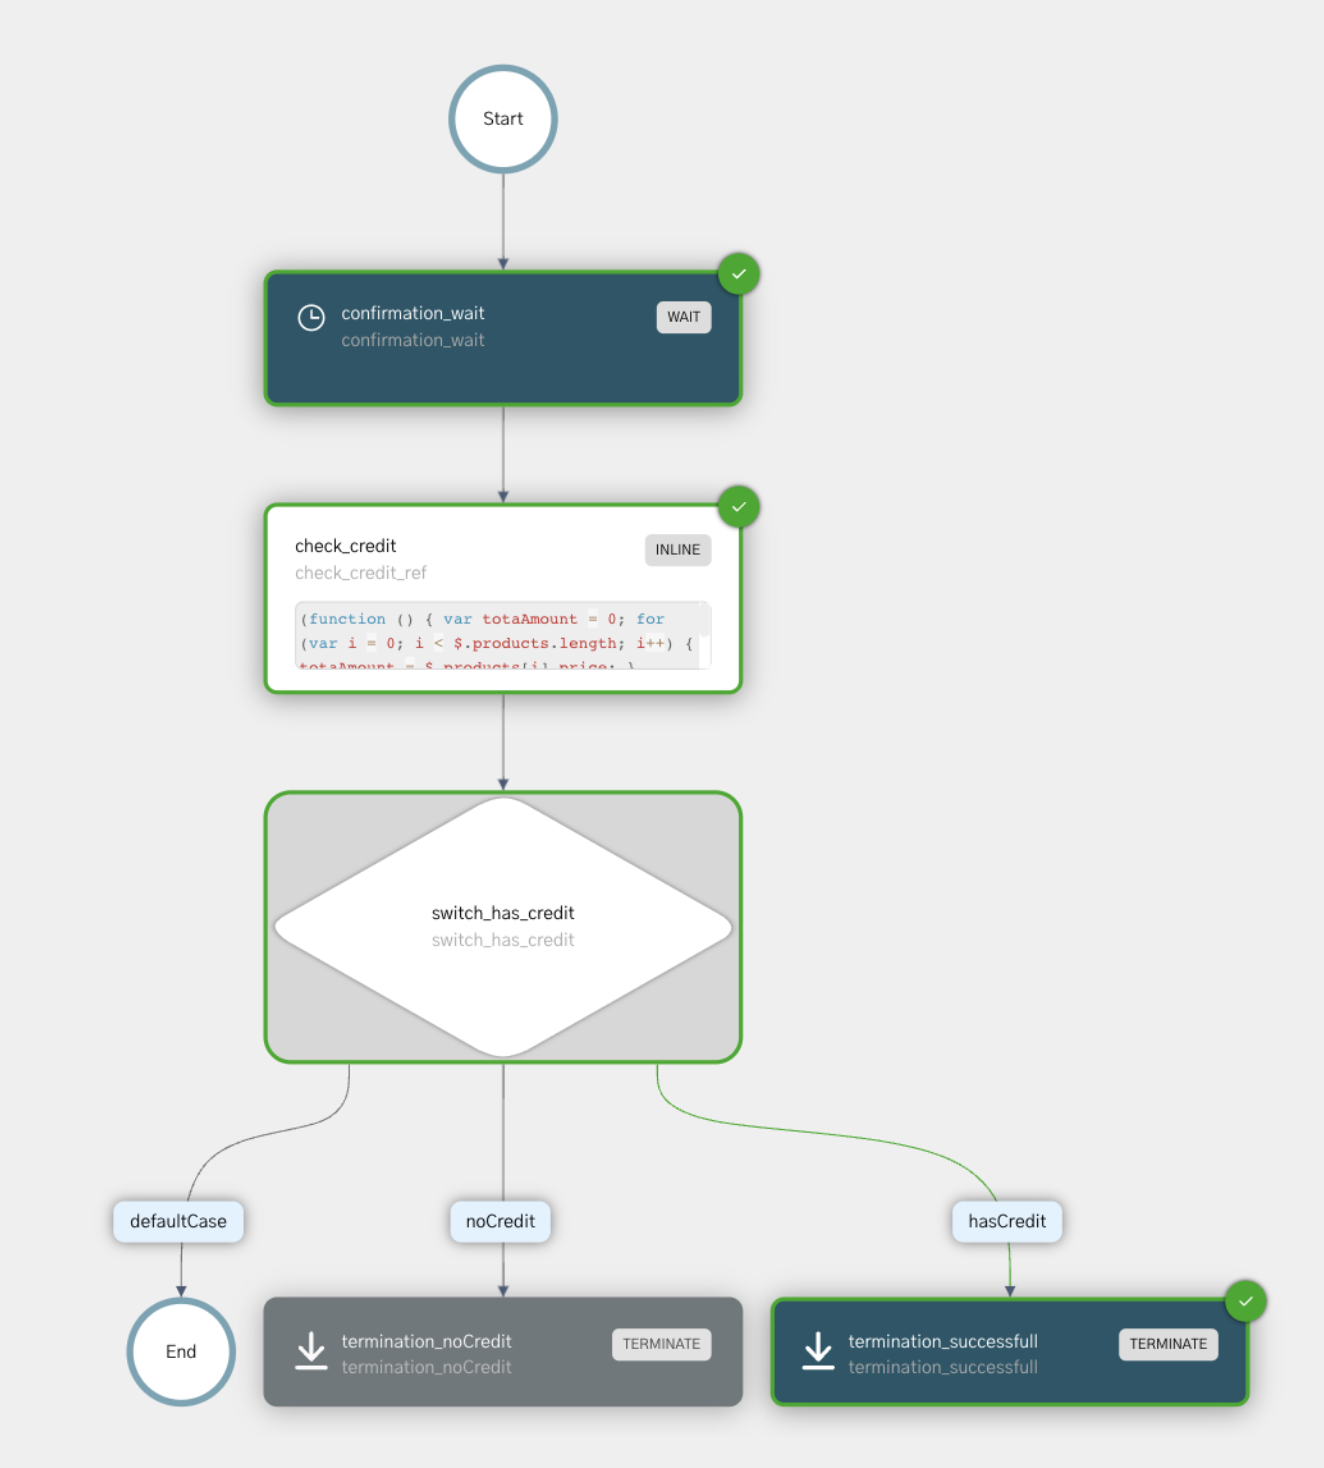
Conductor also provides a visual representation of the workflow with the paths taken. The green tick along the boxes represents that the task has been completed. If any of your tasks are still running, it will show a loading icon instead of the green one. This could help in quickly understanding how your application works.
In situations where your application is stuck, you can visualize them and troubleshoot the issues by looking into the path.
And that’s it! Your application is now ready.
Why don’t you build an app on your own and share your app development stories with us?
We are waiting to hear from you!
Our team at Orkes is always here to help if you have any queries. Do reach out to us on our Slack channel for any help.
Conductor is an enterprise-grade orchestration platform for process automation, API and microservices orchestration, agentic workflows, and more. Check out the full set of features, try it yourself using our Developer Edition sandbox, or get a demo of Orkes Cloud, a fully managed and hosted Conductor service.