Image Effects Workflow
In modern digital media, image filters are an indispensable tool. They have the ability to give life to your visuals with a wide range of moods and aesthetic effects. Image filters help in converting an ordinary image into an extraordinary one.
With Orkes Templates, you can execute the workflow to align with your image filter requirements. This template gives you an out-of-box experience, where you must input the video file with the required elements, and the workflow converts the image to the required filters. This template can be utilized to apply a sepia tone, a vibrant style & to add a watermark to the images.
In this image effect template, we’ve included the concept of external workers. The workflow can have two types of tasks. One is the type of tasks that run on the Conductor server, and the other is the worker tasks that require a worker to be set up outside the Conductor environment.
You can utilize any vendor for adding a filter effect to your images, and Orkes Conductor will orchestrate the workflow. We have implemented the worker as a Java project that utilized the popular tool ImageMagick. You can use this template directly or replace the image filter vendor with your choice.
Conductor features used
How to use the template
Clicking on Import from the workflow explorer takes you to the workflow definition page, where you can see the workflow name as image_effects. You can use this template as it is or modify it to suit your requirements.
Let’s take a look at the workflow and how to run it!
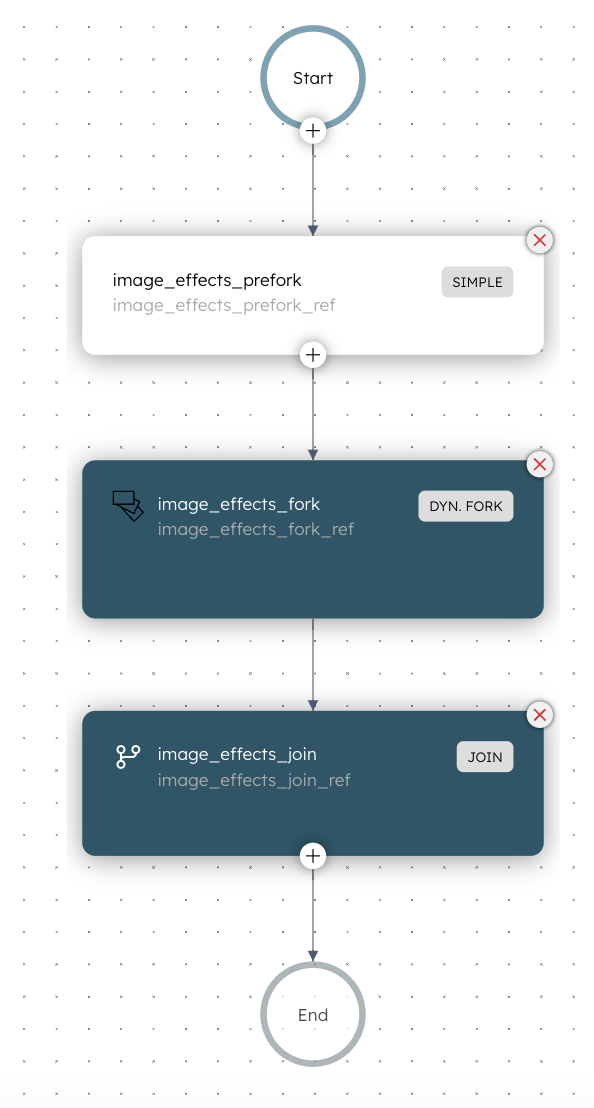
Workflow Logic
The input parameters to this workflow are:
fileLocations - Indicates an array of files containing the locations of the images to be processed by the workflow.
recipeInfos - Specifies the information about how the image is to be processed. The template currently supports three types of recipes: sepia, vibrant, and watermark.
For the sepia effect, the input parameters look like this.
{
 "fileLocations": [
   "https://static01.nyt.com/images/2022/02/24/sports/24soccerRussia-02/merlin_195120864_4c81c841-1349-43dd-8204-c792708e5570-superJumbo.jpg"
 ],
 "recipeInfos": [
   {
     "recipe": "sepia",
     "recipeParameters": {
       "sepiaIntensityThreshold": 80
     }
   }
  ]
}
You should define the sepiaIntensityThreshold, a parameter used to implement a sepia effect on an image. This effect is reminiscent of the traditional darkroom technique of sepia toning. The sepiaIntensityThreshold can be set anywhere between 0 and QuantumRange, and it determines the degree of sepia toning applied to the image. A reasonable starting point for this threshold is typically around 80.
- For the vibrant effect, the input parameters look like this.
{
 "fileLocations": [
   "https://static01.nyt.com/images/2022/02/24/sports/24soccerRussia-02/merlin_195120864_4c81c841-1349-43dd-8204-c792708e5570-superJumbo.jpg"
 ],
 "recipeInfos": [
   {
     "recipe": "vibrant",
     "recipeParameters": {
       "vibrance": 4
     }
   }
 ]
}
Here, you need to provide the vibrance parameter, which makes it more vibrant. A positive value makes the image more vibrant, whereas a negative value makes it less vibrant.
- For the watermark effect, the input parameters look like this.
{
 "fileLocations": [
   "https://static01.nyt.com/images/2022/02/24/sports/24soccerRussia-02/merlin_195120864_4c81c841-1349-43dd-8204-c792708e5570-superJumbo.jpg"
 ],
 "recipeInfos": [
      {
     "recipe": "watermark",
     "recipeParameters": {
       "watermarkFileLocation": "https://orkes.io/logo/orkes/png/4X/orkes-logo-purple-inverted-4x.png",
       "gravity" : "southwest"
     }
   }
 ]
}
You need to provide the watermarkFileLocation, i.e., the location of the file to be added as the watermark.
You must also mention the gravity parameter, which specifies where the watermark should be applied in the image. It can take values northwest, north, northeast, west, center, east, southwest, south, and southeast.
Now, let’s see how the workflow works!
- The first step in the workflow is a simple task which is a task defined prior to the dynamic fork task. This task takes the workflow input and creates the input arrays required for the dynamic fork task.
- The next step is the Dynamic Fork Join task, which processes the output from the previous task as its input. Here, the task dynamically determines the number of forks to be created based on the input data. For example, if an image file is to be filtered into three different formats, the fork task dynamically spawns three parallel tasks.
- The dynamic fork tasks need a worker for polling. For this, an external worker with a proper task to domain mapping needs to be written. This template implements a Java worker that utilizes the popular ImageMagick for applying filters. In this template, you need not set up an external work. Our Orkes workers would catch this up.
- On completing these parallel tasks, the join task, i.e., a part of the dynamic fork task, joins all the forks together.
- The output of the dynamic fork task is stored in a location. This output is fed as the final workflow output with the final image files. In this template, the output files are stored in an Orkes-owned Amazon S3 bucket.
Workflow Invocation
You can invoke the workflow in many different ways.
REST
As with any workflow in Conductor, you can invoke it by calling the REST endpoint of the Conductor server and specifying the workflow name, version, and input data.
You can use the following API to start a workflow execution:
POST /api/workflow/{name}
Refer to the start workflow API doc for more info.
Conductor UI
If you want to run the workflow quickly, you can try to run them in Orkes Playground. Since you haven’t set up the worker here, our Orkes workers will complete the task. Let’s see how to run this in the Playground.
| Run Image Recipe in Playground |
|---|
- Under the Workflow name, choose the workflow image_effects.
- Provide the inputFileLocation and recipeInfos. You can use the following example:
{
 "fileLocations": [
   "https://static01.nyt.com/images/2022/02/24/sports/24soccerRussia-02/merlin_195120864_4c81c841-1349-43dd-8204-c792708e5570-superJumbo.jpg"
 ],
 "recipeInfos": [
   {
     "recipe": "vibrant",
     "recipeParameters": {
       "vibrance": 4
     }
   }
 ]
}
- Click Run Workflow.
When the workflow execution begins, the orkesworkers catch up the tasks, and the workflow gets completed.
| View Sample Execution |
|---|
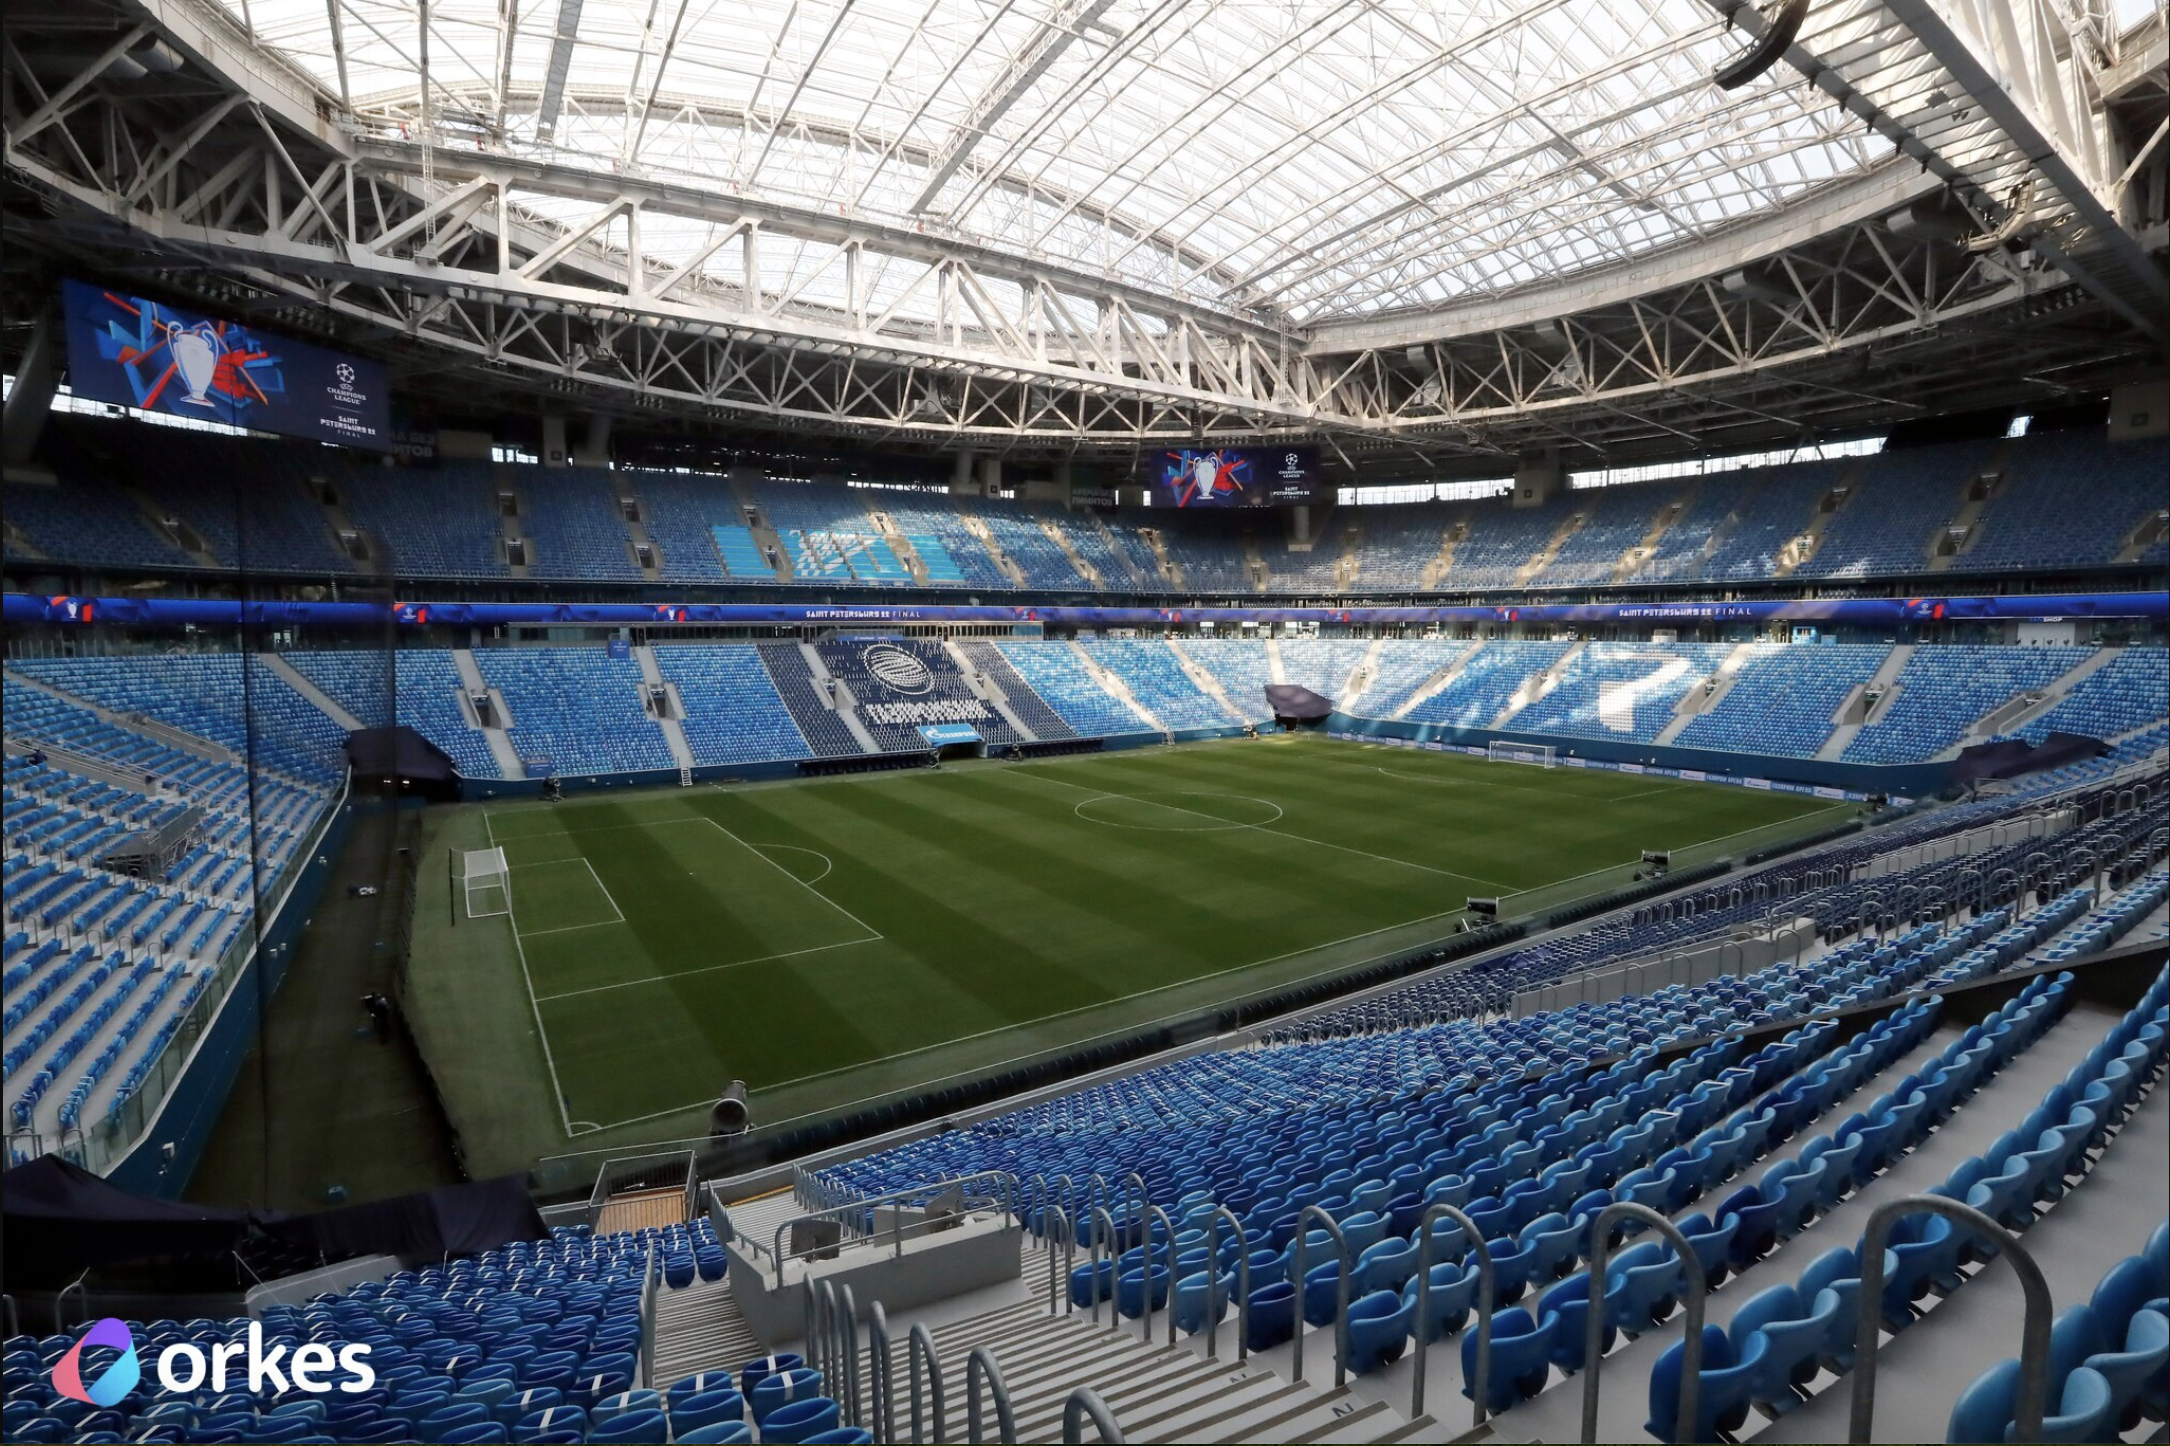
The input image without any filter looks like this:

The workflow output is stored in an Orkes-owned Amazon S3 bucket. You can see the image with the vibrant effect in the output file.

For the sepia effect, the output looks like this:

And if a logo is added as a watermark, the output looks like this: (Here we have added our Orkes logo.)