Quickstart 2: Create Your First Workflow
Estimated time: 8min
In Conductor, workflow definitions are stored as JSON. These workflows can be created using a code-based approach or a UI-based approach:
- Workflow as code: Using the Conductor SDKs, define and execute your workflow in your preferred language.
- Visual workflow builder: Using the Conductor UI, define and execute your workflow visually.
In this quickstart, you will use your preferred option to:
- Create and register a workflow definition consisting of a system task, a custom task, and an operator.
- Test run the workflow.
Create and register a workflow
Follow along to build your first workflow, a conditional helloWorld flow that greets users based on their location.
- Visual workflow builder
- Workflow as code
Use the visual workflow builder in Conductor UI to create your helloWorld workflow.
To create a workflow:
- Log in to your Conductor cluster or the Developer Edition.
- In the left navigation menu, go to Definitions > Workflow.
- Select + Define workflow.
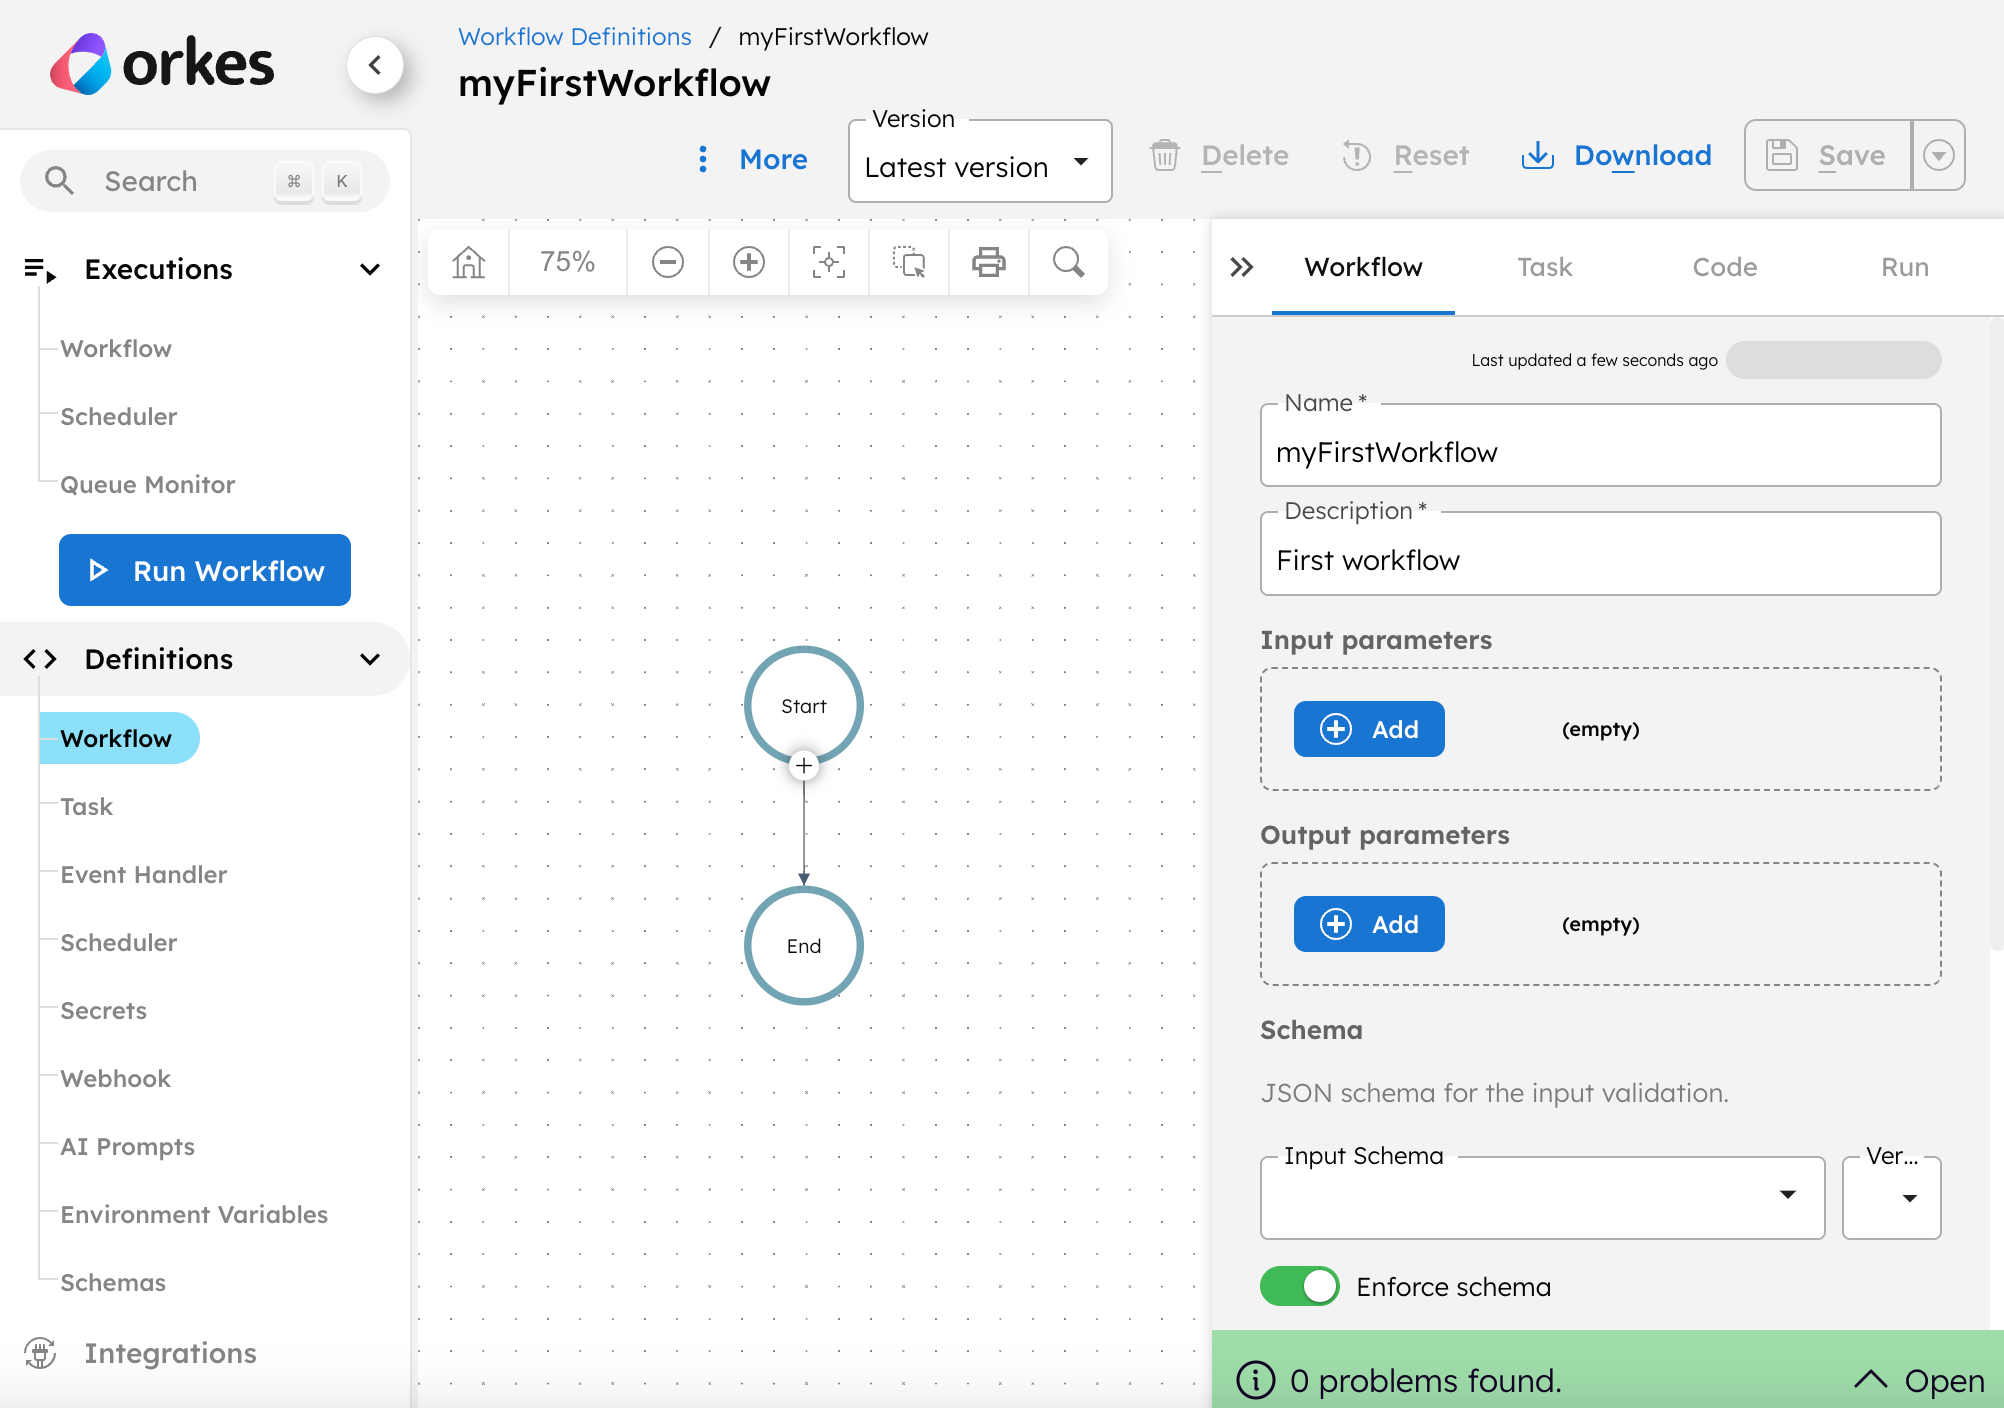
-
Copy the JSON code below into the Code tab of the workflow builder.
{
  "name": "helloWorld",
  "description": "Hello World workflow that greets a user. Uses a Switch task, HTTP task, and Simple task.",
  "version": 1,
  "tasks": [
    {
      "name": "get-user",
      "taskReferenceName": "get-user_ref",
      "inputParameters": {
        "uri": "https://randomuser.me/api/",
        "method": "GET",
        "accept": "application/json",
        "contentType": "application/json",
        "encode": true
      },
      "type": "HTTP"
    },
    {
      "name": "user-criteria",
      "taskReferenceName": "user-criteria_ref",
      "inputParameters": {
        "switchCaseValue": "${get-user_ref.output.response.body.results[0].location.country}"
      },
      "type": "SWITCH",
      "decisionCases": {
        "United States": [
          {
            "name": "myTask",
            "taskReferenceName": "myTask_ref",
            "inputParameters": {
              "name": "${get-user_ref.output.response.body.results[0].name.first}"
            },
            "type": "SIMPLE"
          }
        ]
      },
      "defaultCase": [],
      "evaluatorType": "value-param",
      "expression": "switchCaseValue"
    }
  ],
  "inputParameters": [],
  "outputParameters": {},
  "failureWorkflow": "",
  "schemaVersion": 2
} -
Select Save > Confirm.
Your first workflow has been created! Note how the code above references myTask — this tells the workflow to push tasks onto a queue with that name. Your local worker is then constantly polling for work on that queue. To learn more about how tasks are routed, see Routing Tasks.
Code your Hello World workflow using Conductor SDKs.
Step 1: Create your workflow in code
Create a project for your workflow client where you can define, register, and execute workflows programmatically. To get started quickly, download one of our sample workflow as code projects in your preferred language. If you already cloned the repository in Quickstart 1, skip this step.
git clone https://github.com/conductor-oss/awesome-conductor-apps.git
- Python
- Java
- JavaScript
- C#
- Go
This sample Python code demonstrates how to create, register, and execute a workflow in Conductor.
from conductor.client.http.models import StartWorkflowRequest
from conductor.client.configuration.configuration import Configuration
from conductor.client.configuration.settings.authentication_settings import AuthenticationSettings
from conductor.client.workflow.conductor_workflow import ConductorWorkflow
from conductor.client.workflow.executor.workflow_executor import WorkflowExecutor
from conductor.client.workflow.task.simple_task import SimpleTask
from conductor.client.workflow.task.http_task import HttpTask
from conductor.client.workflow.task.switch_task import SwitchTask


def main():
    # Set up an application in your Orkes Conductor cluster. Sign up for a Developer Edition account at https://developer.orkescloud.com.
    # - Set your cluster's URL as base_url (e.g., "https://developer.orkescloud.com" for Developer Edition).
    # - Use the application's Key ID and Secret here.
    conf = Configuration(base_url='_CHANGE_ME_',
                         authentication_settings=AuthenticationSettings(key_id='_CHANGE_ME_',
                                                                        key_secret='_CHANGE_ME_'))

    # A WorkflowExecutor instance is used to register and execute workflows.
    executor = WorkflowExecutor(conf)

    # Create the workflow definition.
    workflow = ConductorWorkflow(
        executor=executor,
        name='myFirstWorkflow',
        description='Workflow that greets a user. Uses a Switch task, HTTP task, and Simple task.',
        version=1
    )

    # Create the tasks.
    httpTask = HttpTask('get-user_ref', {'uri': 'https://randomuser.me/api/'})
    switchTask = SwitchTask('user-criteria_ref', '${get-user_ref.output.response.body.results[0].location.country}').switch_case(
        'United States', SimpleTask('helloWorld', 'simple_ref').input(
            key='user', value='${get-user_ref.output.response.body.results[0].name.first}'))

    # Add the tasks to the workflow using `add` method or the `>>` operator.
    workflow.add(httpTask)
    workflow >> switchTask

    # Register the workflow.
    workflow.register(True)
    print(f"Registered workflow {workflow.name}")

    # Start the workflow.
    request = StartWorkflowRequest()
    request.name = 'myFirstWorkflow'
    request.version = 1
    id = executor.start_workflow(request)
    print(f"Started workflow {id}")


if __name__ == '__main__':
    main()
This sample Java code demonstrates how to create, register, and execute a workflow in Conductor.
import com.netflix.conductor.sdk.workflow.def.ConductorWorkflow;
import com.netflix.conductor.sdk.workflow.def.WorkflowBuilder;
import com.netflix.conductor.sdk.workflow.def.tasks.Http;
import com.netflix.conductor.sdk.workflow.def.tasks.SimpleTask;
import com.netflix.conductor.sdk.workflow.def.tasks.Switch;
import com.netflix.conductor.sdk.workflow.executor.WorkflowExecutor;
import io.orkes.conductor.client.ApiClient;

import java.util.Map;

public class WorkflowAsCode {

    public static void main(String[] args) {
        // Set up an application in your Orkes Conductor cluster. Sign up for a Developer Edition account at https://developer.orkescloud.com.
        // - Set your cluster's API URL as basePath (e.g., "https://developer.orkescloud.com/api" for Developer Edition).
        // - Use the application's Key ID and Secret here.
        ApiClient client = ApiClient.builder()
                .basePath("_CHANGE_ME_")
                .credentials("_CHANGE_ME_", "_CHANGE_ME_")
                .build();

        // A WorkflowExecutor instance is used to register and execute workflows.
        int pollingInterval = 50;
        WorkflowExecutor executor = new WorkflowExecutor(client, pollingInterval);

        // Create the workflow definition.
        ConductorWorkflow<Object> workflow = new WorkflowBuilder<>(executor)
                .name("myFirstWorkflow")
                .version(1)
                .description("Workflow that greets a user. Uses a Switch task, HTTP task, and Simple task.")
                .add(new Http("get-user_ref").url("https://randomuser.me/api/"))
                // This switch task will execute the "helloWorld" task if the user's country is "United States"
                .add(new Switch("user-criteria_ref", "${get-user_ref.output.response.body.results[0].location.country}")
                        .switchCase("United States", new SimpleTask("helloWorld", "simple_ref")
                                .input("user", "${get-user_ref.output.response.body.results[0].name.first}")))
                .build();

        // Register the workflow with overwrite = true and registerTasks = true.
        workflow.registerWorkflow(true, true);

        // Start the workflow.
        String id = executor.startWorkflow(workflow.getName(), workflow.getVersion(), Map.of());
        System.out.printf("Started workflow %s%n", id);

        executor.shutdown();
    }

}
This sample JavaScript code demonstrates how to create, register, and execute a workflow in Conductor.
import {
  OrkesClients,
  WorkflowExecutor,
  httpTask,
  simpleTask,
  switchTask,
} from "@io-orkes/conductor-javascript";

const clients = await OrkesClients.from();
const executor = new WorkflowExecutor(clients.getClient());

const wf = {
  name: "helloWorld",
  version: 1,
  description:
    "Hello World workflow that greets a user. Uses a Switch task, HTTP task, and Simple task.",
  tasks: [
    httpTask("get-user_ref", { uri: "https://randomuser.me/api/" }),
    switchTask(
      "user-criteria_ref",
      "${get-user_ref.output.response.body.results[0].location.country}",
      {
        "United States": [
          simpleTask("myTask_ref", "myTask", {
            name: "${get-user_ref.output.response.body.results[0].name.first}",
          }),
        ],
      }
    ),
  ],
};

await executor.registerWorkflow(true, wf);

const id = await executor.startWorkflow({ name: wf.name, version: wf.version });
console.log(`Started workflow: ${id}`);
This sample C# code demonstrates how to create, register, and execute a workflow in Conductor.
using Conductor.Client.Authentication;
using Conductor.Client.Models;
using Conductor.Client;
using Conductor.Definition;
using Conductor.Executor;
using Conductor.Definition.TaskType;

// Set up an application in your Orkes Conductor cluster. Sign up for a Developer Edition account at https://developer.orkescloud.com.
// - Set your cluster's API URL as the BasePath (e.g., "https://developer.orkescloud.com/api" for Developer Edition).
// - Use the application's Key ID and Secret here.
var conf = new Configuration
{
    BasePath = "_CHANGE_ME_",
    AuthenticationSettings = new OrkesAuthenticationSettings("_CHANGE_ME_", "_CHANGE_ME_")
};

// A WorkflowExecutor instance is used to register and execute workflows.
var executor = new WorkflowExecutor(conf);

// Create the workflow definition.
var workflow = new ConductorWorkflow()
        .WithName("myFirstWorkflow")
        .WithDescription("Workflow that greets a user. Uses a Switch task, HTTP task, and Simple task.")
        .WithVersion(1)
        .WithTask(new HttpTask("get-user_ref", new HttpTaskSettings { uri = "https://randomuser.me/api/" }))
        .WithTask(new SwitchTask("user-criteria_ref", "${get-user_ref.output.response.body.results[0].location.country}")
            .WithDecisionCase("United States",
                [new SimpleTask("helloWorld", "simple_ref").WithInput("user", "${get-user_ref.output.response.body.results[0].name.first}")]));

// Register the workflow with overwrite = true.
executor.RegisterWorkflow(
    workflow: workflow,
    overwrite: true
);

// Start the workflow.
var workflowId = executor.StartWorkflow(new StartWorkflowRequest(name: workflow.Name, version: workflow.Version));
Console.WriteLine($"Started Workflow: {workflowId}");
This sample Go code demonstrates how to create, register, and execute a workflow in Conductor.
package main

import (
	"fmt"
	"log"

	"github.com/conductor-sdk/conductor-go/sdk/client"
	"github.com/conductor-sdk/conductor-go/sdk/model"
	"github.com/conductor-sdk/conductor-go/sdk/settings"
	"github.com/conductor-sdk/conductor-go/sdk/workflow"
	"github.com/conductor-sdk/conductor-go/sdk/workflow/executor"
)

// Set up an application in your Orkes Conductor cluster. Sign up for a Developer Edition account at https://developer.orkescloud.com.
// - Use the application's Key ID and Secret here.
// - Set your cluster's API URL as the SERVER_URL (e.g., "https://developer.orkescloud.com/api" for Developer Edition).
const SERVER_URL = "_CHANGE_ME_"
const KEY_ID = "_CHANGE_ME_"
const SECRET = "_CHANGE_ME_"

var (
	apiClient = client.NewAPIClient(
		settings.NewAuthenticationSettings(KEY_ID, SECRET),
		settings.NewHttpSettings(SERVER_URL))
	// A WorkflowExecutor instance is used to register and execute workflows.
	workflowExecutor = executor.NewWorkflowExecutor(apiClient)
)

func main() {
	// Create the workflow definition.
	wf := workflow.NewConductorWorkflow(workflowExecutor).
		Name("helloWorld").
		Version(1).
		Description("Workflow that greets a user. Uses a Switch task, HTTP task, and Simple task.")

	httpTask := workflow.NewHttpTask("get-user_ref", &workflow.HttpInput{Uri: "https://randomuser.me/api/"})
	switchTask := workflow.NewSwitchTask("user-criteria_ref", "${get-user_ref.output.response.body.results[0].location.country}").
		SwitchCase("United States", workflow.NewSimpleTask("myTask", "simple_ref").Input("user", "${get-user_ref.output.response.body.results[0].name.first}"))

	wf.Add(httpTask)
	wf.Add(switchTask)

	// Register the workflow with overwrite = true.
	err := wf.Register(true)
	if err != nil {
		log.Fatalf("Failed to register workflow: %v", err)
	}
	fmt.Printf("Registered workflow: %s\n", wf.GetName())

	// Start the workflow.
	id, err := workflowExecutor.StartWorkflow(&model.StartWorkflowRequest{
		Name:    wf.GetName(),
		Version: wf.GetVersion(),
	})

	if err != nil {
		log.Fatalf("Error when starting workflow: %v", err)
	}
	fmt.Printf("Started workflow: %s\n", id)
}
Step 2: Get access credentials for your workflow client
To connect your workflow-as-code project, create an application in Conductor with the Metadata API role.
To create an application for your workflow client:
- In the left navigation menu, go to Access Control > Applications.
- Select + Create application and enter a Name for it. For example, myWorkflowClient or myApp.
- Enable the Metadata API application role, which allows the application to create and manage workflows and tasks.
- Select + Create access key and store the generated credentials securely.
- (Skip this step if you are using Developer Edition) Grant the application permission to the
helloWorldworkflow definition:- Under Permissions, select Add permission.
- Select the Workflow tab and choose
helloWorld. - Enable the Read, Execute, and Update toggles.
- Select Add Permissions.
- Now go back to your project, and set the credentials in the workflow client file for your language:
- Python — Update the credentials in
awesome-conductor-apps/python/quickstarts/create-your-first-workflow/workflow_as_code.py. Note thatbase_urlshould not include/api. - Java — Update the credentials in
awesome-conductor-apps/java/quickstarts/create-your-first-workflow/src/main/java/io/orkes/conductor/examples/WorkflowAsCode.java. Note thatbasePathshould include/api. - JavaScript — Set as environment variables before running:
export CONDUCTOR_SERVER_URL=https://your-cluster-url/api
export CONDUCTOR_AUTH_KEY=<YOUR-KEY-ID>
export CONDUCTOR_AUTH_SECRET=<YOUR-KEY-SECRET> - C# — Update the credentials in
awesome-conductor-apps/csharp/quickstarts/create-your-first-workflow/workflow_as_code.cs. Note thatBasePathshould include/api. - Go — Update the credentials in
awesome-conductor-apps/go/quickstarts/create-your-first-workflow/workflow_as_code.go. Note thatSERVER_URLshould include/api.
- Python — Update the credentials in
The application account can now create, manage, and execute the workflow.
Run workflow
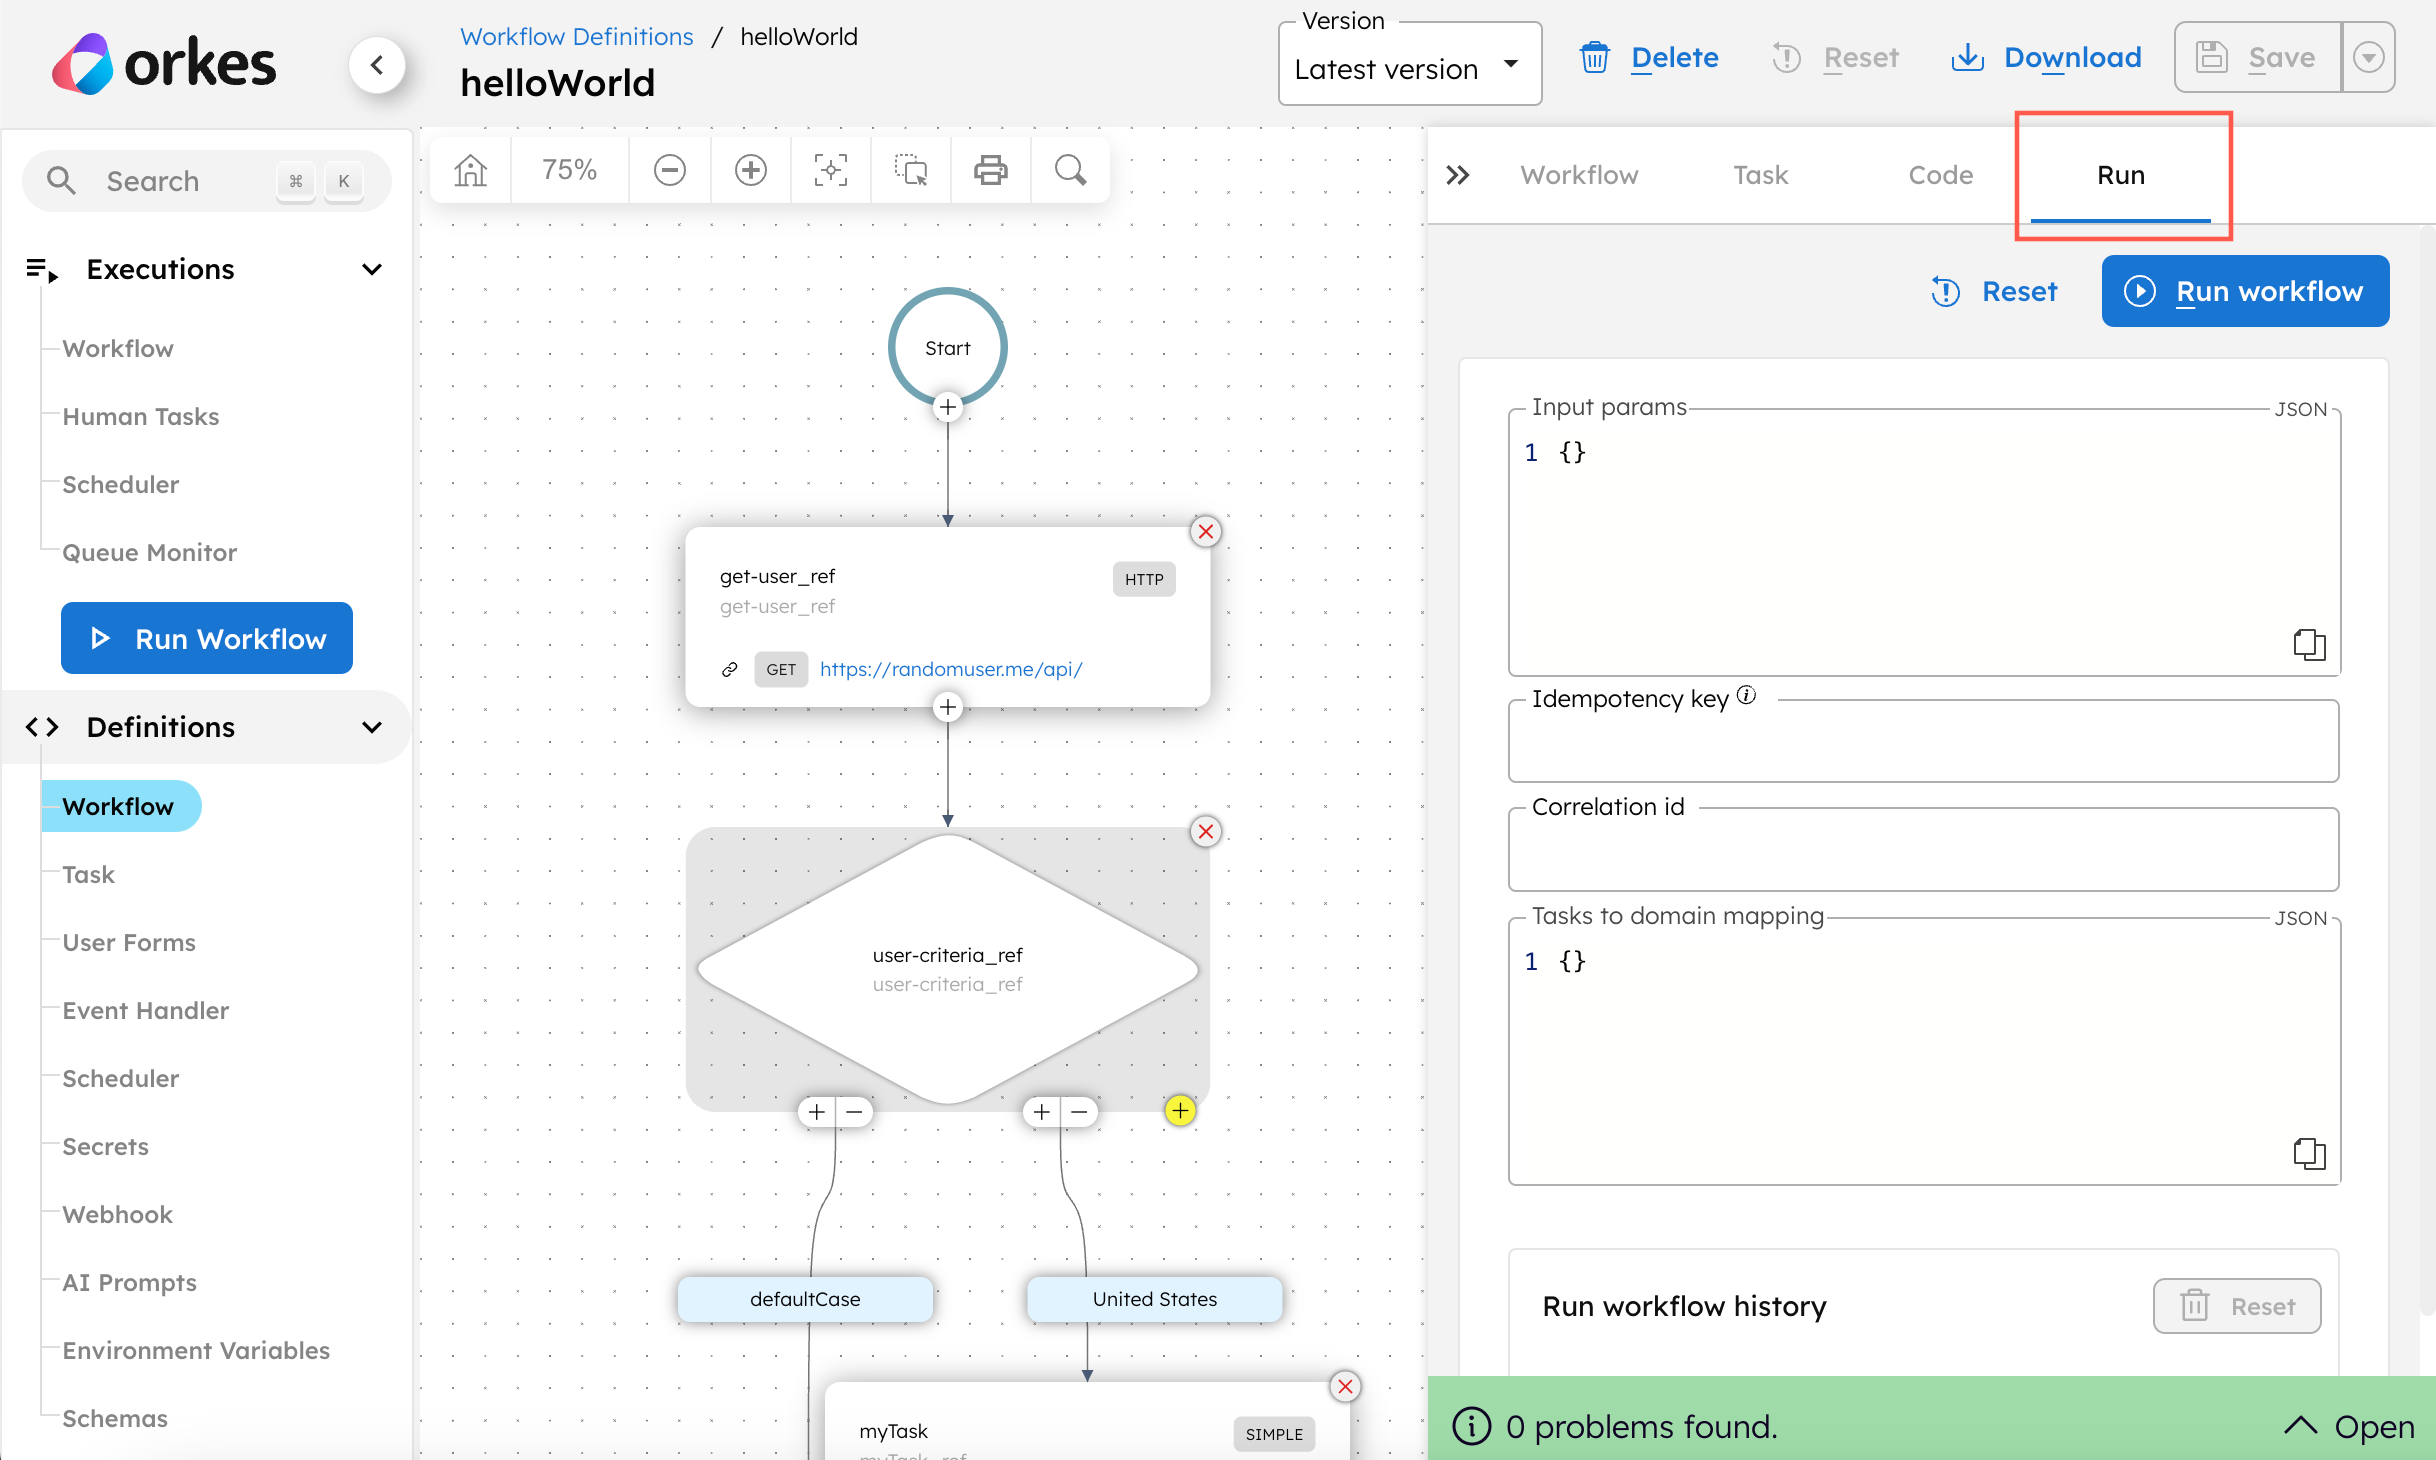
Let’s give your first workflow a test run.
Before running the workflow, make sure that your myTask worker is actively polling the Conductor server. Otherwise, go back and start your worker again.
- Visual workflow builder
- Workflow as code
Inside the workflow visual builder, go to the Run tab and select Execute.
In a new terminal, navigate to the project directory and run:
- Python
- Java
- JavaScript
- C#
- Go
cd awesome-conductor-apps/python/quickstarts/create-your-first-workflow
pip3 install -r requirements.txt
python3 workflow_as_code.py
cd awesome-conductor-apps/java/quickstarts/create-your-first-workflow
./gradlew build && ./gradlew run
If ./gradlew fails with a GradleWrapperMain error, use gradle build && gradle run instead.
cd awesome-conductor-apps/javascript/quickstarts/create-your-first-workflow
npm install
node workflow_as_code.js
cd awesome-conductor-apps/csharp/quickstarts/create-your-first-workflow
dotnet run
C# sample requires .NET 8.0 or above.
Go
cd awesome-conductor-apps/go/quickstarts/create-your-first-workflow
go run workflow_as_code.go
Done! To track the workflow progress, go to Executions > Workflow in the Conductor UI.
Now that you have gotten the hang of creating workflows, let’s discover the power of Conductor in monitoring and debugging workflow executions in the next quickstart.