Managing Tags
Tags use the key:value format and can be applied to the following resources in Conductor:
- Workflows
- Tasks
- User forms
- Event Handlers
- Schedules
- Secrets
- Webhooks
- Prompts
- Environment variables
- Integrations
- Applications
- API/MCP Gateway
Tags can be used for organizing your resources, and for bulk-sharing resource access at a group or application level.
Assigning tags to resources
You can add or remove multiple tags to various resources.
To add or remove a tag:
- In the left navigation menu, go to one of the following locations based on the resource you want to tag:
- Definitions > Workflow / Task / User Forms / Event Handler / Scheduler / Secrets / Webhook / AI Prompts / Environment Variables
- Integrations
- APIs > Services
- Access Control > Applications
- Locate the specific resource.
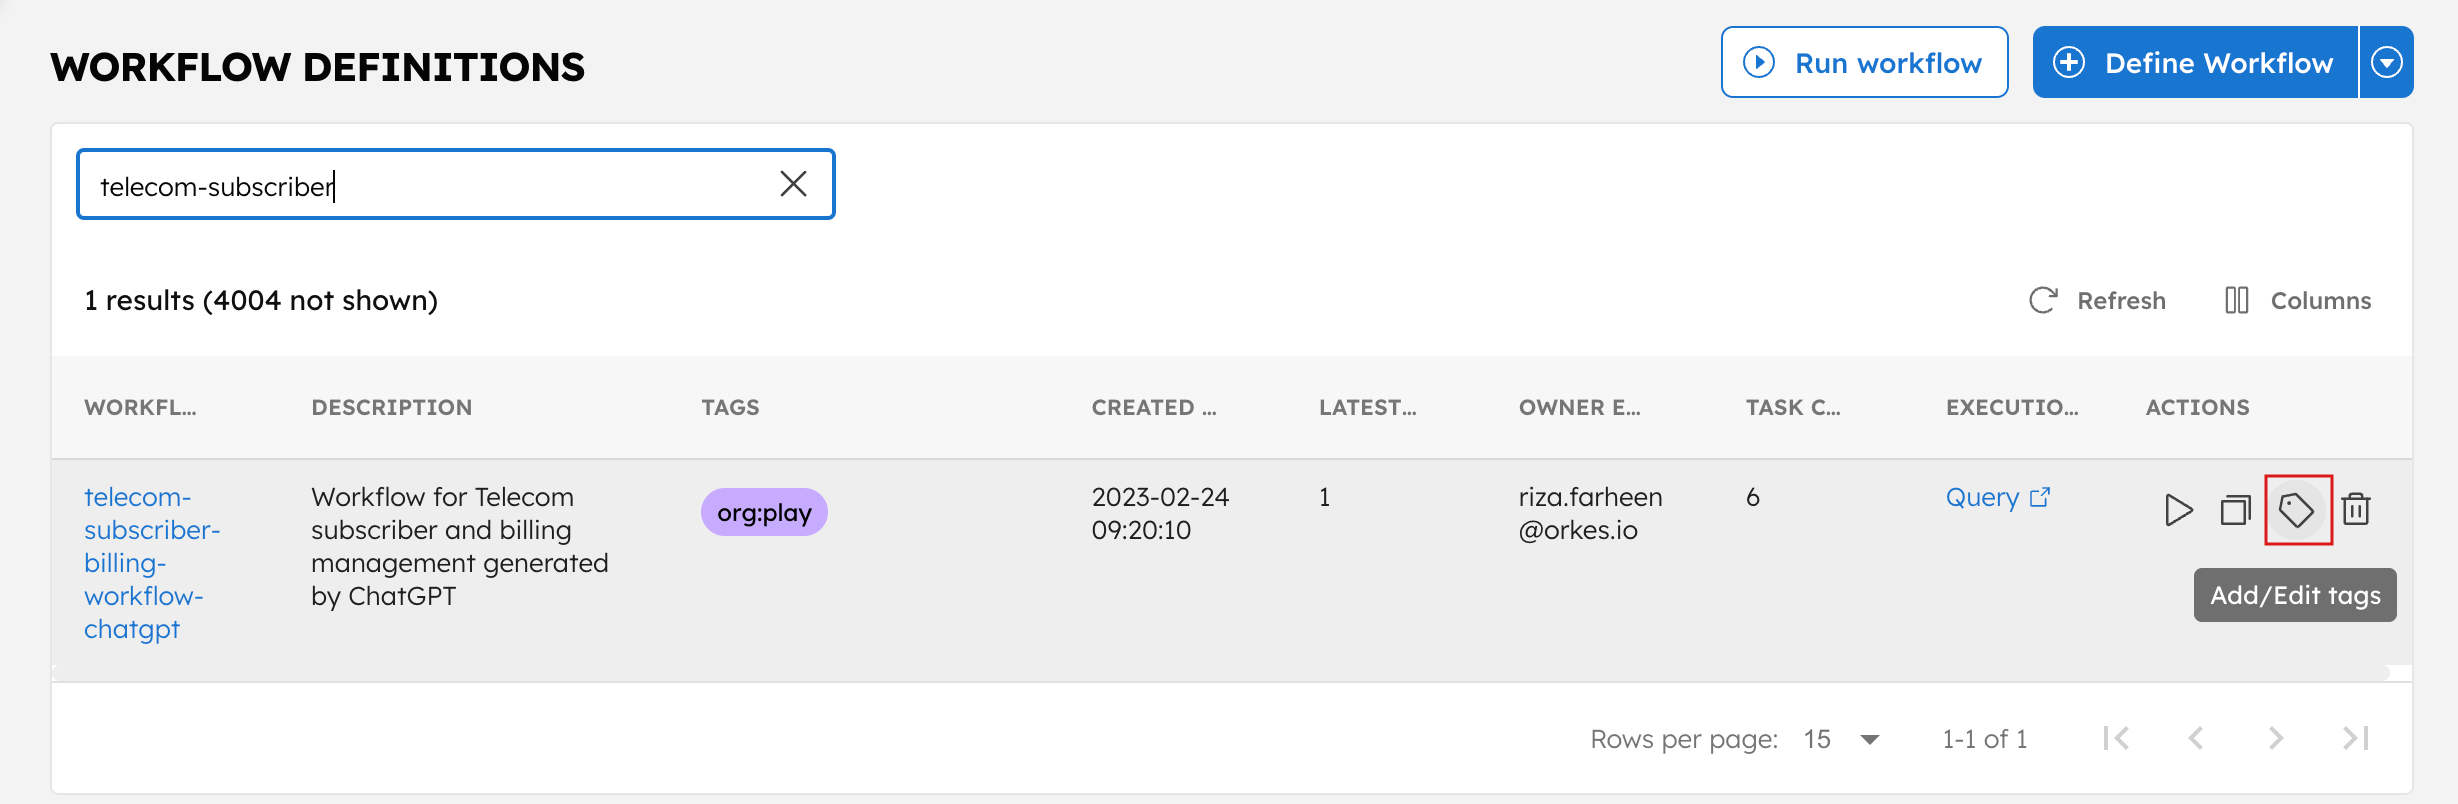
- In the Actions column, select the Tag icon.
A pop-up window for Edit Tags appears.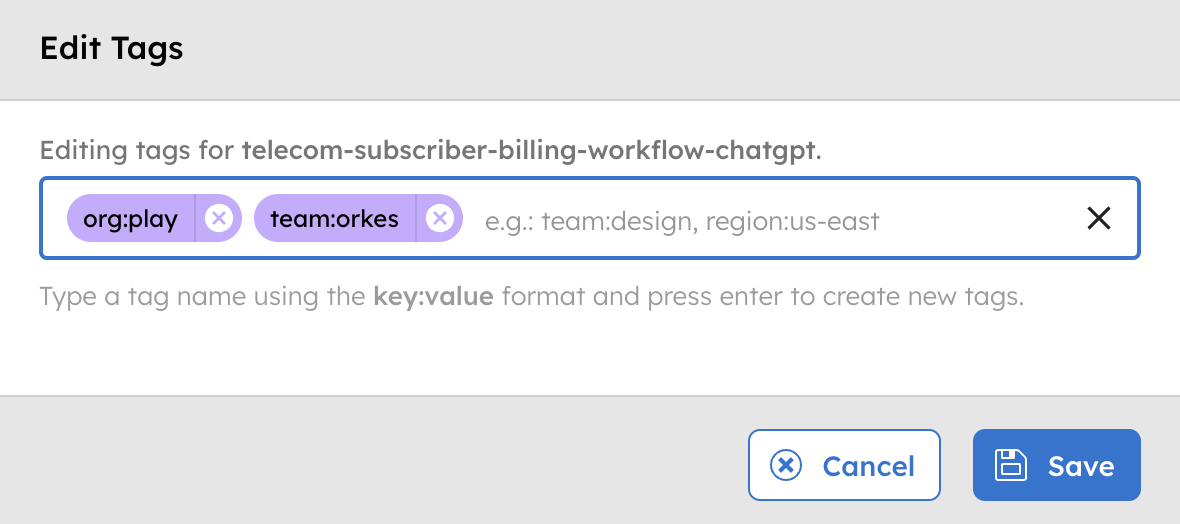
- To create a tag, enter a tag in the
key:valueformat and select Enter. - To remove a tag, select x next to the tag.
- Once tagged, select Save.
Tags dashboard
The tags dashboard provides a complete overview of all tags in the cluster and the resources associated with each tag.
To view the tags dashboard:
- Go to Definitions > Tags Dashboard from the left navigation menu on your Conductor cluster.
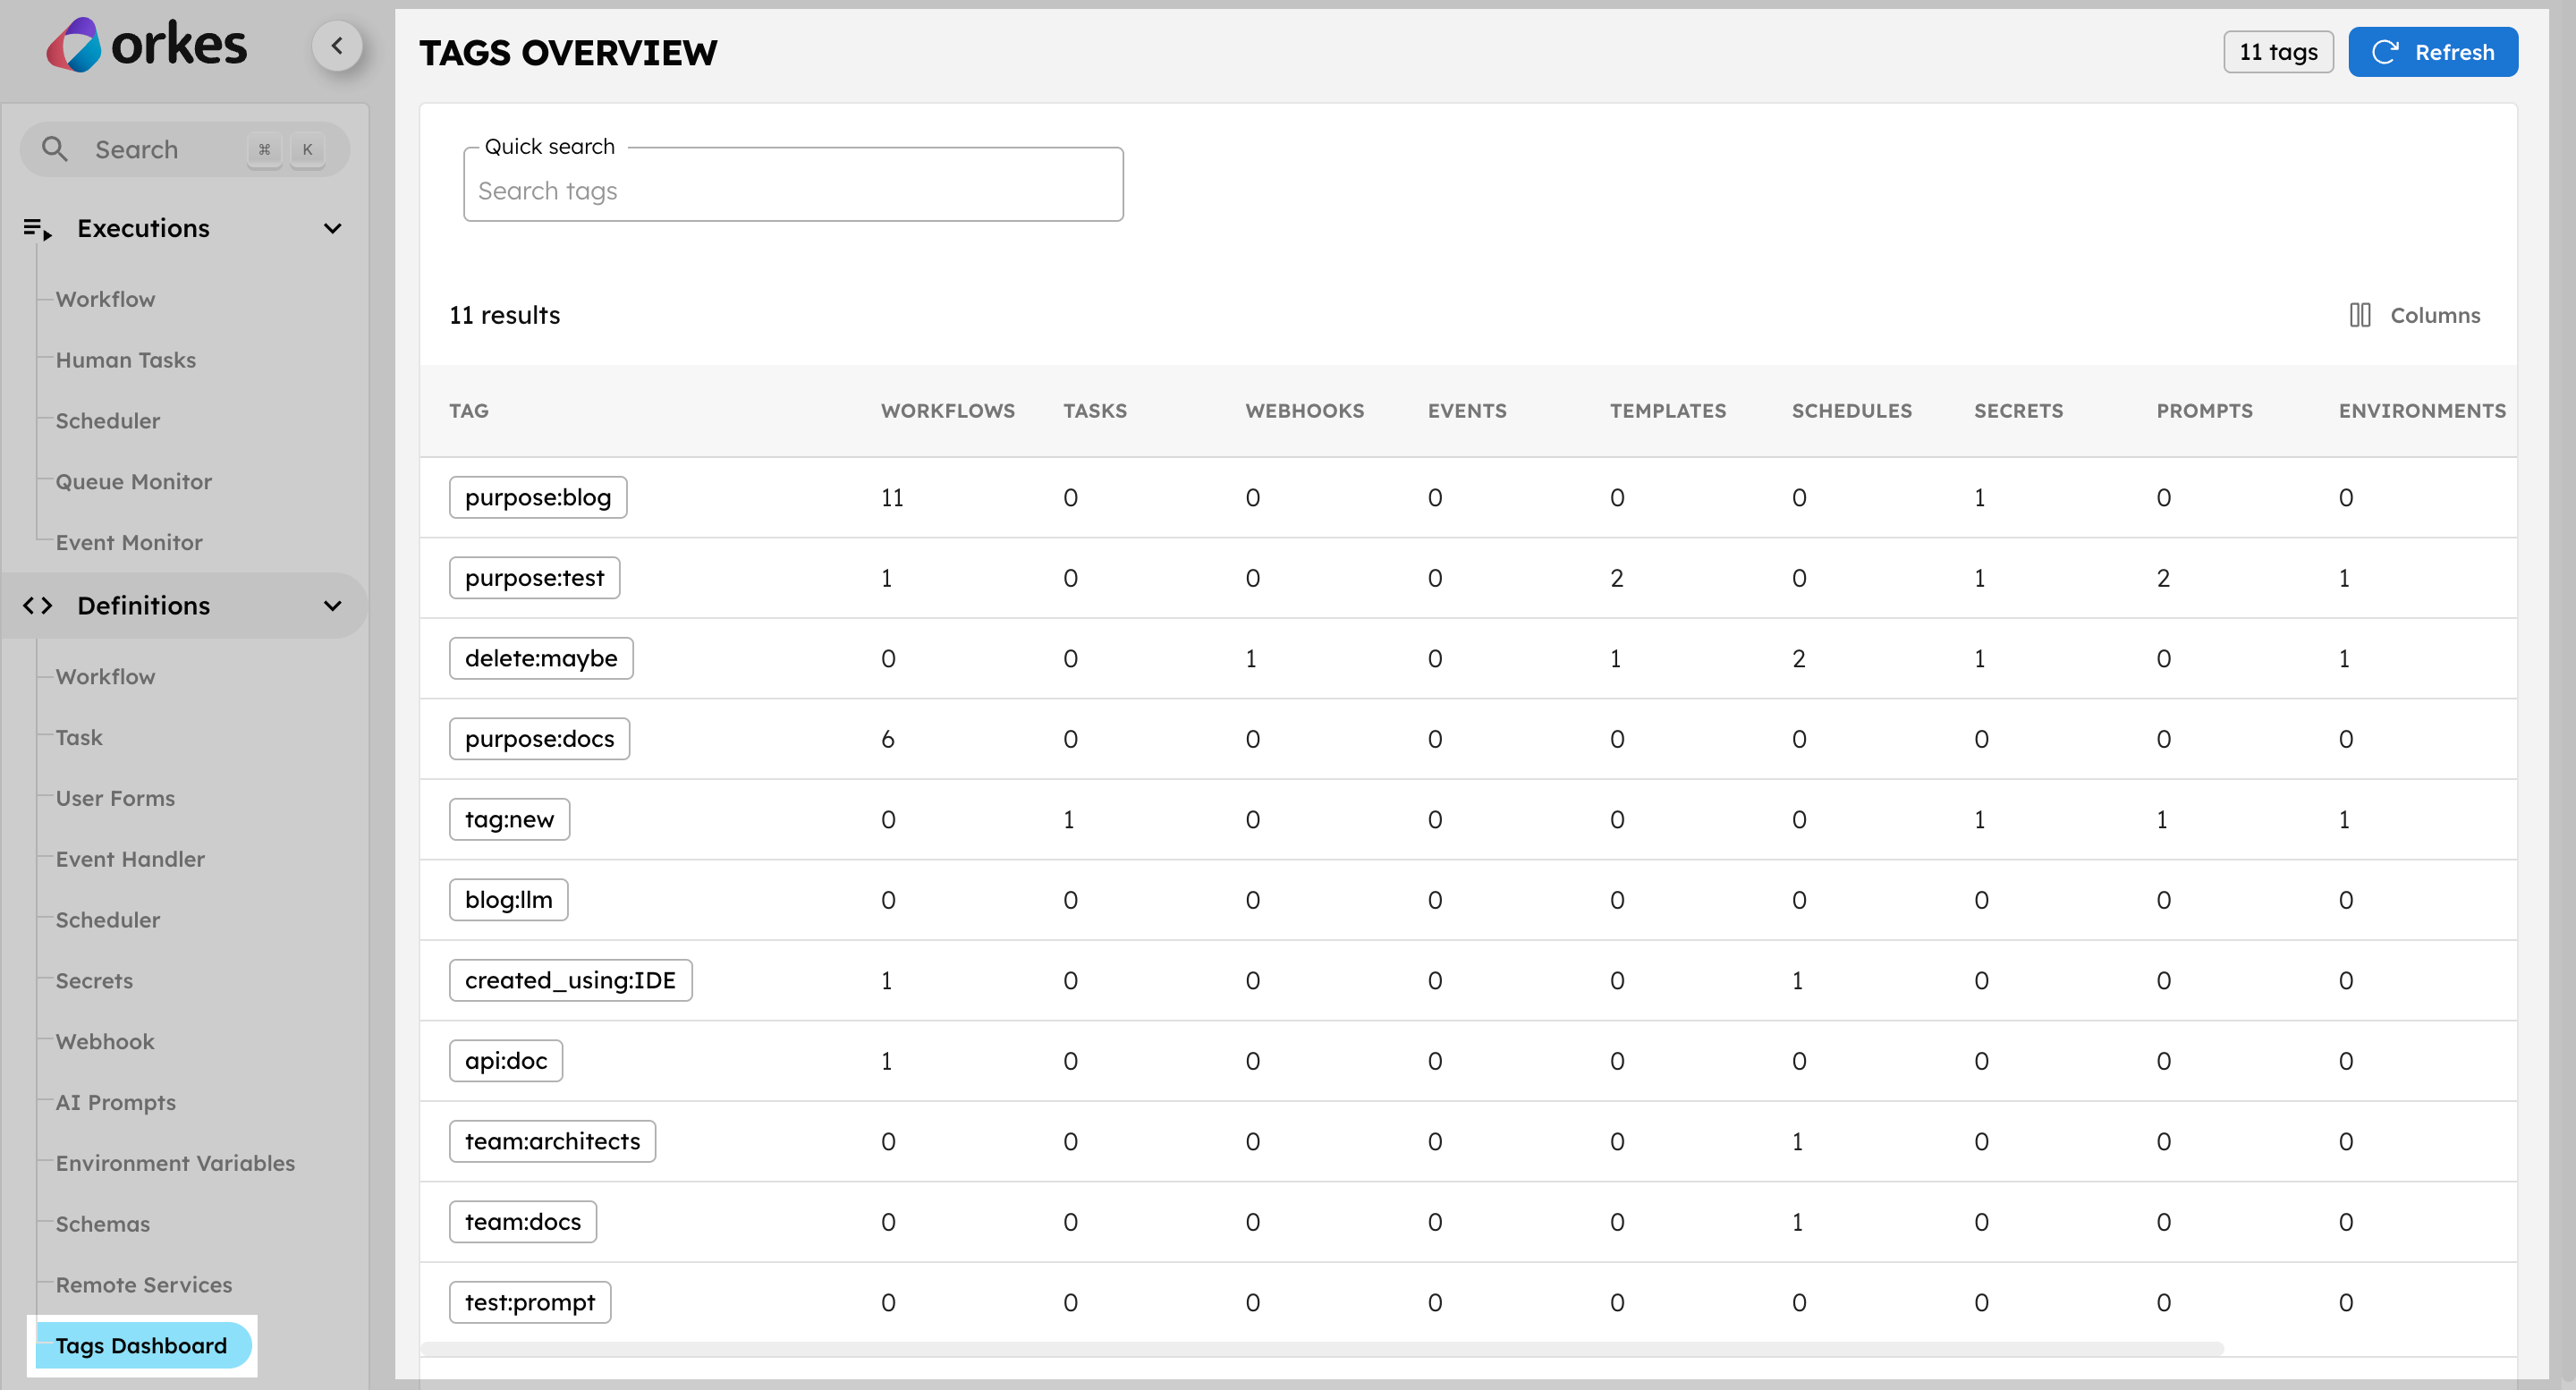
The page displays the total number of tags in the cluster, along with the count of resources associated with each tag.
Bulk-access to resources using tags
Tags simplify permission management for large teams or projects. After tagging individual resources, you can use the tags to bulk-share resource access at a group or application level.
Granting tag permissions
You can grant tag permissions to groups or to applications. When granting tag permissions, ensure that the target resources already have the specified tag.
- For Groups
- For Applications
This feature is only available to Admins.
To add permissions to a group:
- Go to Access Control > Groups from the left navigation menu on your Conductor cluster.
- Select the group name or the Edit icon located next to the group name.
- In the Permissions section, select + Add Permission.
- Toggle to the Tag tab and select the tag to provide access to.
- Toggle the access levels for your selected resource:
- Read: Users will be able to view the resource.
- Update: Users will be able to update the resource.
- Execute: Users will be able to execute the resource.
- Delete: Users will be able to delete the resource.
- Select Add permissions.
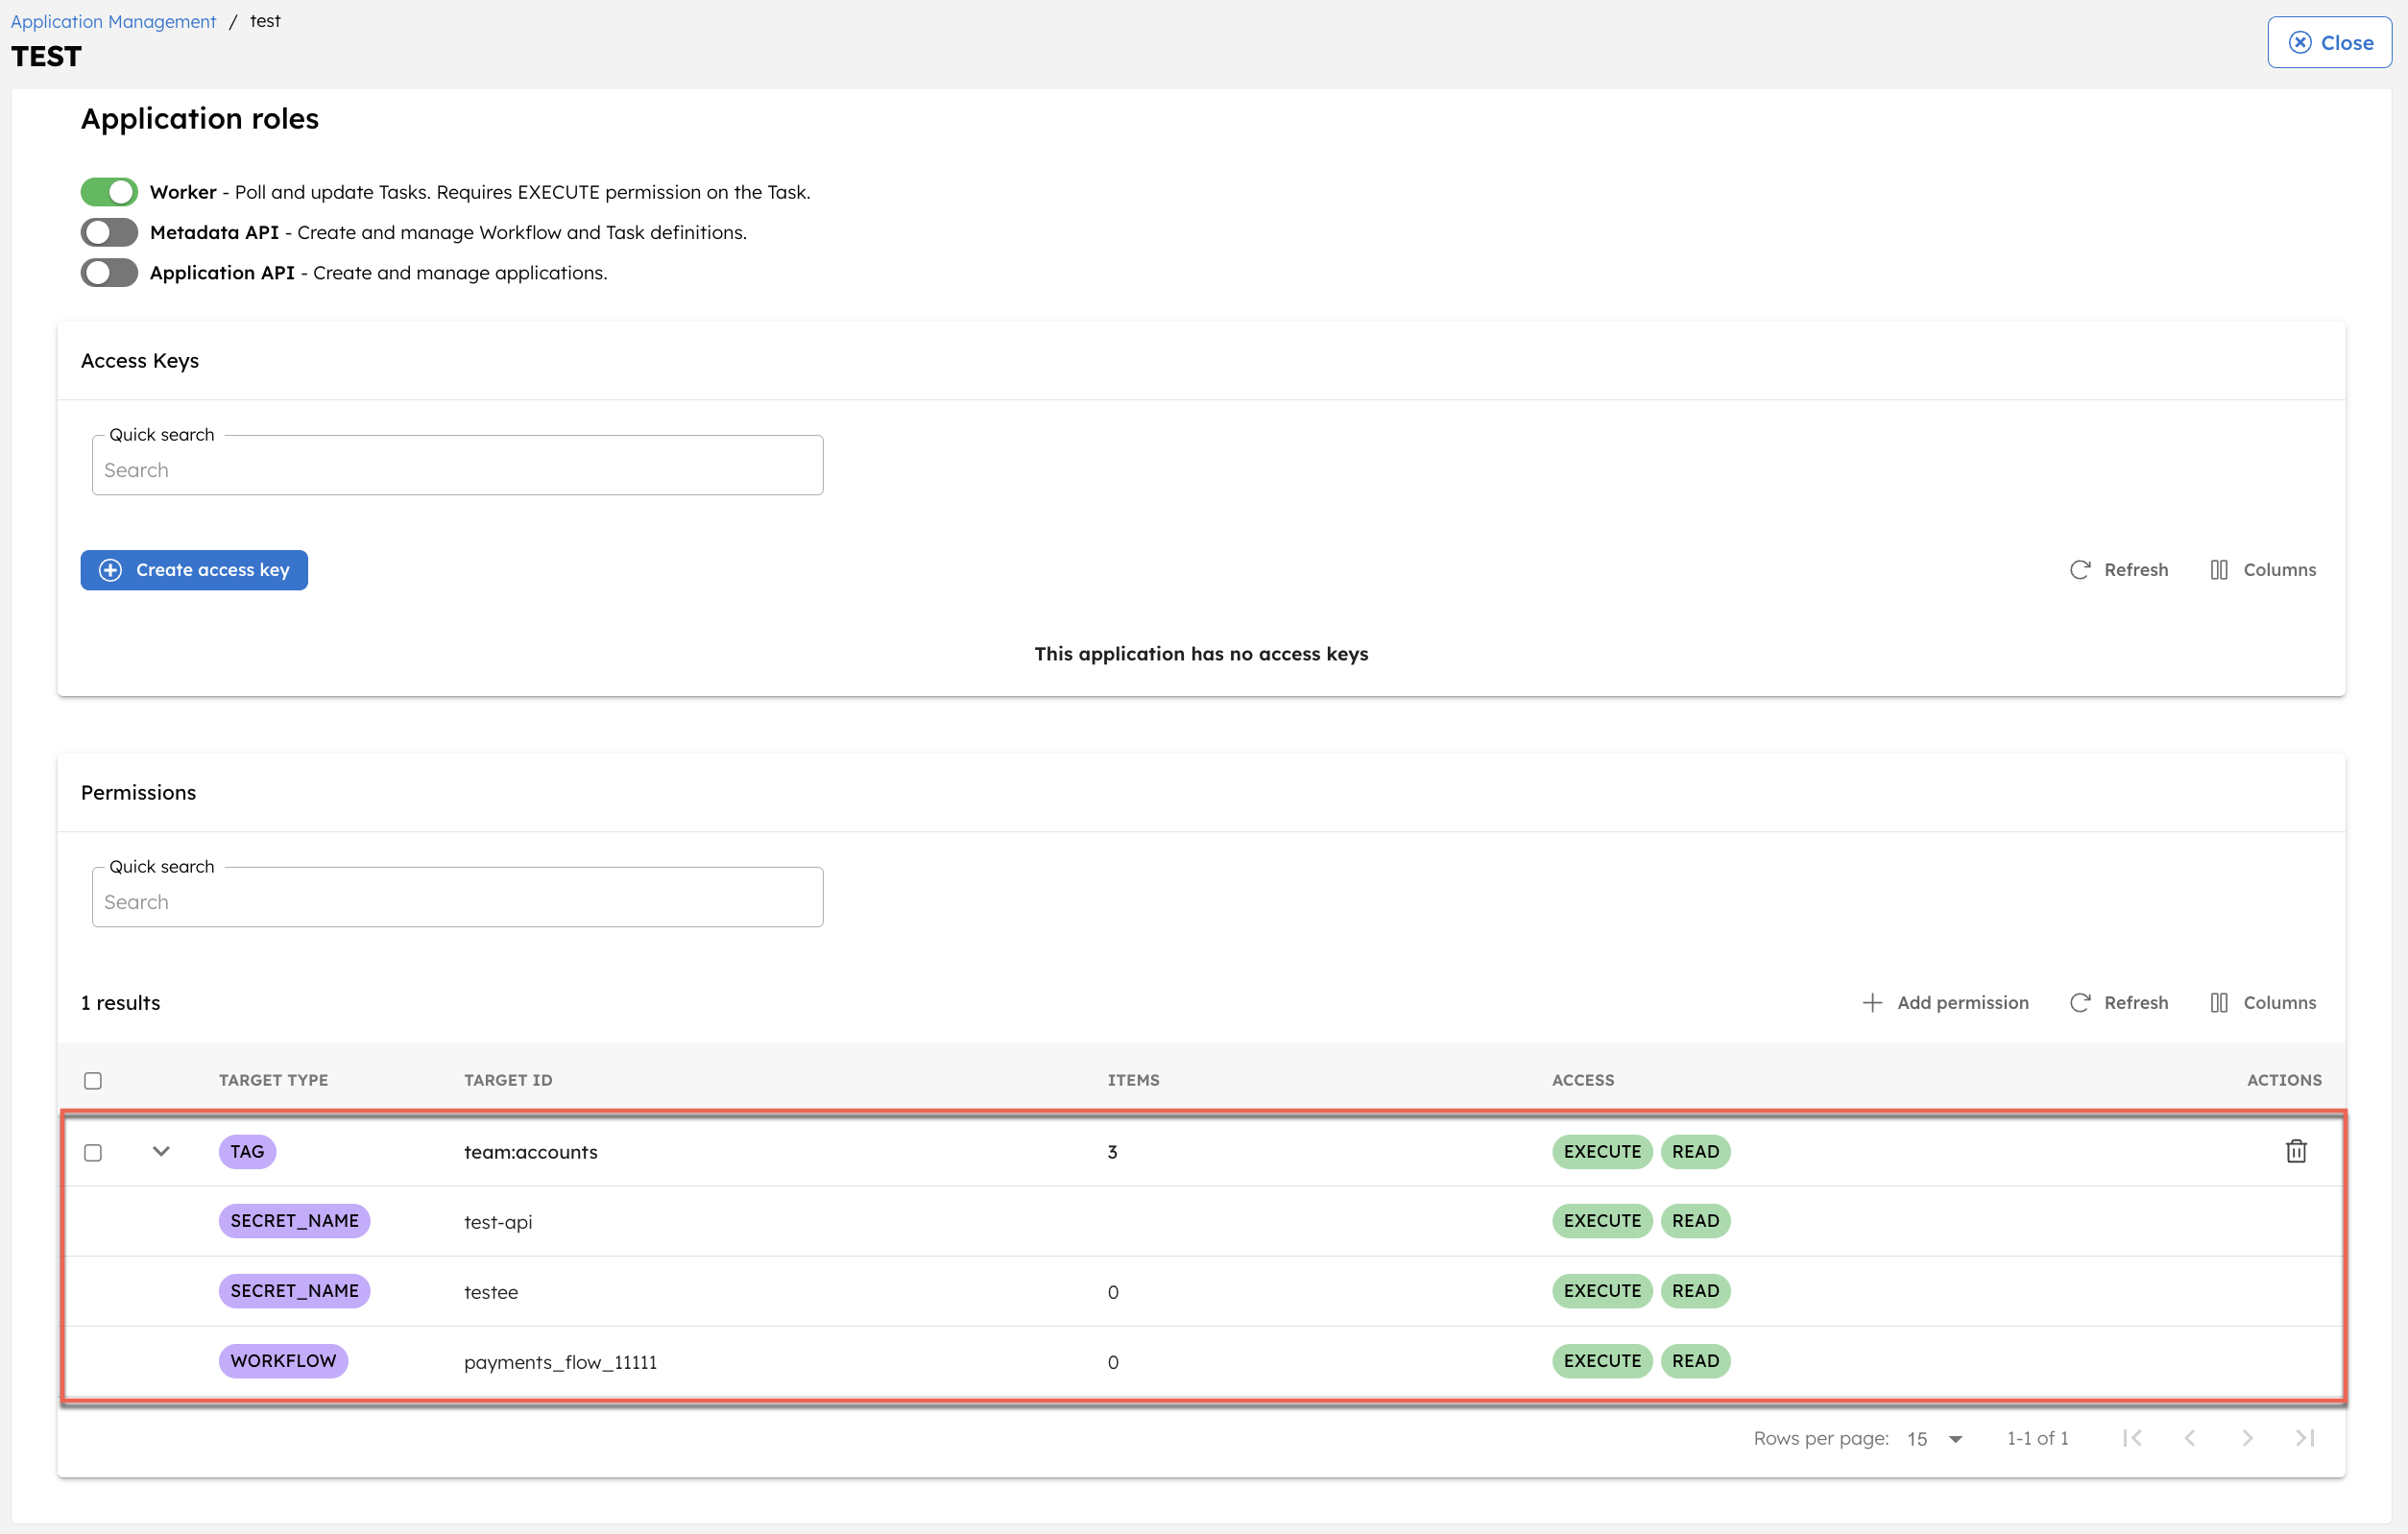
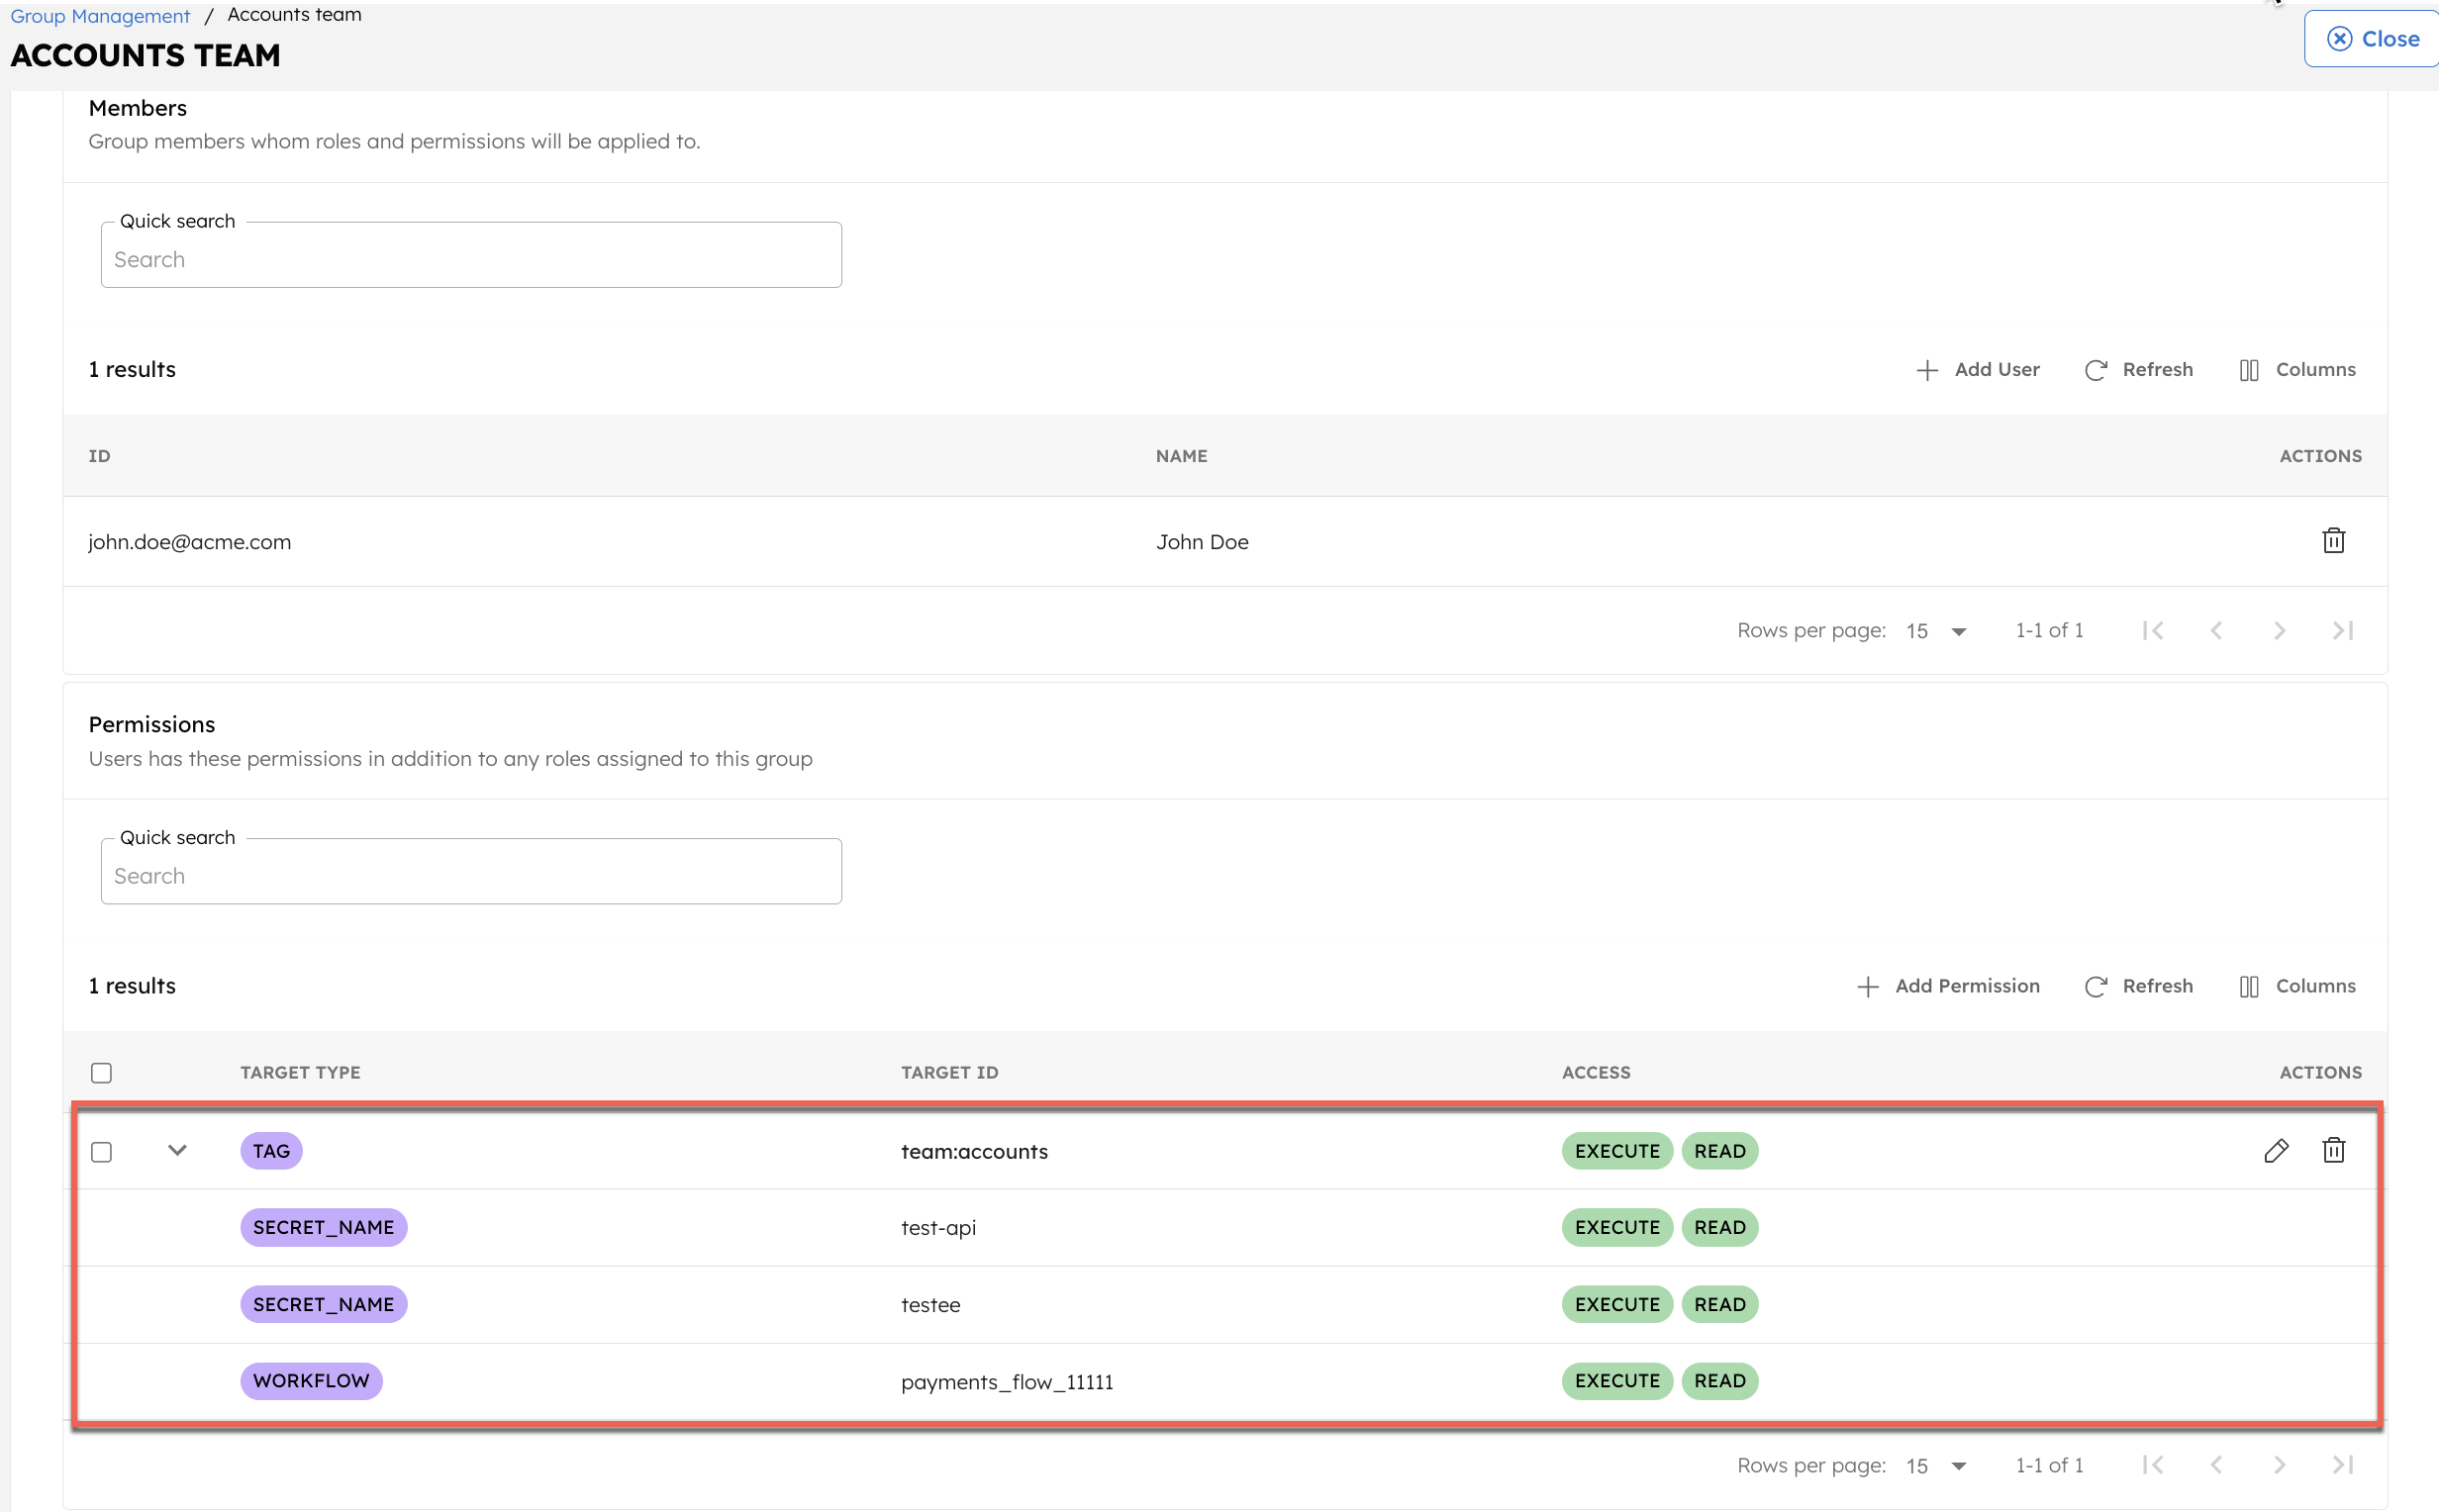
All users in the group now have access to all resources associated with the tag. You can select the drop-down icon to view all of the tagged resources.
To add permissions to an application:
- Go to Access Control > Applications from the left navigation menu on your Conductor cluster.
- Select the application name or the Edit icon located next to the application name.
- In the Permissions section, select + Add permission.
- Toggle to the Tag tab and select the tag to provide access to.
- Toggle the access levels for your selected resource:
- Read: The application will be able to view the resource.
- Update: The application will be able to update the resource.
- Execute: The application will be able to execute the resource.
- Delete: The application will be able to delete the resource.
- Select Add permissions.
The application now has access to all resources associated with the tag. You can select the drop-down icon to view all of the tagged resources.