Relational Database Integration with Orkes Conductor
To use a JDBC task in Orkes Conductor, you must integrate your Conductor cluster with the necessary relational database providers.
The choice of database depends on your use case, whether for transaction processing, analytical queries, or data warehousing. It also varies based on required functionalities, such as indexing, partitioning, and replication, as well as data management needs, including integrity enforcement, concurrency control, and recovery.
Orkes Conductor currently supports integration with PostgreSQL.
This guide explains how to integrate a Relational Database with Orkes Conductor. Here’s an overview:
- Get the required credentials from the database provider.
- Configure a new Relational Database integration in Orkes Conductor.
- Add tables to the integration.
- Set access limits to the database tables to govern which applications or groups can use it.
Step 1: Get the credentials from the PostgreSQL database
Set up PostgreSQL and retrieve the following database credentials:
- Database username
- Password
- Database URL
Step 2: Add an integration for Relational Database
After obtaining the credentials, add a Relational Database integration to your Conductor cluster.
To create a Relational Database integration:
- Go to Integrations from the left navigation menu on your Conductor cluster.
- Select + New integration.
- In the RDBMS section, choose Relational Database.
- Select + Add and enter the following parameters:
| Parameter | Description |
|---|---|
| Integration name | A name for the integration. |
| Database Type | Select the type of database to integrate. Currently supports Postgres. |
| Database User | The database username. |
| Database Password | The password associated with the database username. |
| Database URL | The database URL, which is the JDBC connection string in the format: jdbc:database://url/databaseName. For example: jdbc:postgresql://localhost:5432/mydb |
| Description | A description of the integration. |
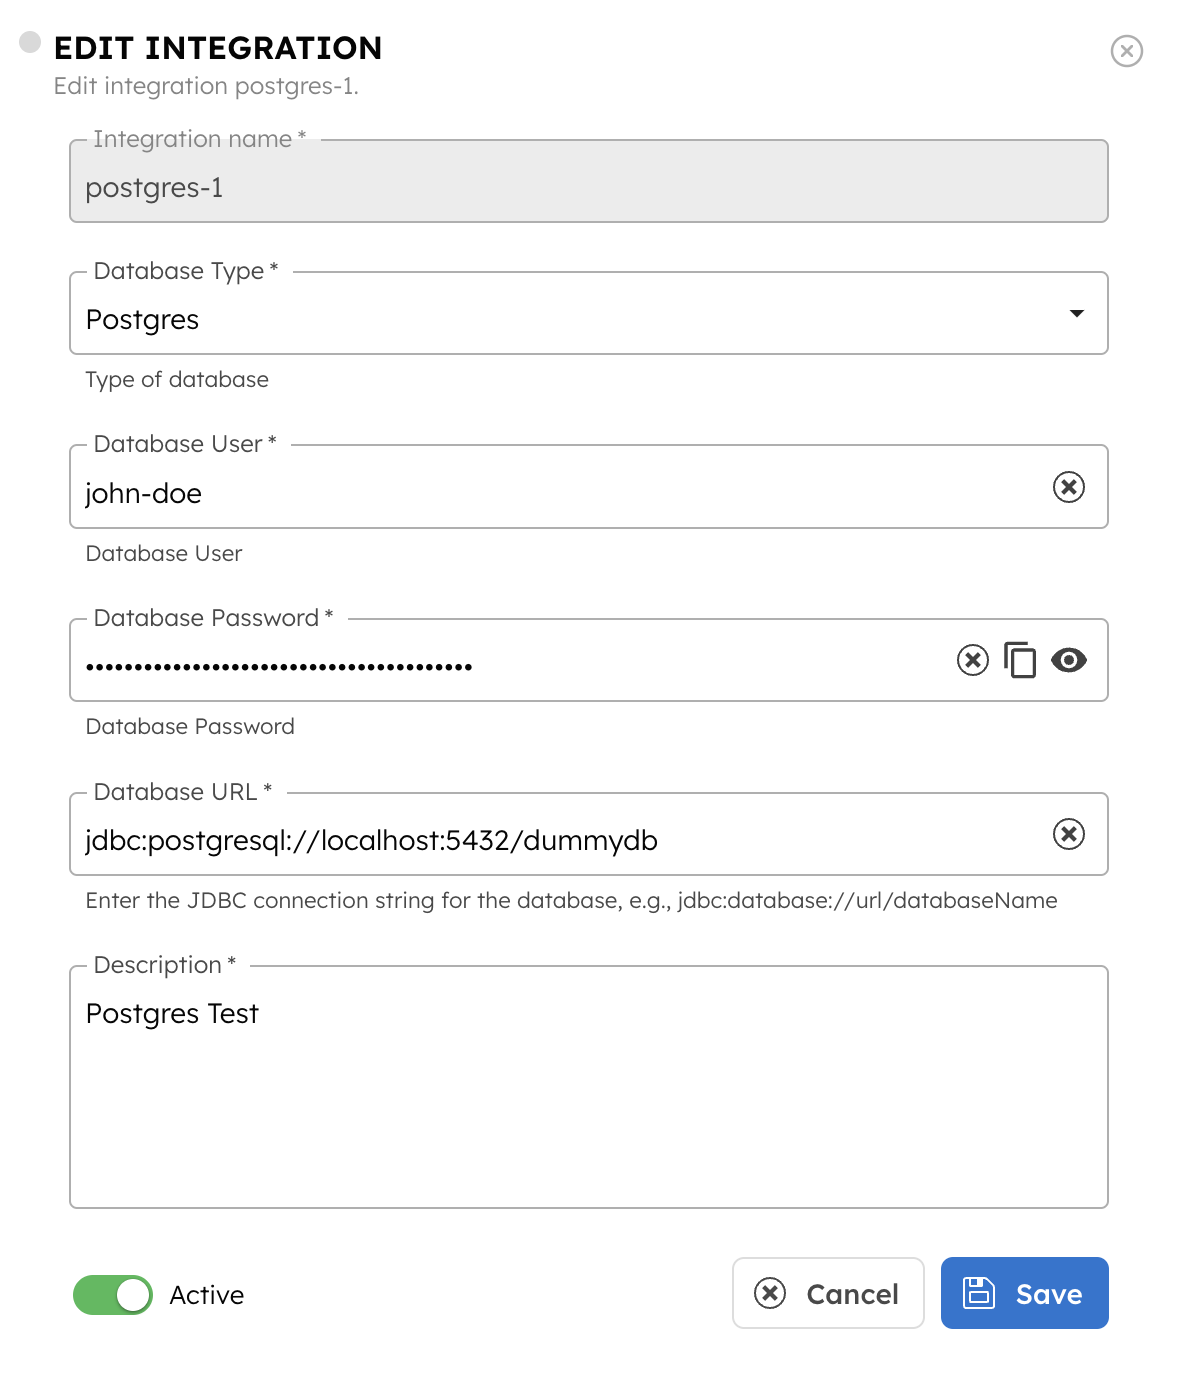
- (Optional) Toggle the Active button off if you don’t want to activate the integration instantly.
- Select Save.
Step 3: Add Relational Database table
Once you’ve integrated a Relational Database, the next step is to configure specific tables.
To add a table to the integration:
- Go to Integrations and select the + button next to the integration created.

- Select + New Table.
- Enter the Table name and a Description. The table must already exist in the connected PostgreSQL database.
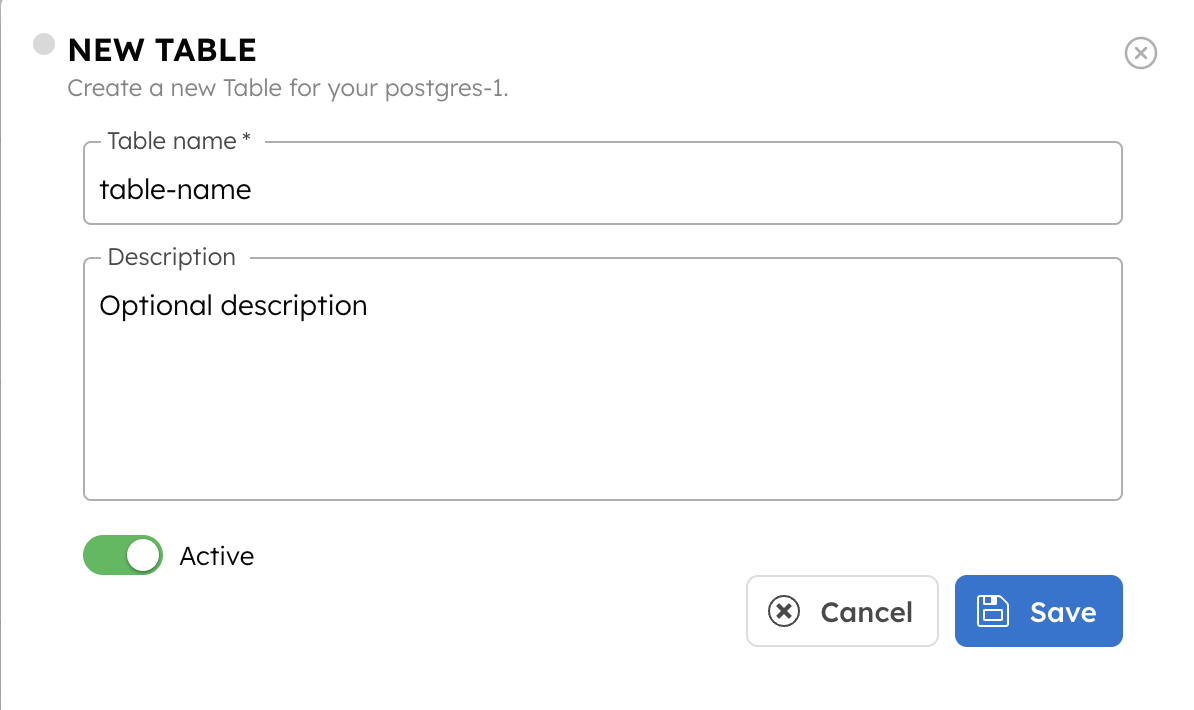
- (Optional) Toggle the Active button off if you don’t want to activate the table instantly.
- Select Save.
This saves the table for future use in JDBC tasks within Orkes Conductor.
Step 4: Set access limits to integration
Once the integration is configured, set access controls to manage which applications or groups can use the database tables.
To provide access to an application or group:
- Go to Access Control > Applications or Groups from the left navigation menu on your Conductor cluster.
- Create a new group/application or select an existing one.
- In the Permissions section, select + Add Permission.
- In the Integration tab, select the required relational database providers and toggle the necessary permissions.
- Select Add Permissions.
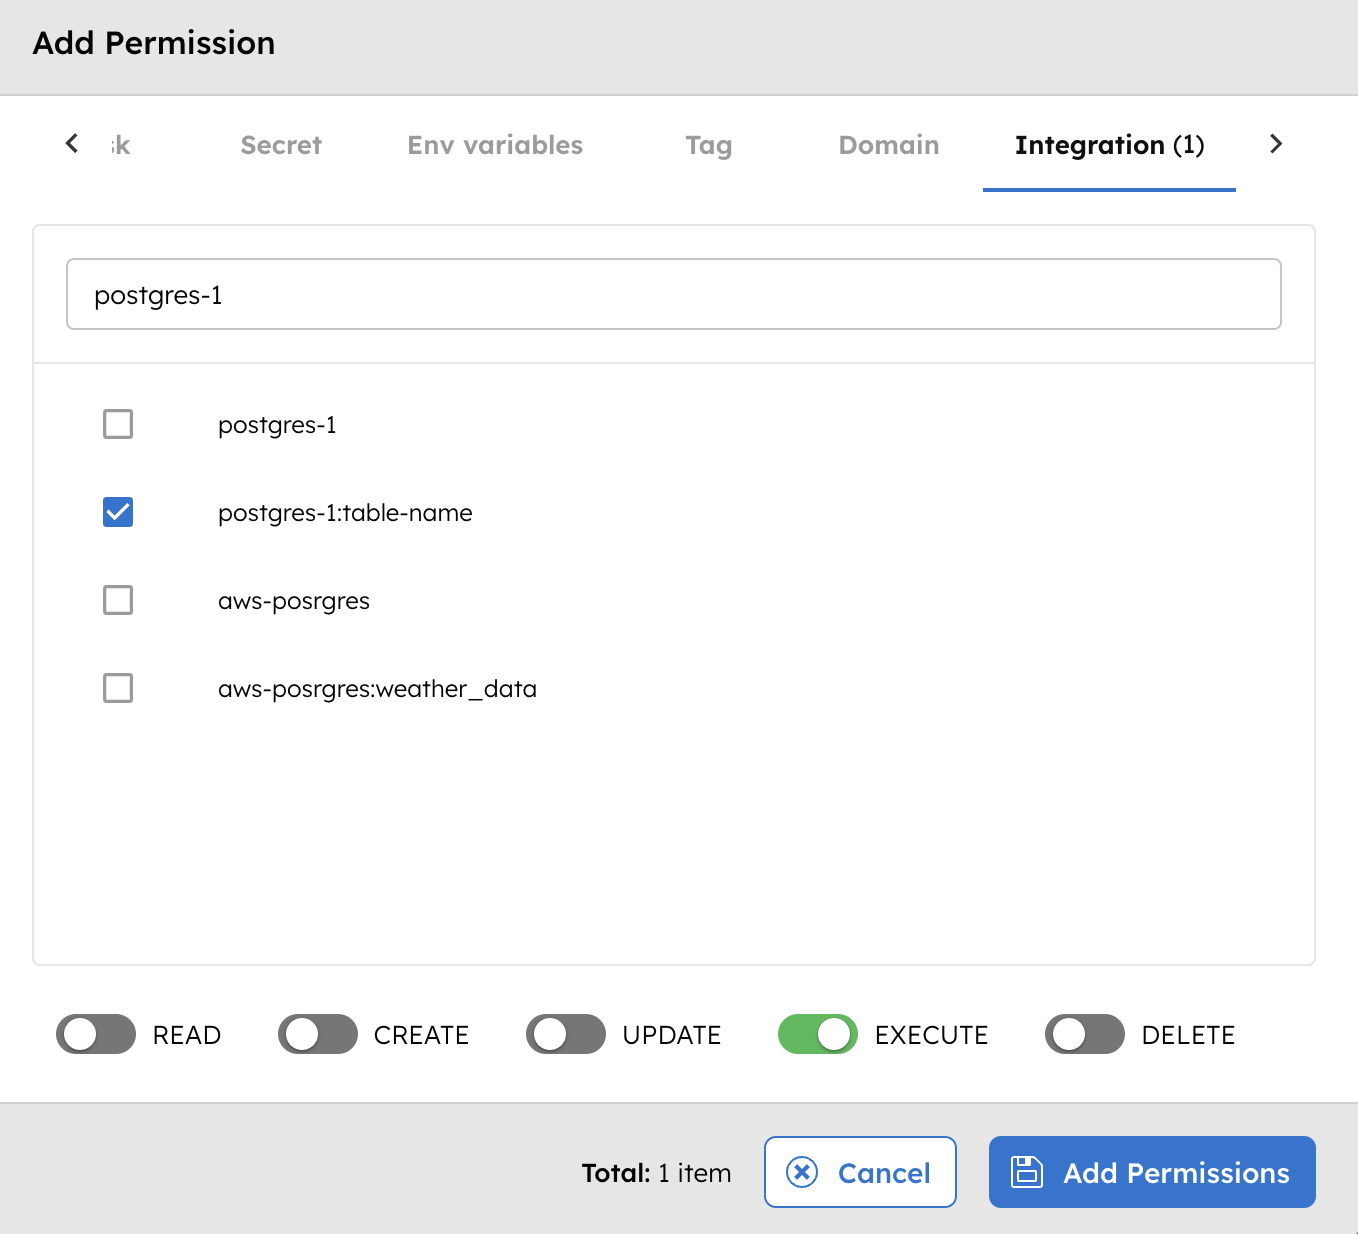
The group or application can now access the database tables according to the configured permissions.
With the integration in place, you can now create workflows using the JDBC task.