Quickstart 1: Write a Worker
Estimated time: 5min
As you will have learned in Core Concepts, the core units of every Conductor workflow are tasks and operators. All code is executed by workers; system tasks are serviced by internal Conductor workers, and any custom tasks must be serviced by workers of your own hosting.
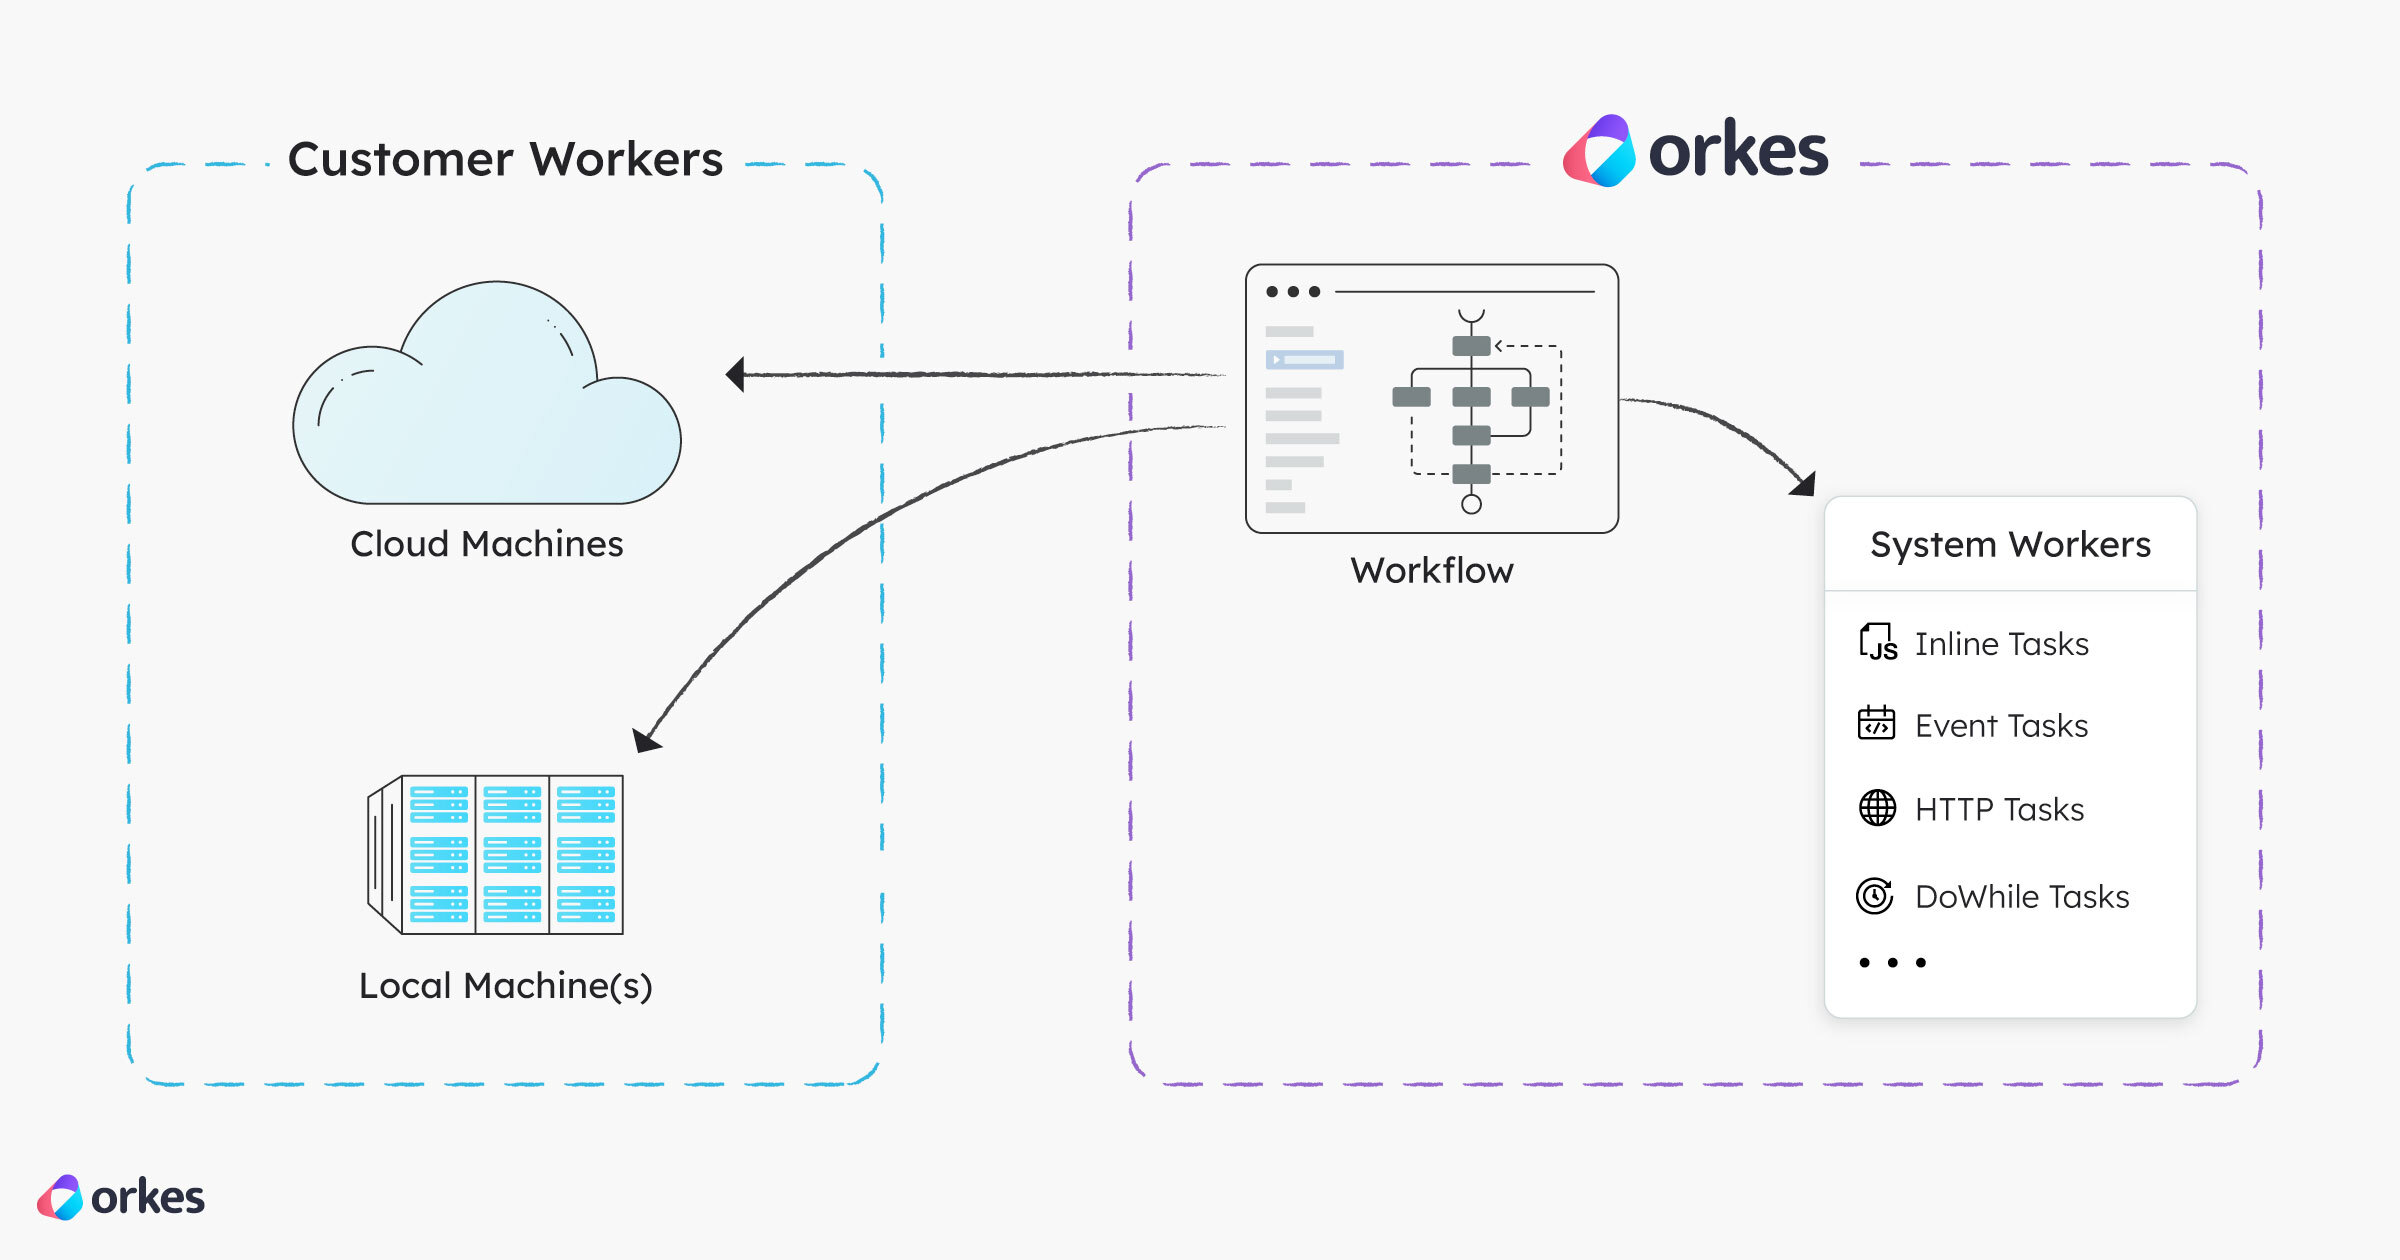
Custom workers can be deployed anywhere: container, VM, or bare metal.
In this quickstart, you will:
- Download a worker project.
- Integrate the worker with Conductor.
- Deploy the worker from your local machine.
Download a worker project
Begin by creating a task worker that polls the Conductor server for scheduled tasks at regular intervals. To get started quickly, download one of our sample myTask worker projects in your preferred language:
git clone https://github.com/conductor-oss/awesome-conductor-apps.git
Integrate the worker with Conductor
To connect your task worker with the Conductor server, you must:
- Register your worker by creating a task definition in Conductor
- Create a worker application and grant it Execute permission
Register worker
To register your worker:
- Log in to your Conductor cluster or Developer Edition.
- In the left navigation menu, go to Definitions > Task.
- Select + Define task.
- Enter the Name for the task, which must match the task definition name in your worker code. This must be
myTaskif you are using the sample worker project downloaded in the previous step. - Select Save > Confirm Save.
The task is now saved to the Conductor server, which facilitates the routing of the task to the correct worker pool during workflow execution.
Create a worker application
Your worker requires programmatic access to the Conductor server. This is done by creating an application in Conductor; an access layer with its own permissions and access tokens.
To create an application for your worker:
- In the left navigation menu, go to Access Control > Applications.
- Select + Create application and enter a Name for it. For example, myApp or myWorkerApp.
- Enable the Worker application role, which allows the application to poll and update tasks.
- Select + Create access key and store the generated credentials securely.
- (Skip this step if you are using Developer Edition) Grant Execute permission to the application:
- Under Permissions, select Add permission.
- Select the Task tab and choose
myTask. - Enable the Execute toggle.
- Select Add Permissions.
- Now, go back to your worker project and set the credentials in the worker project file for your language:
- Python
- Java
- JavaScript
- C#
- Go
Update the following in awesome-conductor-apps/python/developer-guides/using-workers/main.py. Note that base_url should not include /api.
    configuration = Configuration(
        base_url='https://your-cluster-url',
        authentication_settings=AuthenticationSettings(
            key_id='<YOUR-KEY-ID>',
            key_secret='<YOUR-KEY-SECRET>'
        )
    )
Update the following in awesome-conductor-apps/java/developer-guides/using-workers/src/main/java/io/orkes/conductor/examples/Main.java. Note that basePath should include /api.
    ApiClient client = ApiClient.builder()
        .basePath("https://your-cluster-url/api")
        .credentials("<YOUR-KEY-ID>", "<YOUR-KEY-SECRET>")
        .build();
Set as environment variables before running.
export CONDUCTOR_SERVER_URL=https://your-cluster-url/api
export CONDUCTOR_AUTH_KEY=<YOUR-KEY-ID>
export CONDUCTOR_AUTH_SECRET=<YOUR-KEY-SECRET>
Update the following in awesome-conductor-apps/csharp/developer-guides/using-workers/Worker.cs. Note that BasePath should include /api.
var conf = new Configuration
{
    BasePath = "https://your-cluster-url/api",
    AuthenticationSettings = new OrkesAuthenticationSettings("<YOUR-KEY-ID>", "<YOUR-KEY-SECRET>")
};
Update the following in awesome-conductor-apps/go/developer-guides/using-workers/worker.go. Note that API_URL should include /api.
const API_URL = "https://your-cluster-url/api"
const KEY_ID = "<YOUR-KEY-ID>"
const SECRET = "<YOUR-KEY-SECRET>"
The application account can now execute the worker task.
Start the worker
Using the command line, navigate to the downloaded project directory and launch the worker.
- Python
- Java
- JavaScript
- C#
- Go
cd awesome-conductor-apps/python/developer-guides/using-workers
python3 -m venv venv
source venv/bin/activate
pip3 install -r requirements.txt
python3 main.py
cd awesome-conductor-apps/java/developer-guides/using-workers
./gradlew build && ./gradlew run
If ./gradlew fails with a GradleWrapperMain error, use gradle build && gradle run instead.
cd awesome-conductor-apps/javascript/developer-guides/using-workers
npm install
node worker.js
cd awesome-conductor-apps/csharp/developer-guides/using-workers
dotnet run
C# sample requires .NET 8.0 or above.
cd awesome-conductor-apps/go/developer-guides/using-workers
go run worker.go
When the worker starts successfully, you should see polling logs in the terminal. Later, when you run a workflow containing this worker, the task should run to completion. But first, let’s build a workflow using this task in Quickstart 2.