Writing Workers for Conductor Workflows
A worker is a piece of code responsible for executing a task. In Conductor, workers can be implemented in any language and deployed anywhere. Here is the overview for using custom workers:
- Create a worker project in your preferred language.
- Set up the worker.
- Use the worker task in a workflow.
Creating a worker
To create a worker, you can use Conductor’s polyglot SDKs. These SDKs contain features that make it easier to create workers, such as polling threads, metrics, and server communication.
Best practices for writing workers
In Conductor, each worker should embody the microservice design pattern and follow these basic principles:
- Defined I/O: Each worker executes a specific task and produces a well-defined output, given specific inputs.
- Statelessness: Workers are stateless and do not implement workflow-specific logic, such as deciding which task comes next.
- Idempotency: Workers are meant to be idempotent and should handle cases where partially executed tasks get rescheduled for completion.
- Decoupled implementation: Workers do not implement the logic to handle retries, timeouts, and other implementation details, which are handled by the Conductor server.
Step 1: Get Conductor SDK
Get Conductor SDK in your preferred language.
- Python
- Java
- JavaScript
- C#
- Go
- Clojure
python3 -m pip install conductor-python
For Gradle:
implementation 'org.conductoross:conductor-client:4.0.1'
implementation 'org.conductoross:java-sdk:4.0.1'
implementation 'io.orkes.conductor:orkes-conductor-client:4.0.1'
For Maven:
<dependency>
    <groupId>org.conductoross</groupId>
    <artifactId>conductor-client</artifactId>
    <version>4.0.1</version>
</dependency>
<dependency>
    <groupId>org.conductoross</groupId>
    <artifactId>java-sdk</artifactId>
    <version>4.0.1</version>
</dependency>
<dependency>
    <groupId>io.orkes.conductor</groupId>
    <artifactId>orkes-conductor-client</artifactId>
    <version>4.0.1</version>
</dependency>
npm:
npm i @io-orkes/conductor-javascript
yarn:
yarn add @io-orkes/conductor-javascript
dotnet add package conductor-csharp
go get github.com/conductor-sdk/conductor-go
Get the Conductor Clojure package from clojars.
:deps {org.clojure/clojure {:mvn/version "1.11.0"}
        io.orkes/conductor-clojure {:mvn/version "0.3.0"}}
Step 2: Write your worker logic
In general, workers can be instantiated from classes that implement the Worker interface, or that are annotated using a WorkerTask annotation or decorator, depending on the language.
All workers must have a task definition name, which will be used for reference during task polling and execution. The task definition name may be different from the name of the function or method that the worker is responsible for.
A worker in your project may look like this:
- Python
- Java
- JavaScript
- C#
- Go
- Clojure
Create a Python worker by adding a @worker_task decorator to a function.
from conductor.client.worker.worker_task import worker_task

@worker_task(task_definition_name='myTask')
def greet(name: str) -> str:
    return f'Hello {name}'
Check out the full sample worker project in Python: https://github.com/conductor-oss/conductor-apps/tree/main/python/developer-guides/using-workers
Create a Java worker by instantiating a class that implements the Worker interface. The @WorkerTask annotation takes the task definition name as an argument.
import com.netflix.conductor.sdk.workflow.task.InputParam;
import com.netflix.conductor.sdk.workflow.task.WorkerTask;

public class Workers {
    @WorkerTask("myTask")
    public String greeting(@InputParam("name") String name) {
        return ("Hello " + name);
    }
}
Check out the full sample worker project in Java: https://github.com/conductor-oss/conductor-apps/tree/main/java/developer-guides/using-workers
const worker = {
  taskDefName: "myTask",
  execute: async (task) => {
    console.log(task)
    return {
      outputData: {
        hello: "Hello " + task.inputData?.name,
      },
      status: "COMPLETED",
    };
  },
};
Check out the full sample worker project in JavaScript: https://github.com/conductor-oss/conductor-apps/tree/main/javascript/developer-guides/using-workers
[WorkerTask(taskType: "myTask", batchSize: 5, pollIntervalMs: 500, workerId: "csharp-worker")]
public static TaskResult MyTask(Conductor.Client.Models.Task task)
{
    var inputData = task.InputData;
    var result = task.ToTaskResult();
    result.OutputData = new Dictionary<string, object>
    {
        ["message"] = "Hello " + inputData.GetValueOrDefault("name", null)
    };
    return result;
}
Check out the full sample worker project in C#: https://github.com/conductor-oss/conductor-apps/tree/main/csharp/developer-guides/using-workers
import (
	"fmt"

	"github.com/conductor-sdk/conductor-go/sdk/model"
)

func myTask(task *model.Task) (interface{}, error) {
	return map[string]interface{}{
		"greetings": "Hello, " + fmt.Sprintf("%v", task.InputData["name"]),
	}, nil
}
Check out the full sample worker project in Go: https://github.com/conductor-oss/conductor-apps/tree/main/go/developer-guides/using-workers
(def worker
  {:name "myTask",
   :execute (fn [d]
              (let [name (get-in d [:inputData :name])]
                {:status  "COMPLETED"
                 :outputData {"message" (str "hello "  name)}}))})
Check out the full sample worker project in Clojure: https://github.com/conductor-oss/conductor-apps/tree/main/clojure/developer-guides/using-workers
Step 3: Run your worker
Start the workers using the SDK-provided interface. The interface polls the server for work, executes worker code, and updates the results back to the server.
- Python
- Java
- JavaScript
- C#
- Go
- Clojure
Run the Python worker by calling a TaskHandler.
from conductor.client.automator.task_handler import TaskHandler
from conductor.client.configuration.configuration import Configuration

task_handler = TaskHandler(configuration=Configuration())
task_handler.start_processes()
task_handler.join_processes()
Run the annotated Java worker using WorkflowExecutor.
var client = ApiClient.builder()
        .basePath("https://SERVER_URL/api") // e.g., "https://developer.orkescloud.com/api"
        .credentials("_CHANGE_ME_", "_CHANGE_ME_")
        .build();
int pollingInterval = 50;
var executor = new WorkflowExecutor(client, pollingInterval);
// List of packages  (comma separated) to scan for annotated workers.
// Please note, the worker method MUST be public and the class in which they are defined
// MUST have a no-args constructor
executor.initWorkers("io.orkes.conductor.examples.workers");
Import TaskRunner to run the JavaScript worker.
import {
  orkesConductorClient,
  TaskManager,
} from "@io-orkes/conductor-javascript";

const config = {
  serverUrl: "https://SERVER_URL/api", // e.g., "https://developer.orkescloud.com/api"
  keyId: "_CHANGE_ME_",
  keySecret: "_CHANGE_ME_",
};

const client = await orkesConductorClient(config);
const manager = new TaskManager(client, [worker]);
manager.startPolling();
var conf = new Configuration
{
   BasePath = "https://SERVER_URL/api", // e.g., "https://developer.orkescloud.com/api"
   AuthenticationSettings = new OrkesAuthenticationSettings("_CHANGE_ME_", "_CHANGE_ME_")
};

var host = WorkflowTaskHost.CreateWorkerHost(
   conf,
   LogLevel.Debug
);
host.Start();
Run the Go worker using TaskRunner.
import (
	"github.com/conductor-sdk/conductor-go/sdk/client"
	"github.com/conductor-sdk/conductor-go/sdk/model"
	"github.com/conductor-sdk/conductor-go/sdk/settings"

	"github.com/conductor-sdk/conductor-go/sdk/worker"
)

apiClient := client.NewAPIClient(
    settings.NewAuthenticationSettings(
        KEY,
        SECRET,
    ),
    settings.NewHttpSettings(
    "https://SERVER_URL/api", // e.g., "https://developer.orkescloud.com/api"
))

taskRunner = worker.NewTaskRunnerWithApiClient(apiClient)
taskRunner.StartWorker("myTask", myTask, 1, time.Second*1)
(defn -main
  [& args]
  ;; Create and run the task executor
  (tr/runner-executer-for-workers options [worker])
  ;; Keep the process running
  (loop []
    (Thread/sleep 1000)
    (recur)))
For more information on creating workers in your preferred language, refer to the SDK guides.
Setting up the worker
To use the worker in a workflow, you should register the worker task to the Conductor server, set up authorized access, and launch your worker project.
The worker task cannot begin execution until the worker is connected to the Conductor server. If the workflow is run, the task will remain in the Scheduled status until the worker comes online to service the task.
Register worker task
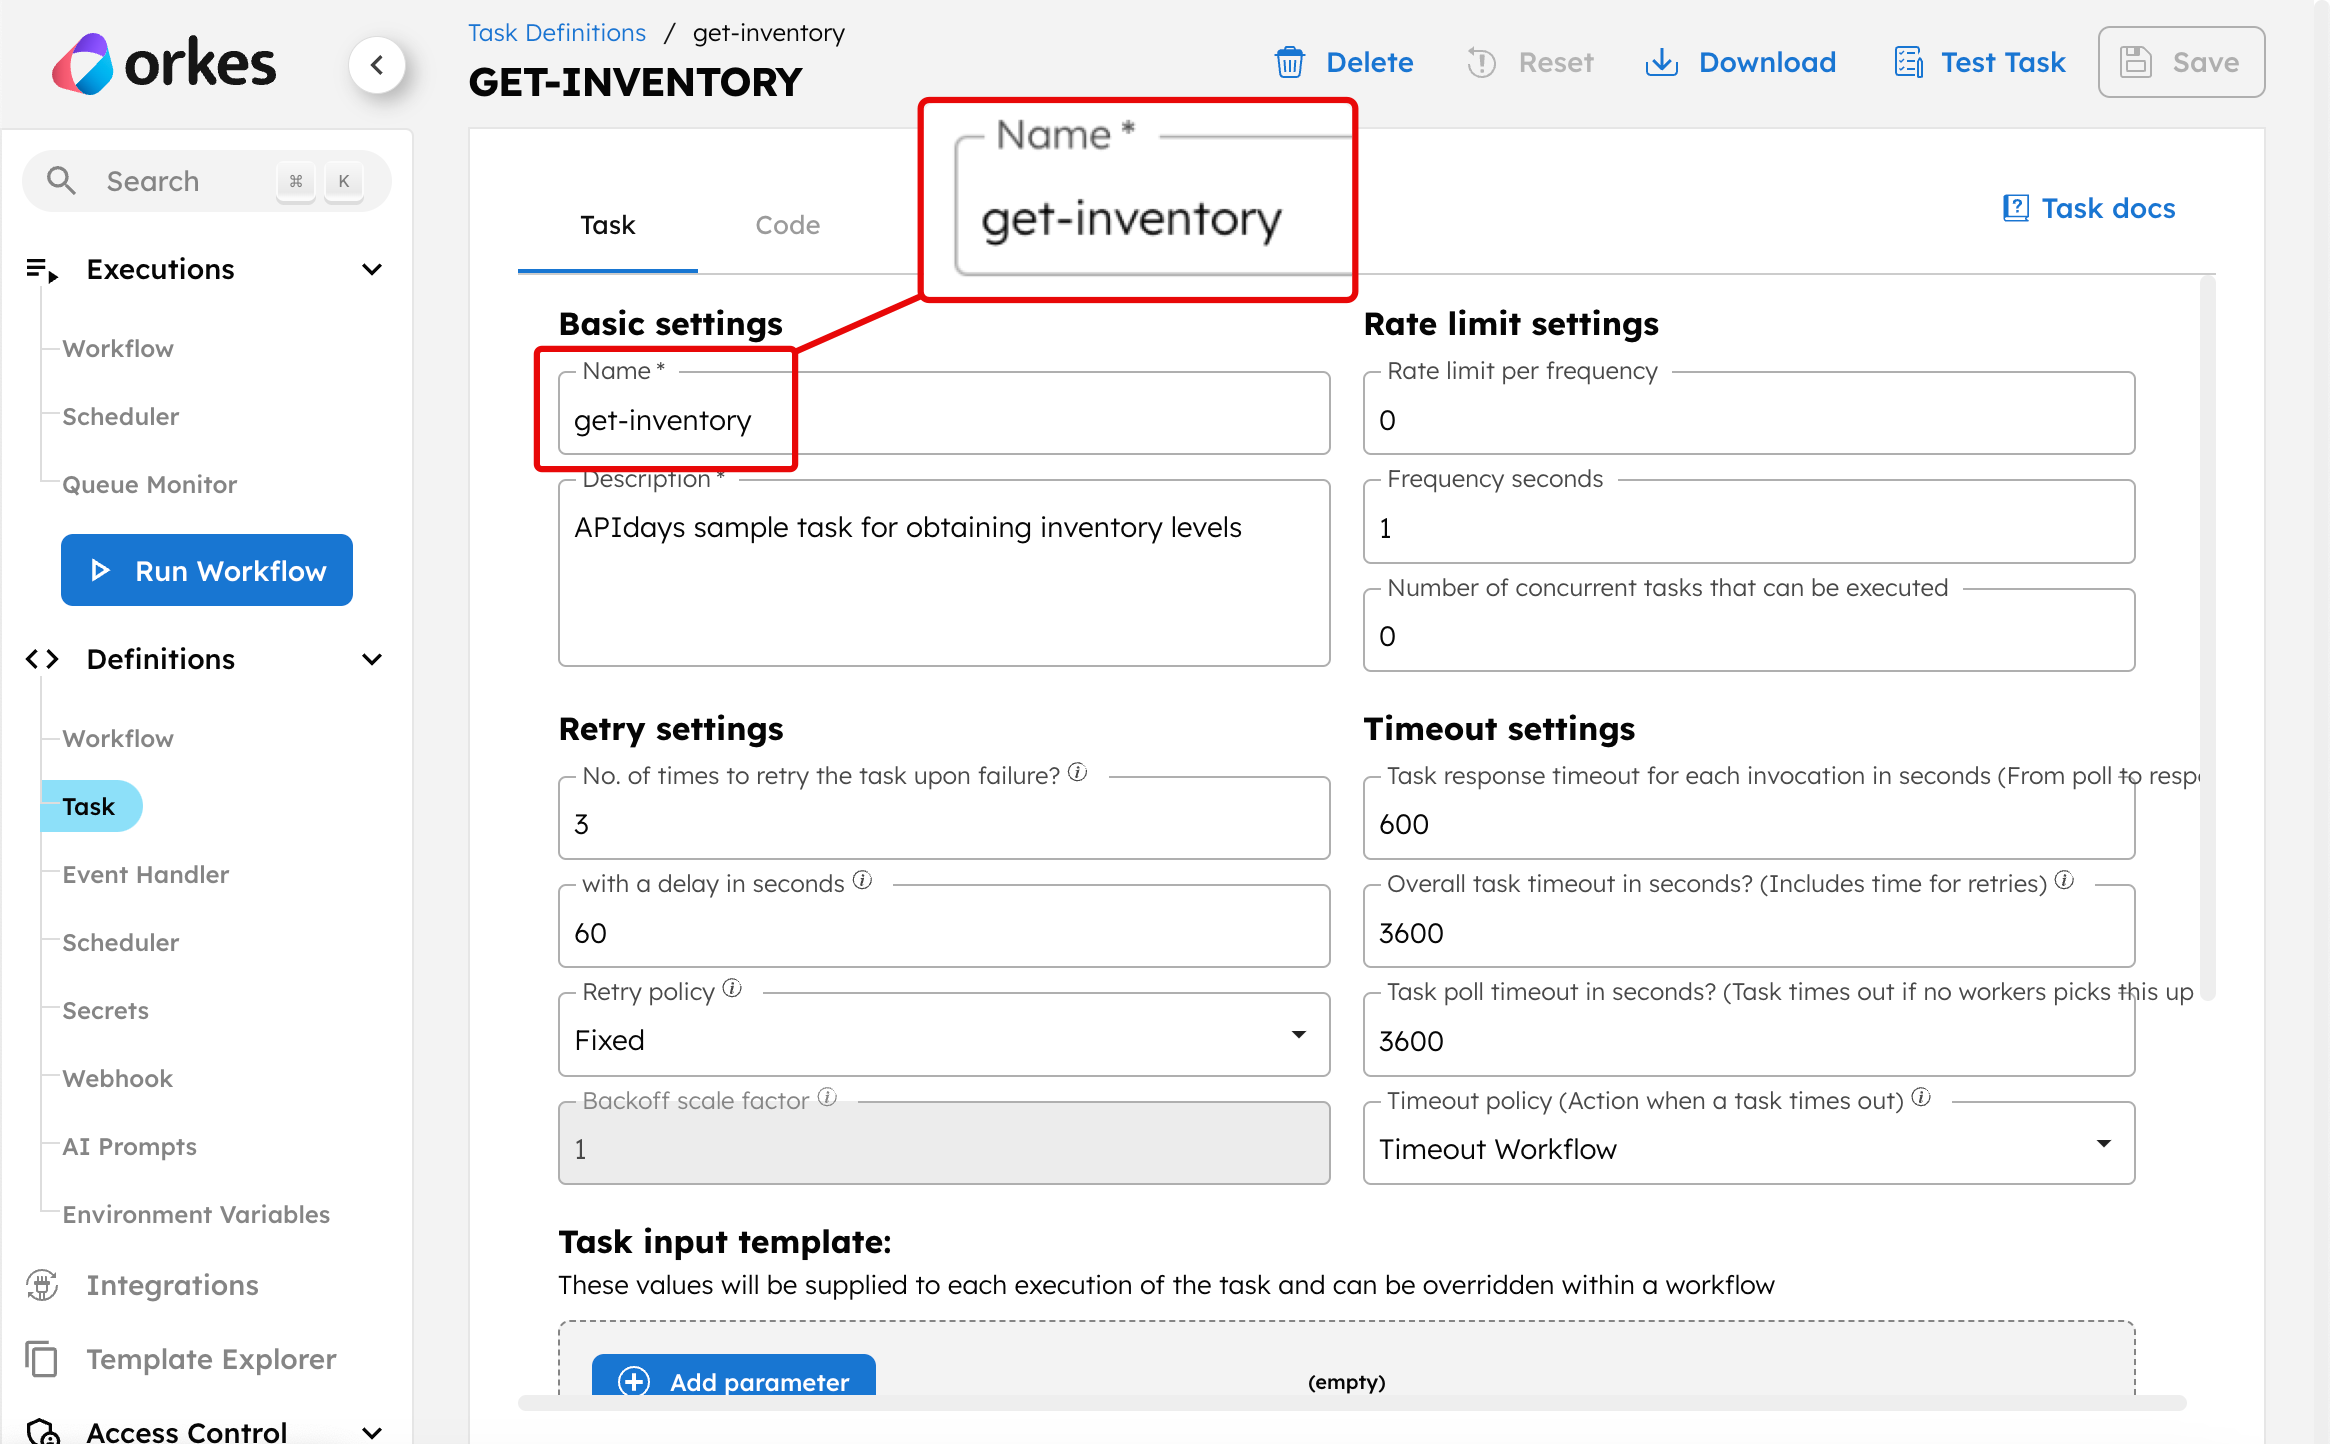
All worker tasks should be registered to the Conductor server, which is done by creating a task definition. The task definition contains configuration options for failure handling and expected input/output payloads. Tasks can be defined in UI, using API, or SDK.
To define a worker task:
- Using Conductor UI
- Using API
- Go to Definitions > Task from the left navigation menu on your Conductor cluster.
- Select + Define task.
- Enter the task details, such as the rate limits, retry settings, timeout settings, and expected inputs and outputs.
The Name must match the task name defined previously in your code.
- Select Save > Confirm Save.
Refer to the Create Task Definition API.
Set up authorized access
If you are using the Developer Edition to create your worker, you can simply grab the access key ID and secret from the application in Access Control > Applications for your worker project and skip the rest of the steps in this section.
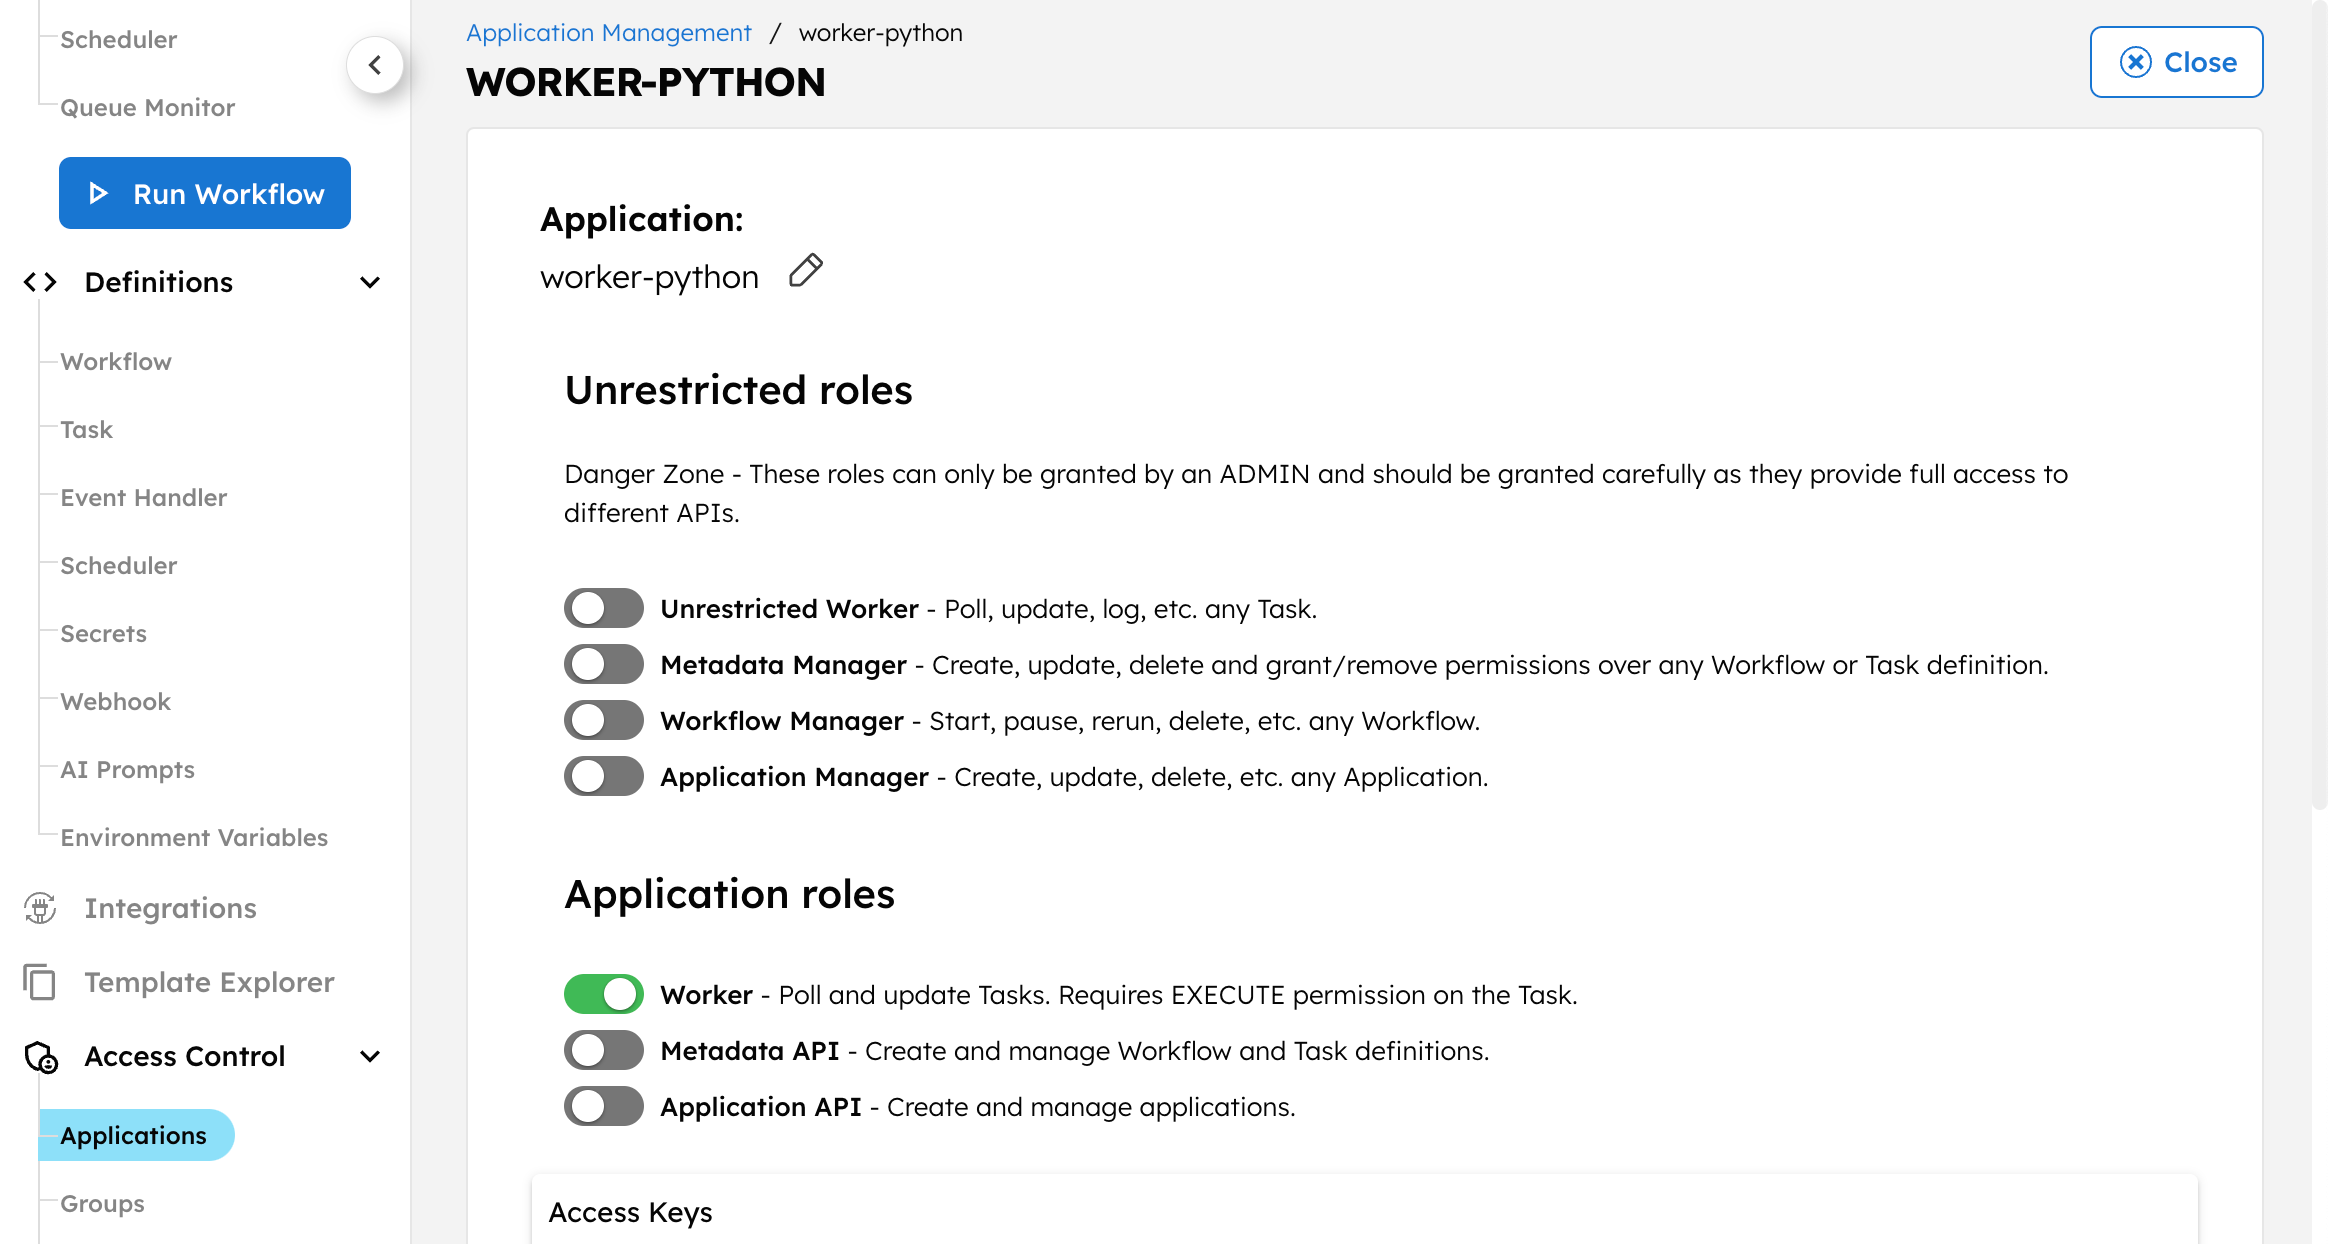
In Orkes Conductor, an application account with a Worker role type enables workers to authenticate and authorize against the Conductor server. To set up authorized access, you need to add the worker to an application and grant it Execute permission.
For well-defined access controls, your worker application should be kept separate from your workflow client application. Learn more about proper application separation.
To set up authorized access:
- Configure an application account.
- Go to Access Control > Applications from the left navigation menu on your Conductor cluster.
- Create a new application or select an application to which you will be adding your worker. Ensure that the application role has Worker enabled.

- Get the application access key for your worker project.
- In Access Keys, select Create access key and store your credentials securely.
- Set the Key ID and Key Secret in your project.
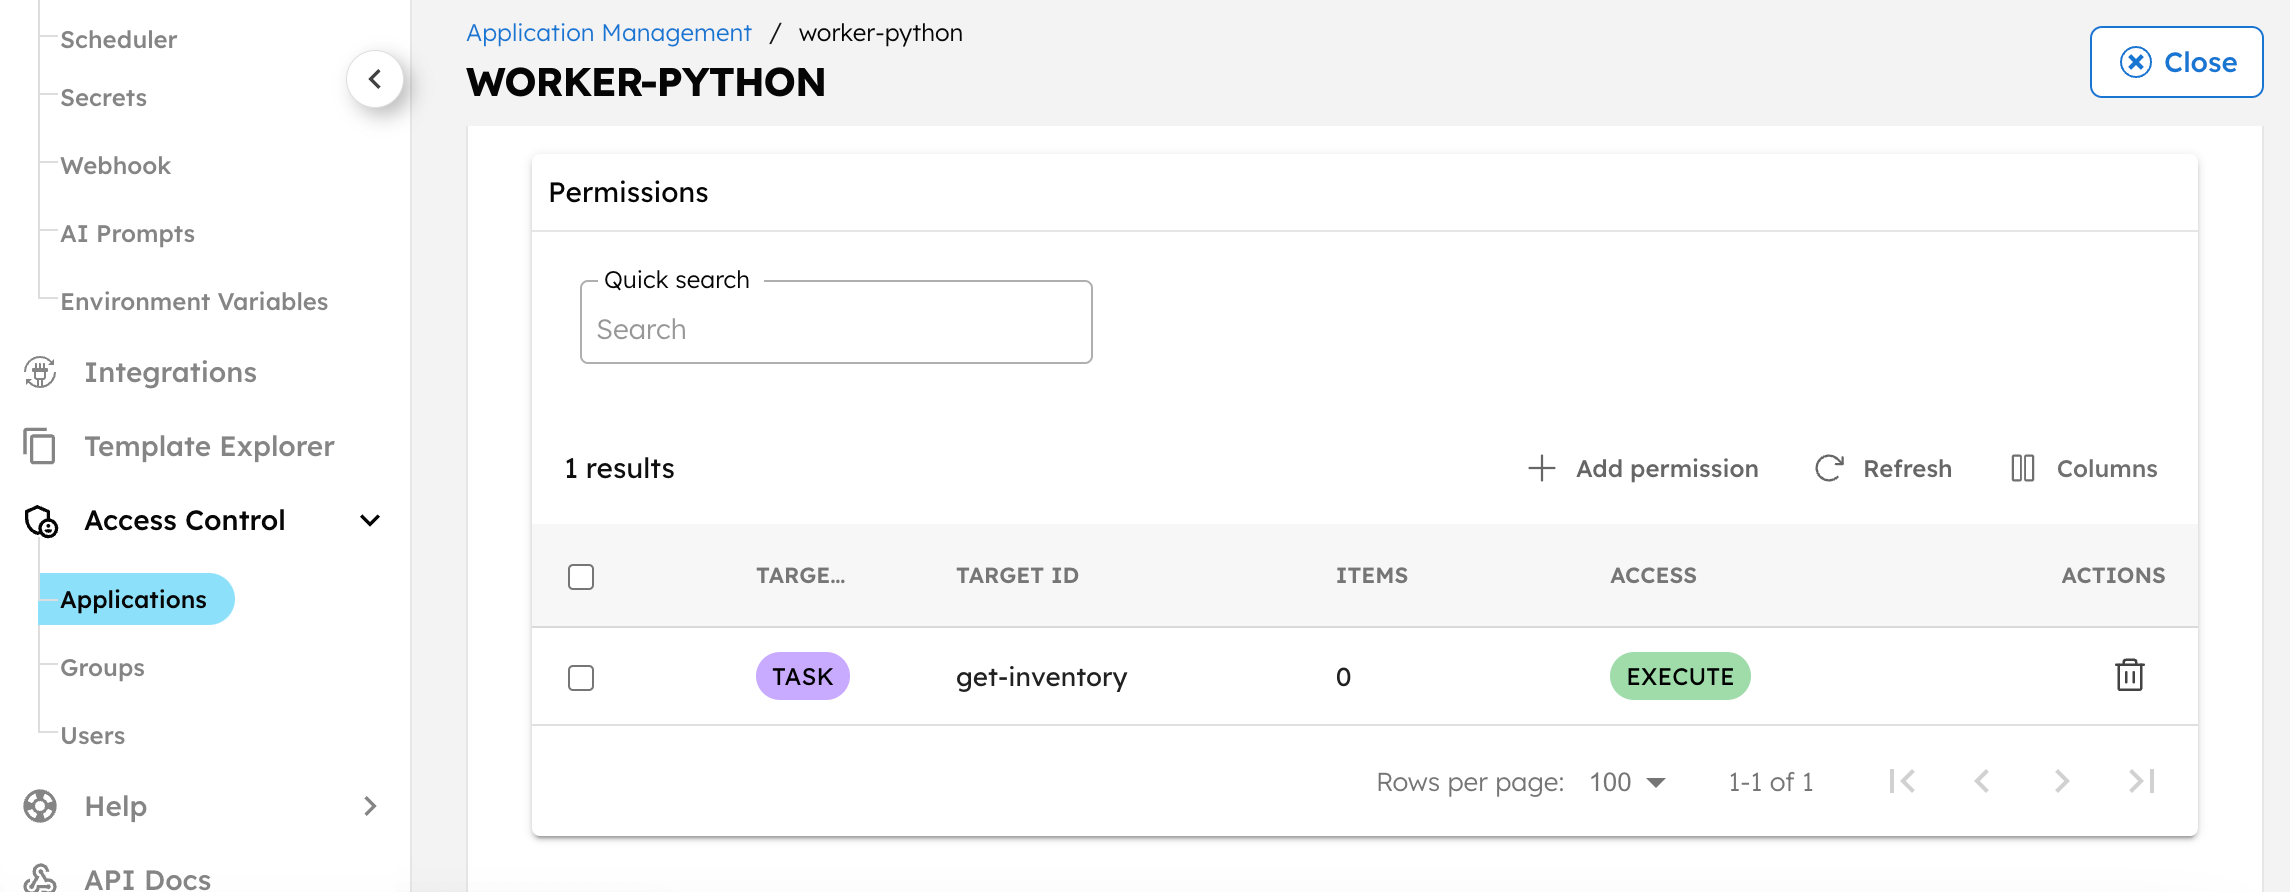
- Grant Execute permission to the application.
- In Permissions, select + Add permission.
- Select the Task tab and then your worker task.
- Enable the Execute toggle.
- (If task-to-domain is used) In Domain, enter the domain name used in your worker code.
- Select Add Permissions.
The application account can now execute the worker task.

Launch the worker
Launch the worker to begin polling the Conductor server. The specific method depends on your language and project configuration.
Example
- Python
- Java
- JavaScript
python3 worker.py
./gradlew build run
node index.js
Using the worker task
To use a Worker task, add it to a workflow definition.
Add to workflow
To add a worker task to a workflow:
- Using Conductor UI
- Using API
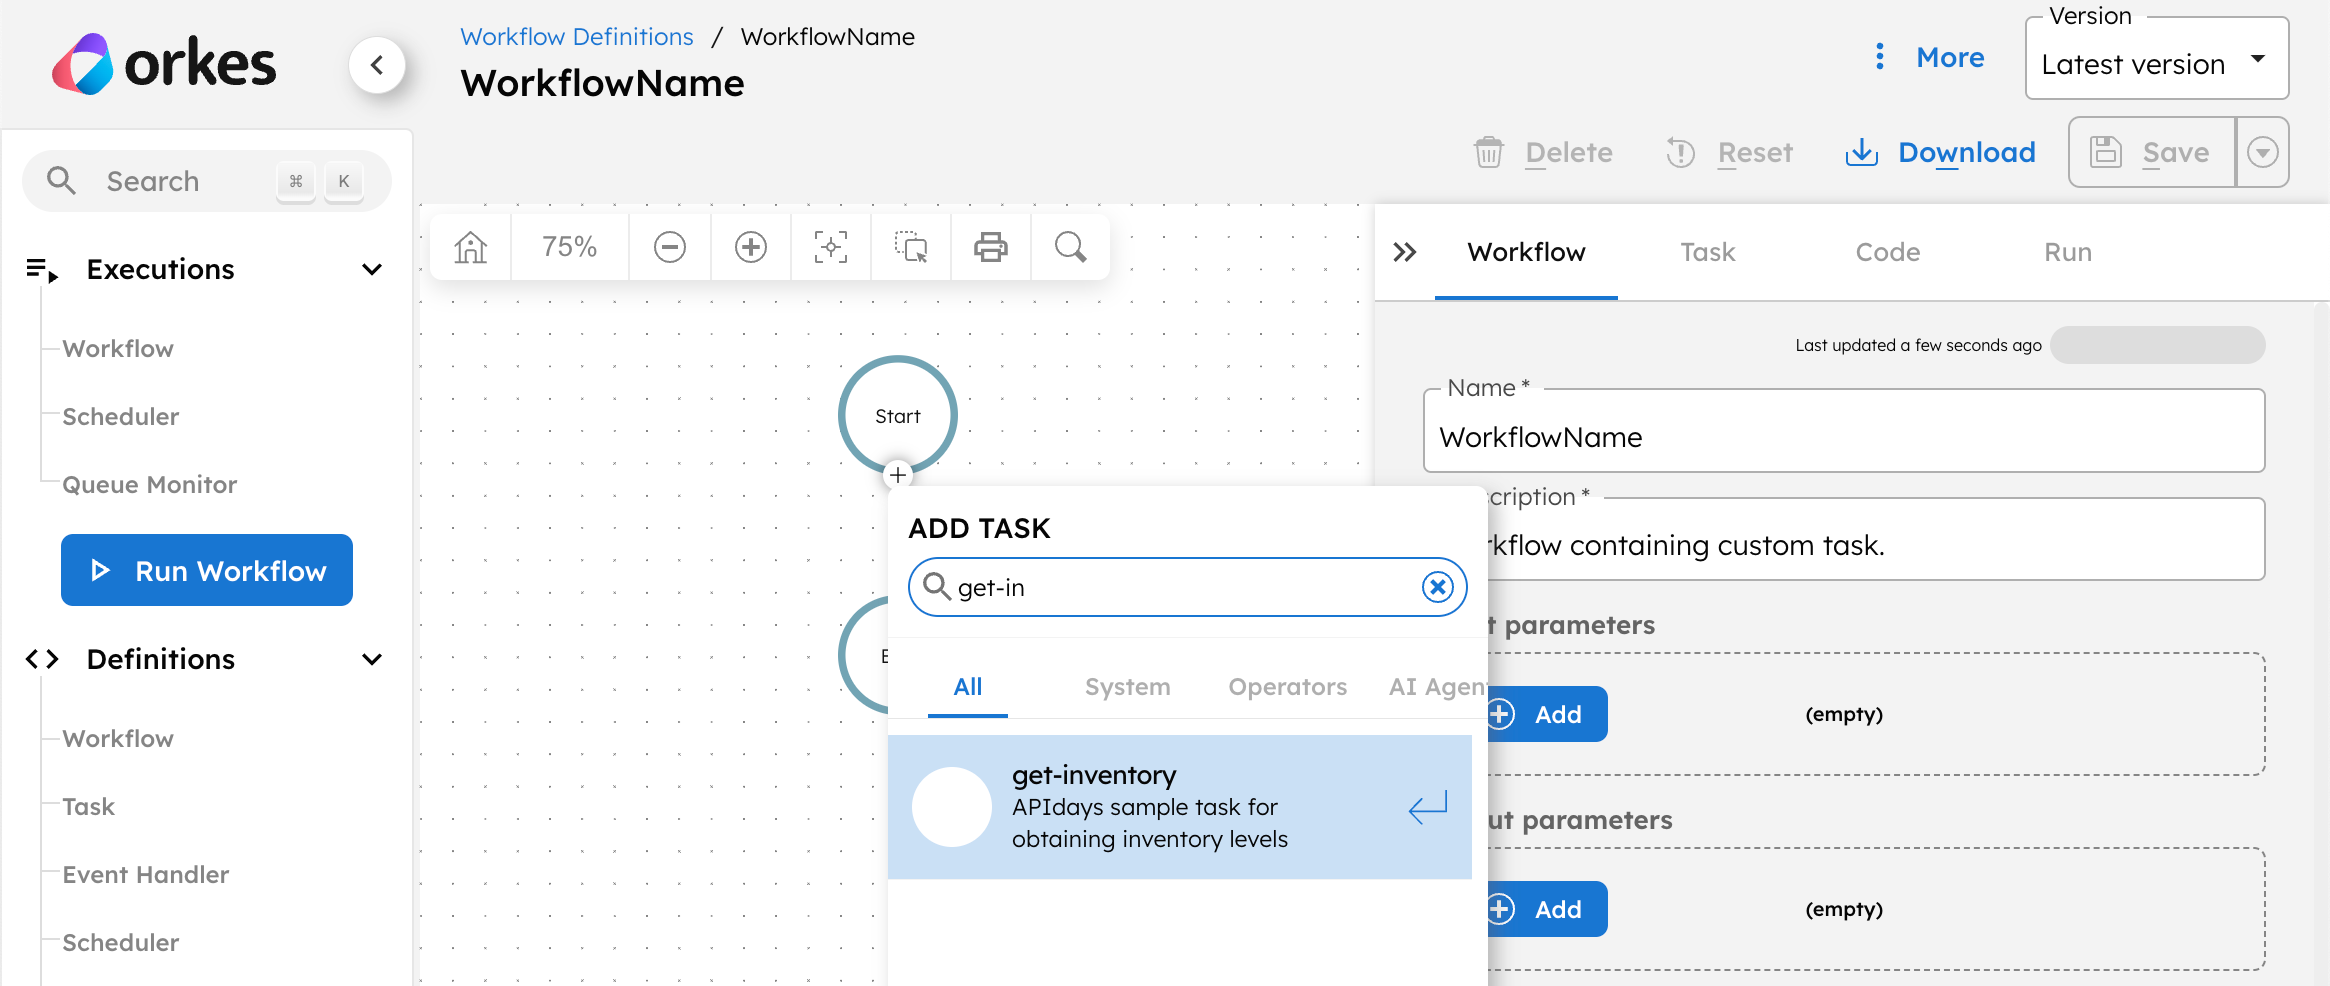
- Go to Definitions > Workflow from the left navigation menu on your Conductor cluster.
- Select or create a workflow.
- In the visual workflow builder, select the (+) icon to add a new task. There are two ways to add a worker task:
- Search for your task using its task name and select to add it to the workflow.
- Add a Worker Task (Simple) and enter the task name in Task Definition.
- Configure the task, such as its inputs, caching, and optionality.
- On the top right, select Save > Confirm.

Refer to the Create Workflow Definition or Update Workflow Definition APIs.
Run workflow
Run the workflow to ensure that your worker has started successfully. If not, return to the previous steps and verify that all details have been entered correctly, such as:
- Server URL, Key ID, and Key Secret: Set in your worker project.
- Execute permissions: Added for the worker task in your application account.
- (if applicable) Domain: The domain in your code matches the domain used during workflow execution and in the application permissions.