Build a Sequential HTTP Workflow with Orkes Conductor
In this tutorial, you’ll build a sequential HTTP workflow in Orkes Conductor. You’ll learn how to chain multiple HTTP system tasks so that the output from one task becomes the input to the next.
This pattern is useful for real-world scenarios where tasks must run in a specific order and depend on internal/external APIs.
The sequential HTTP workflow
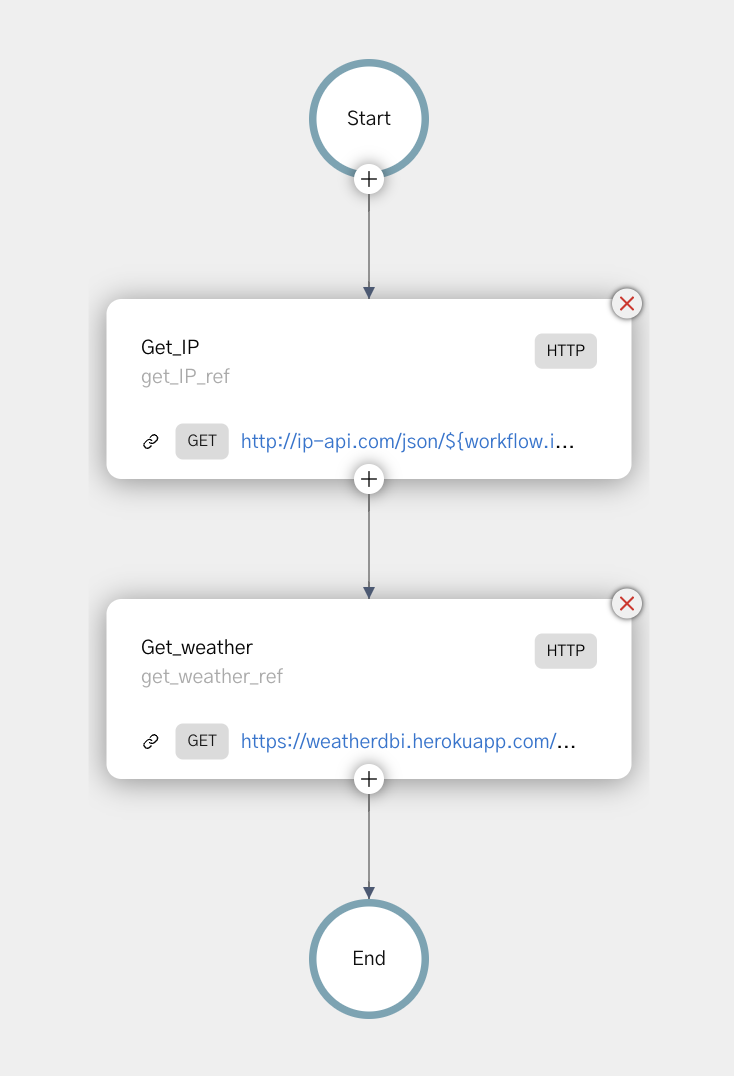
In this tutorial, you’ll build a workflow that runs two HTTP tasks in order. The first task fetches location details based on an IP address, and the second uses that information to retrieve weather data.
Here’s what the workflow looks like:
Follow along using the free Developer Edition. If you don’t have an account yet, sign up to get started.
This tutorial uses free third-party APIs for demonstration purposes only. These APIs have rate limits and usage restrictions, and may experience downtime. Do not use them in production workflows.
Step 1: Create a workflow in Orkes Conductor
Orkes Conductor lets you define workflows as JSON, through SDKs, APIs, or the UI. Use the provided JSON below to create the workflow using the Conductor UI.
To create a workflow using Conductor UI:
- Go to Definitions > Workflow from the left navigation menu on your Conductor cluster.
- Select + Define workflow.
- In the Code tab, paste the following code:
{
 "name": "SequentialHTTPWorkflow",
 "description": "Sequential HTTP workflow using IP geolocation and no-auth weather API.",
 "version": 1,
 "tasks": [
   {
     "name": "get_IP",
     "taskReferenceName": "get_IP_ref",
     "inputParameters": {
       "http_request": {
         "uri": "http://ip-api.com/json/${workflow.input.ipaddress}?fields=status,message,country,countryCode,region,regionName,city,zip,lat,lon,timezone,offset,isp,org,as,query",
         "method": "GET"
       }
     },
     "type": "HTTP"
   },
   {
     "name": "get_weather",
     "taskReferenceName": "get_weather_ref",
     "inputParameters": {
       "http_request": {
         "uri": "https://wttr.in/${get_IP_ref.output.response.body.lat},${get_IP_ref.output.response.body.lon}?format=j1",
         "method": "GET"
       }
     },
     "type": "HTTP"
   }
 ],
 "inputParameters": [
   "ipaddress"
 ],
 "outputParameters": {
   "weather": "${get_weather_ref.output.response.body.current_condition[0].weatherDesc[0].value}",
   "temperature_C": "${get_weather_ref.output.response.body.current_condition[0].temp_C}"
 },
 "schemaVersion": 2
}
- Select Save > Confirm.
Step 2: Execute workflow
To test the workflow:
- From your workflow definition, go to the Run tab.
- Set the input parameter. For example:
{
 "ipaddress": "8.8.8.8"
}
Want to personalize your test run? Replace with your own public IP address. You can find it at https://whatismyipaddress.com. The workflow will return your actual ZIP code and local weather.
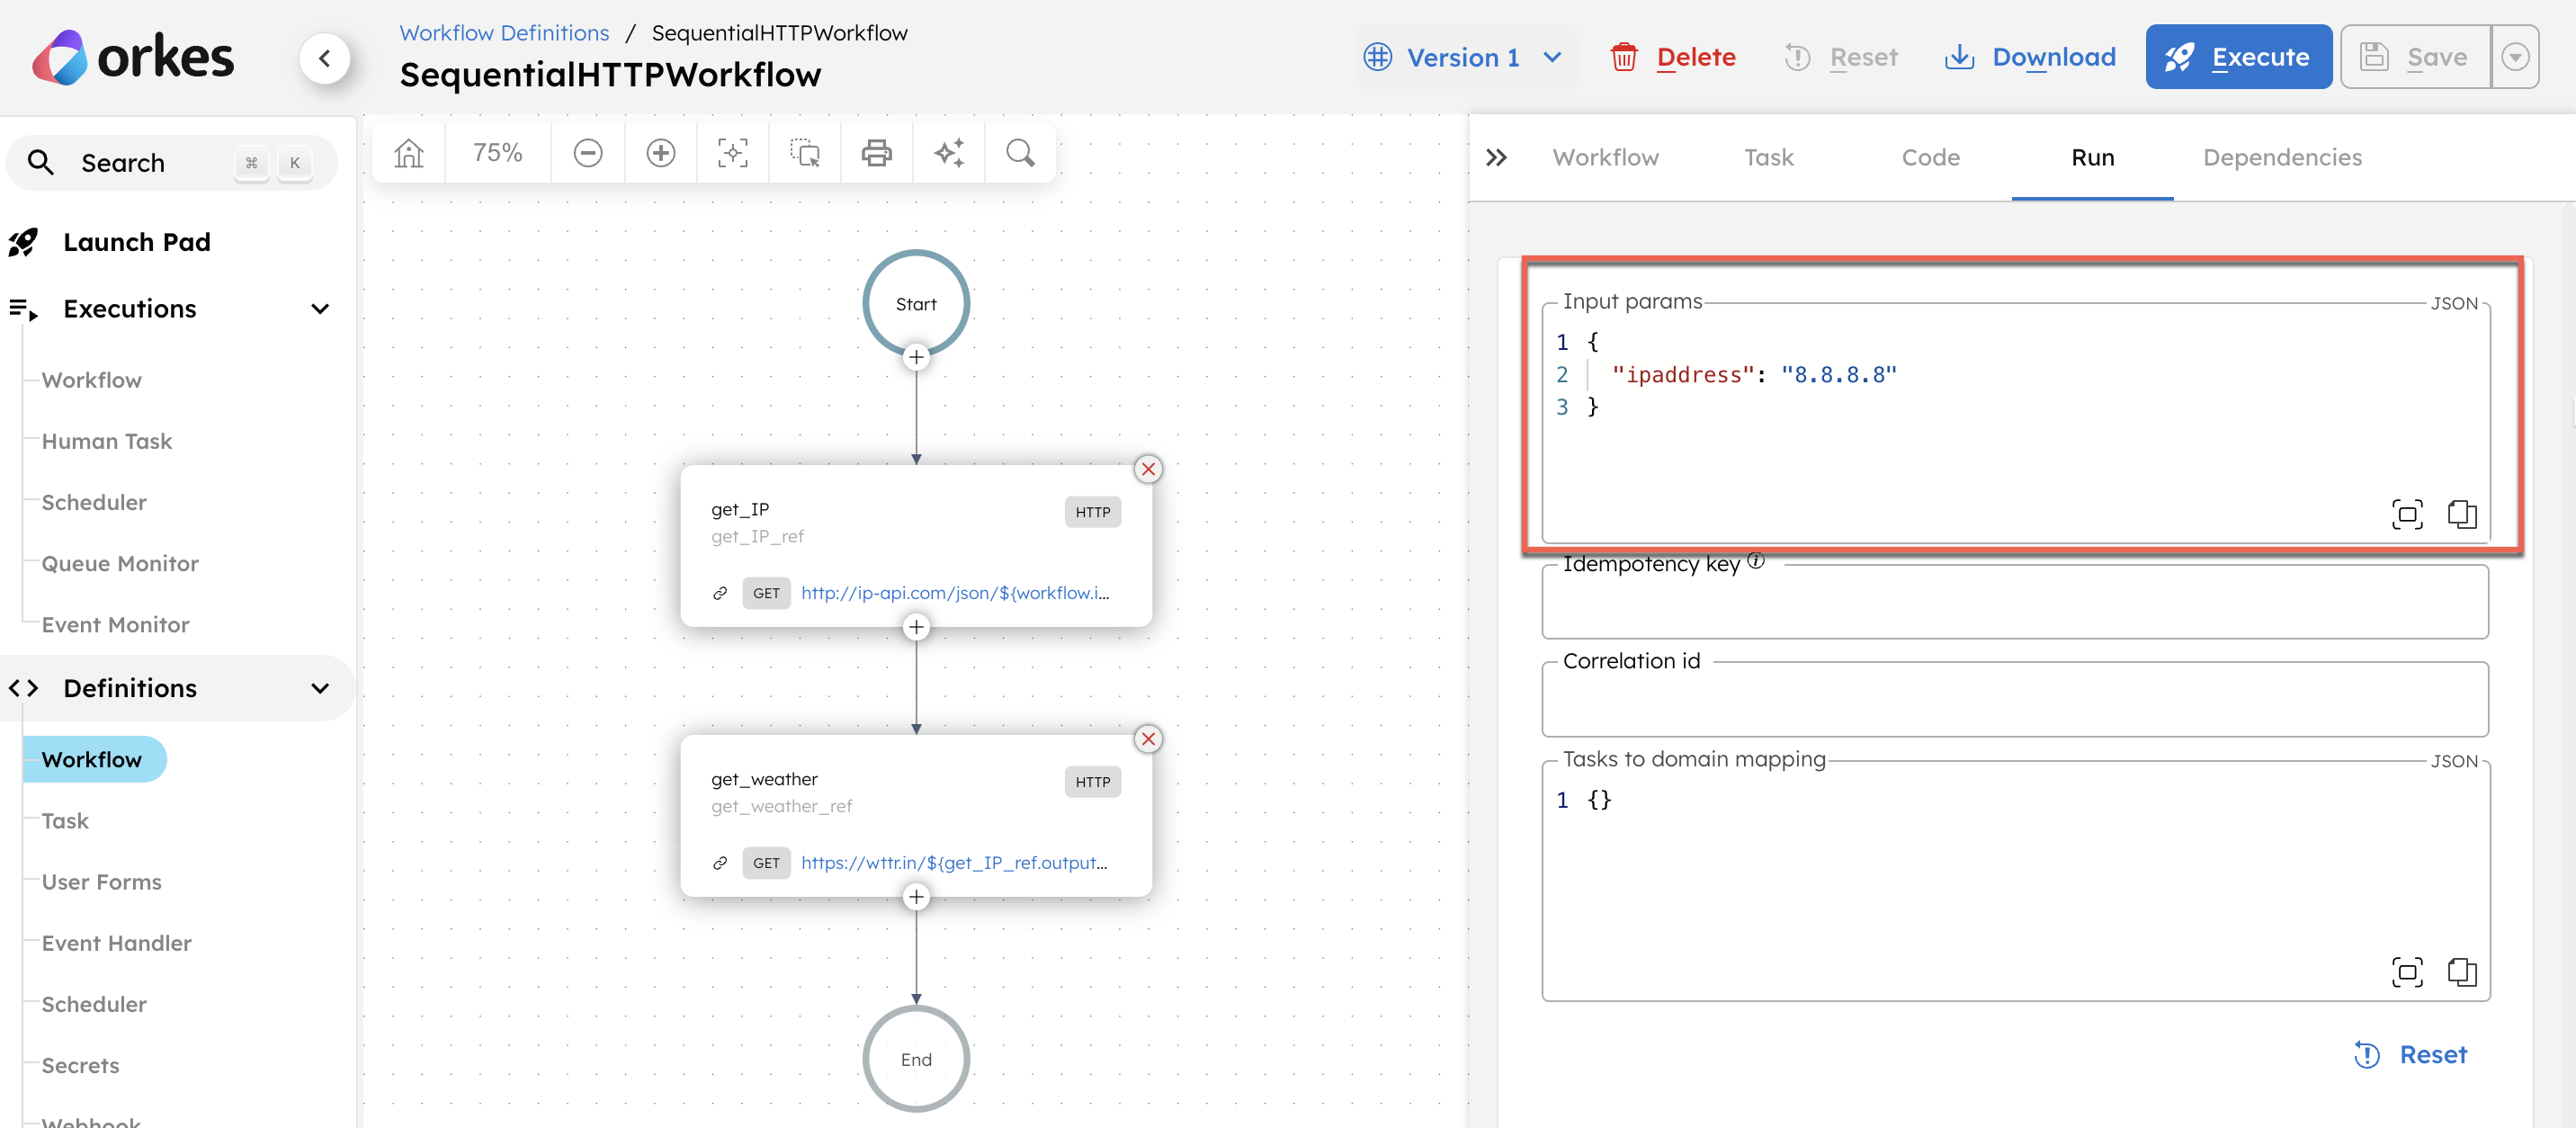
- Select Execute.
This initiates the workflow and takes you to the workflow execution page.
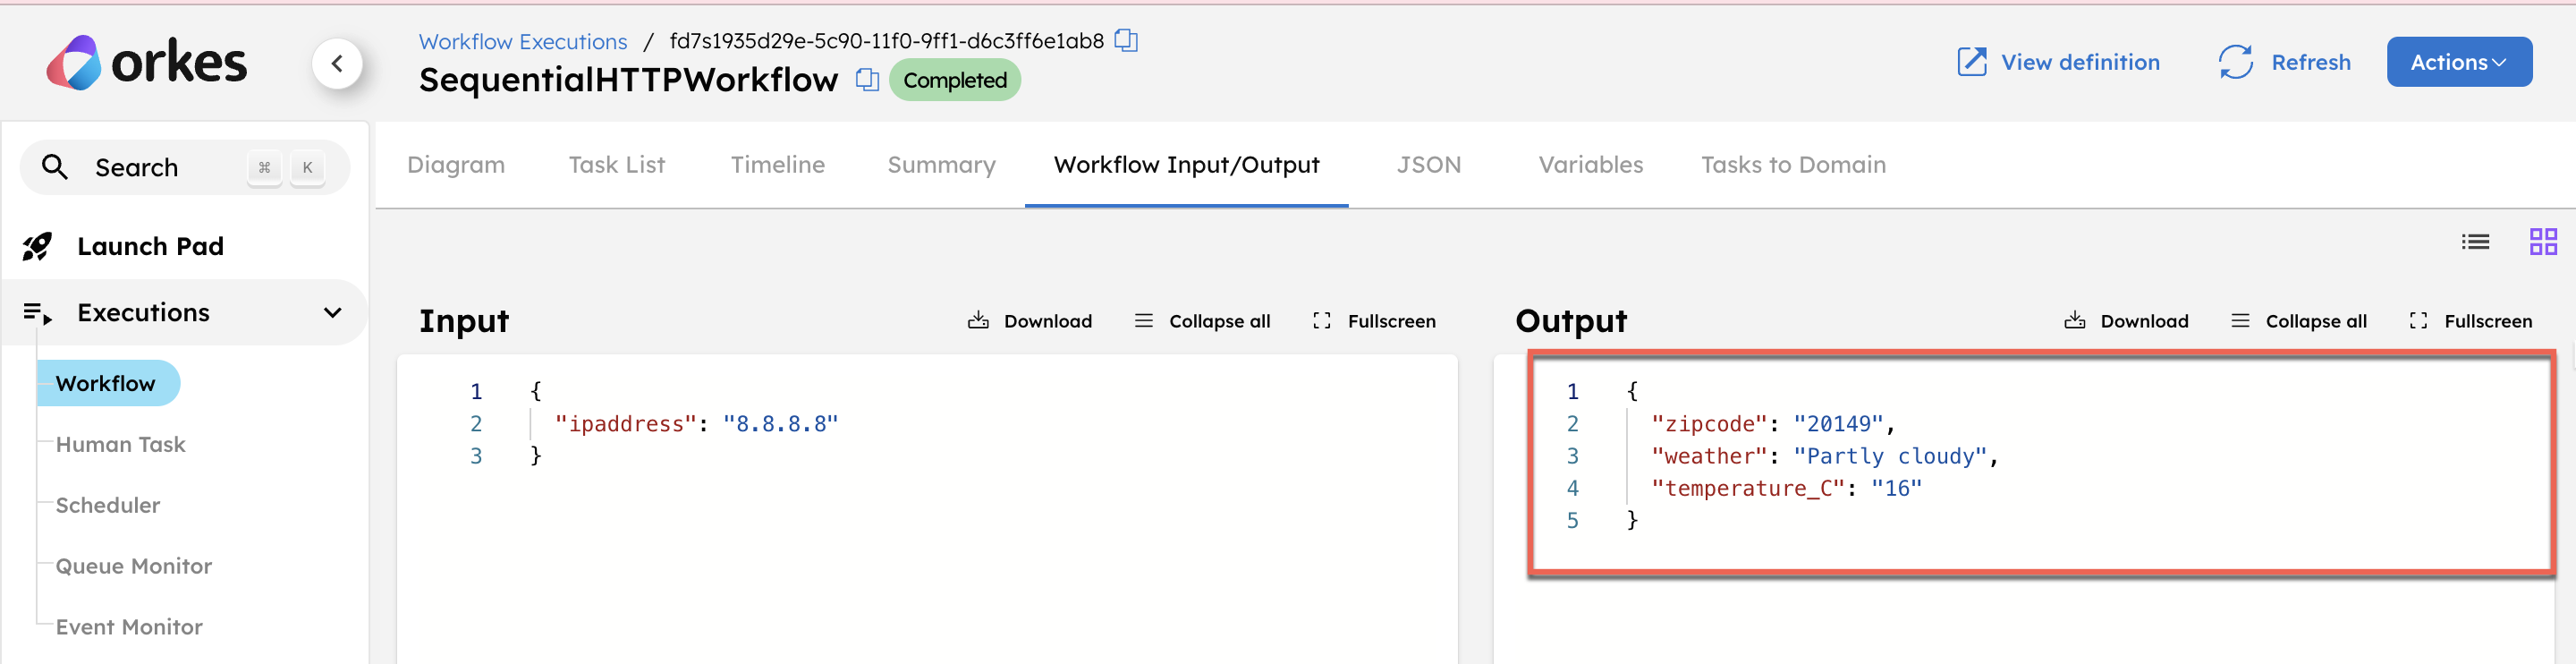
Once the workflow is completed, check the Workflow Input/Output tab to see the result, which includes the weather condition and temperature for the given IP address.