Build an AI-Powered Translator with Orkes Conductor
This tutorial demonstrates how to build an AI-powered translation workflow using Conductor’s AI Orchestration features. In this tutorial, you will use the Conductor UI to accomplish the following:
- Integrate the required AI models with your cluster. OpenAI will be used in this tutorial.
- Create a prompt to instruct the model.
- Build the translation workflow.
After creating the translation workflow, we will run through a basic example for deploying it to production via the Conductor API. Using this translation workflow, you can quickly develop stand-alone translation tools or ship your product’s in-app translation feature.
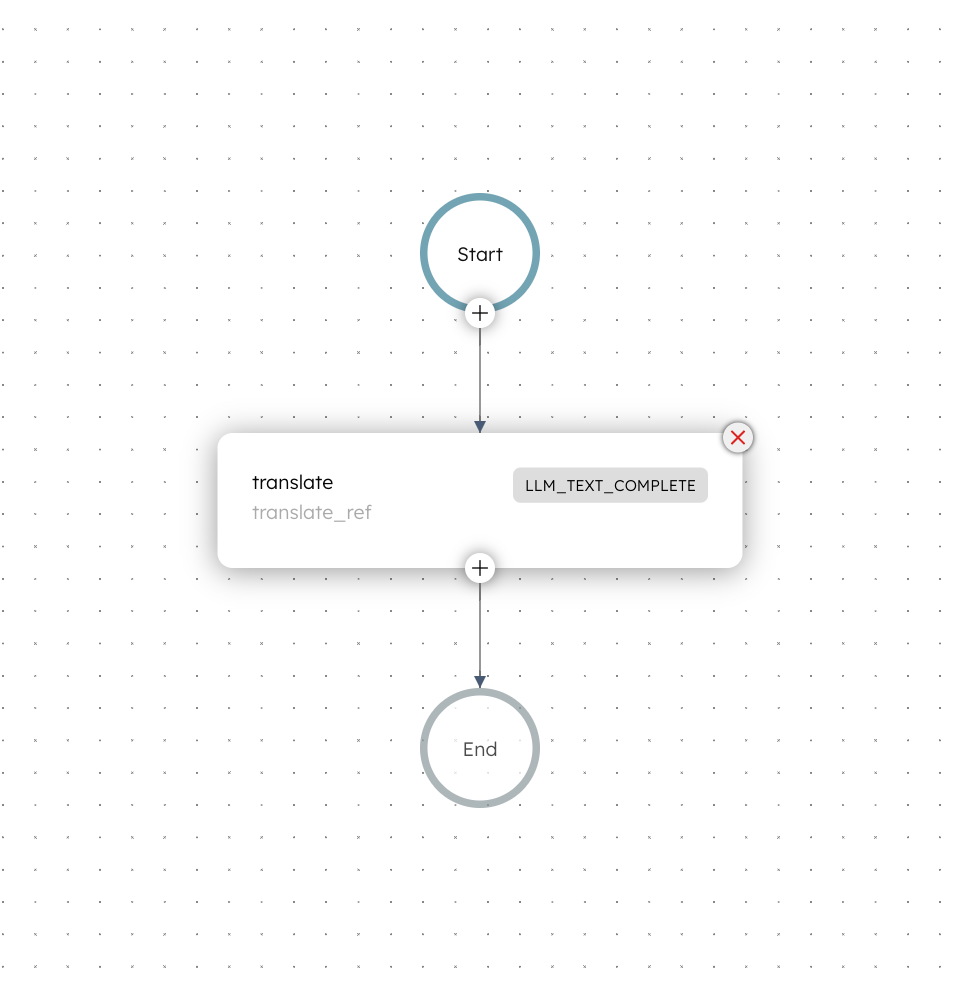
The translation workflow
Here is the translation workflow that you’ll build in this tutorial:
Step 1: Integrate the model provider for translation
To begin, we will use OpenAI’s gpt-4o model to service the translation task. Add an OpenAI integration to your Conductor cluster, then add the required gpt-4o model.
Add OpenAI integration
To add an OpenAI integration:
- Get your OpenAI API Key from OpenAI’s platform.
- In Conductor, go to Integrations and select + New integration.
- In the AI/LLM section, select + Add for OpenAI.
- Create the integration by providing the following mandatory parameters:
- Integration name:“openai”
- API Key:<YOUR_OPENAI_API_KEY>
- Description:“OpenAI Integration”
- Ensure that the Active toggle is switched on, then select Save.
Refer to the AI/LLM Integration Guides for information on integrating with other providers.
Add gpt-4o models
To add the gpt-4o model:
- In Integrations, select the + icon next to your newly-created OpenAI integration.
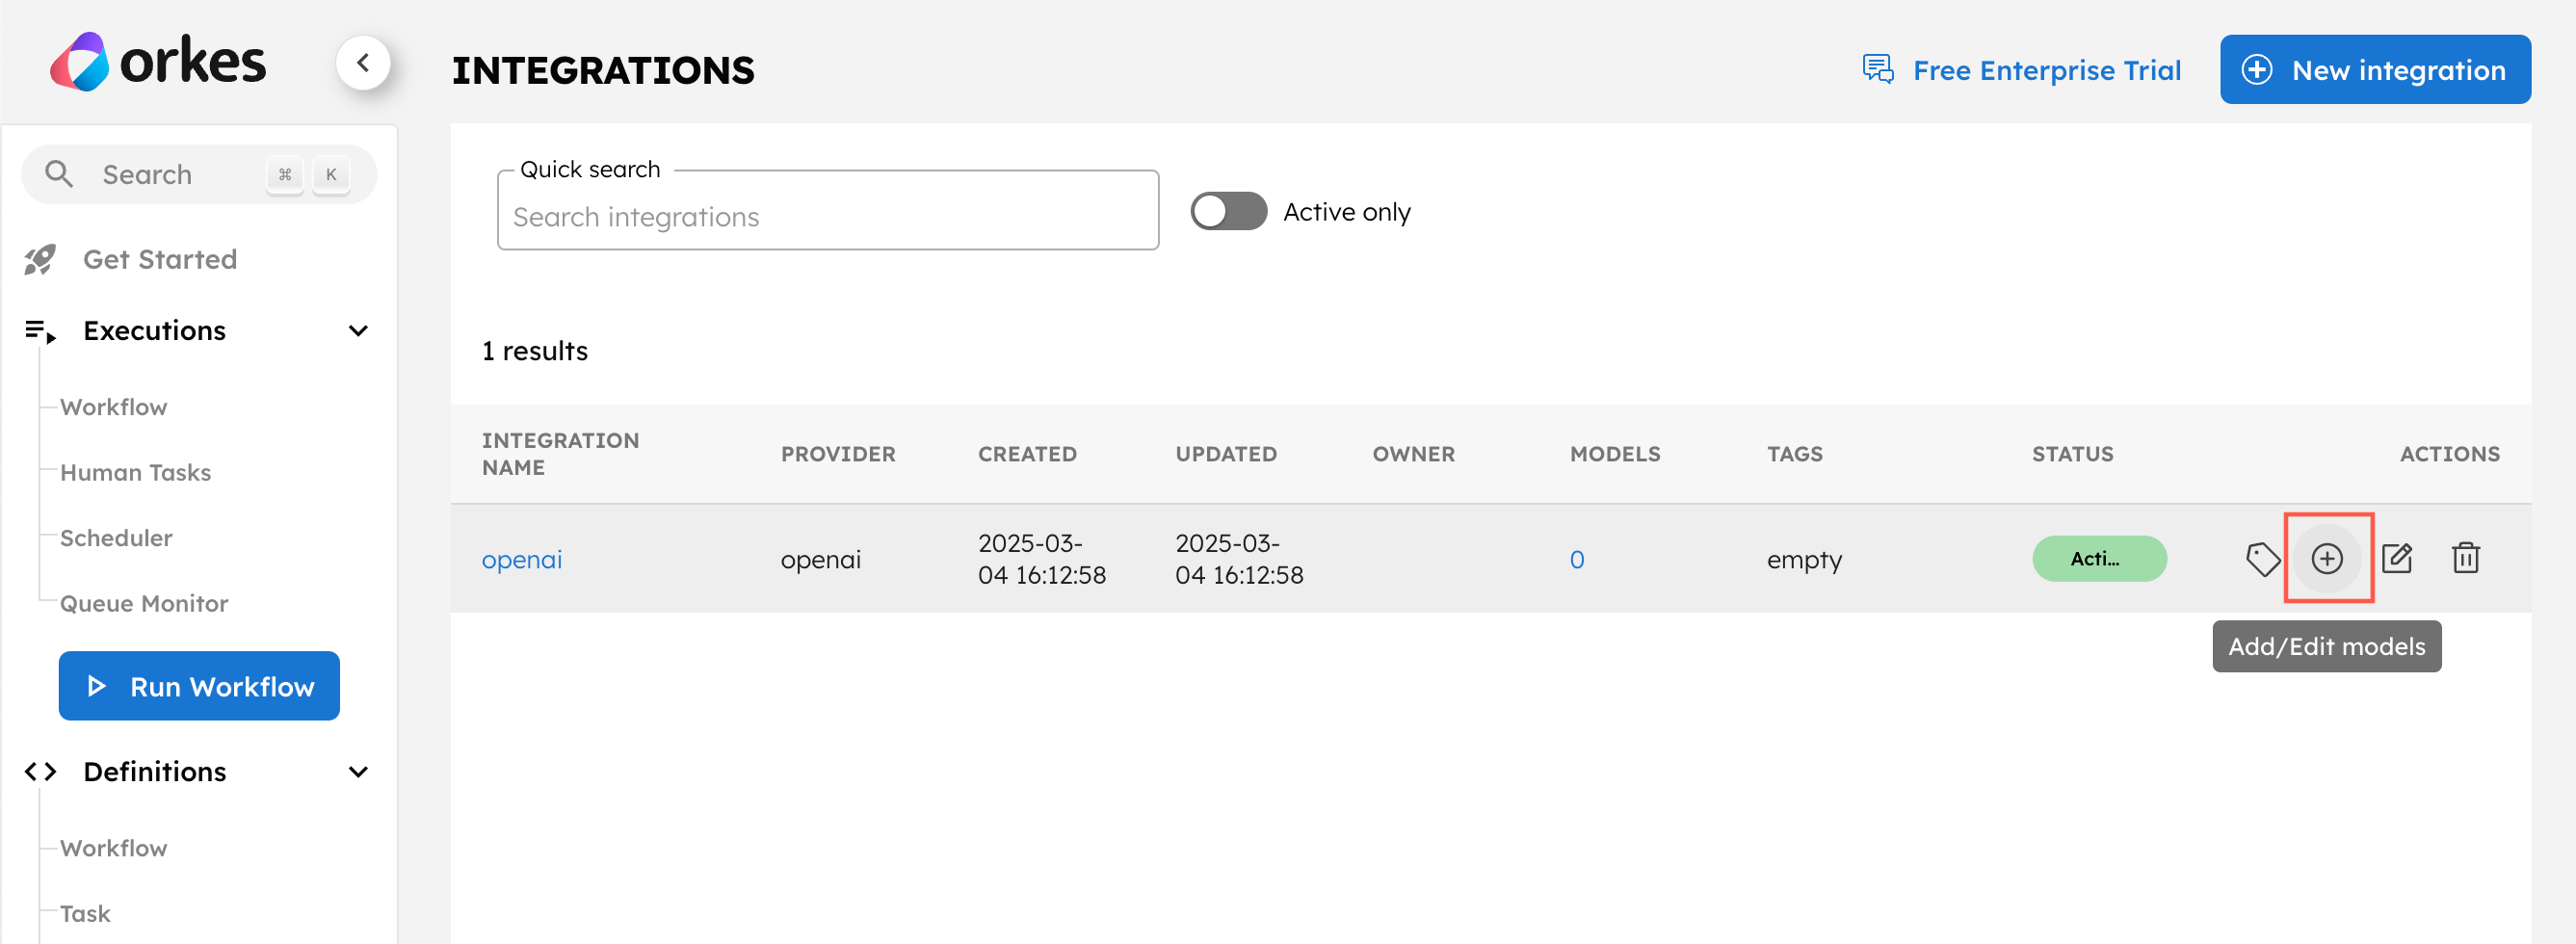
- Select + New model.
- Enter the model name “gpt-4o” and an optional description like “OpenAI’s gpt-4o model”.
- Ensure that the Active toggle is switched on, then select Save.
Repeat the procedure to add more OpenAI models, allowing you to test and compare them with different models. For example, let’s add “chatgpt-4o-latest”.
Step 2: Create the AI prompt for translation
Once your integration is added, let’s create and test the AI prompt in Orkes Conductor. This is where we will verify that the translation feature can work as expected.
Create the prompt
To create the prompt:
- Go to Definitions > AI Prompts and select + Add AI prompt.
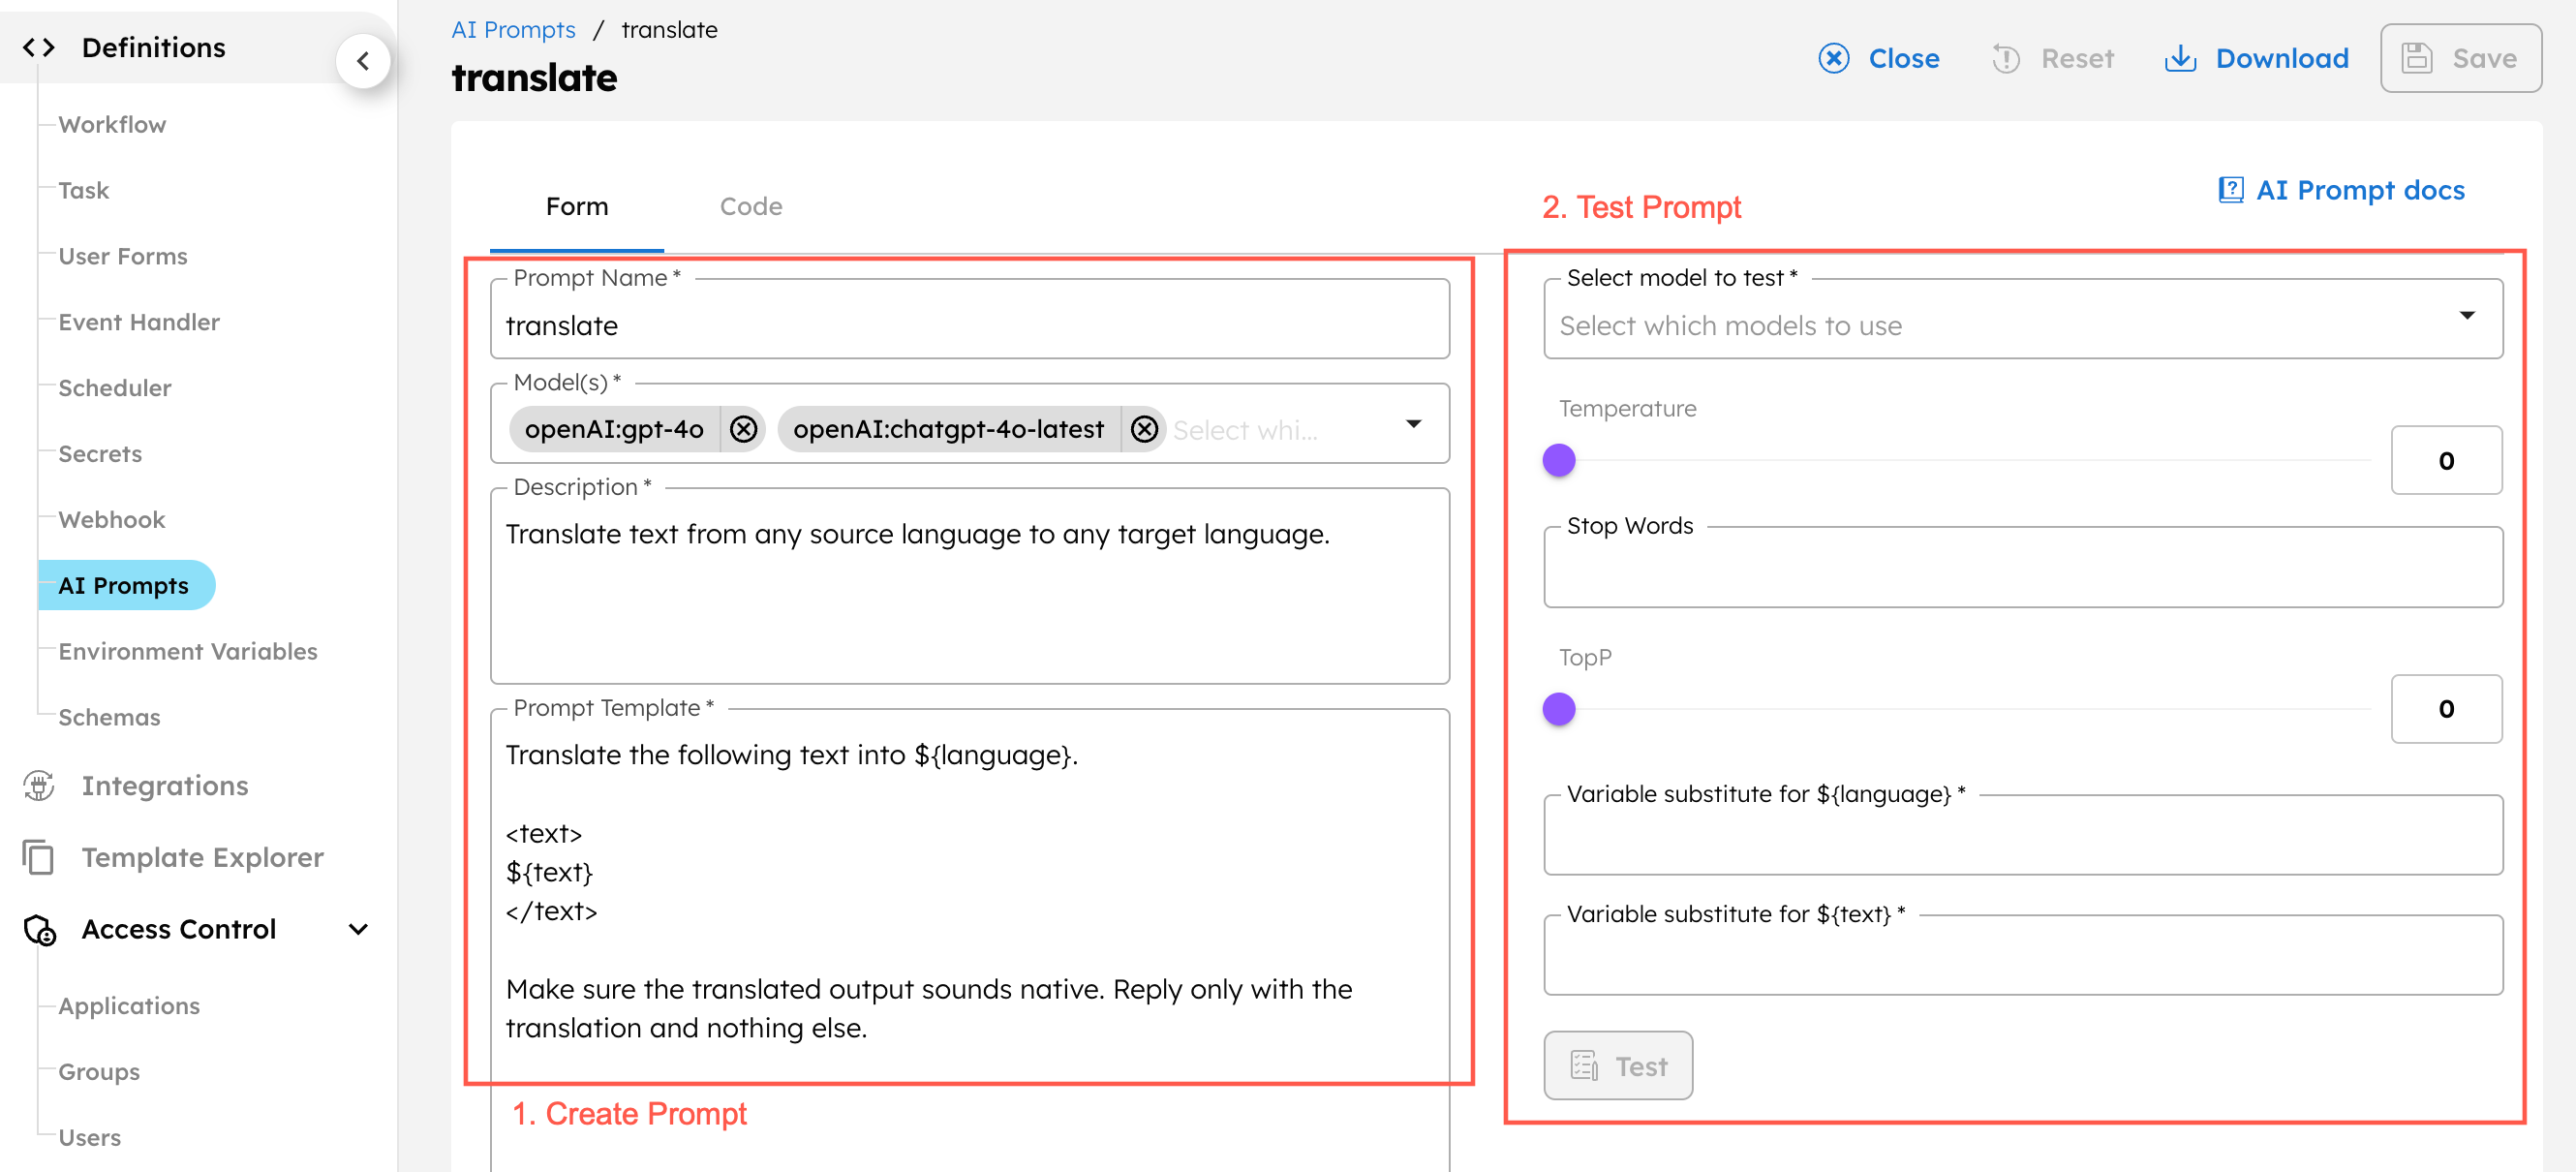
- In the Code tab, enter the following JSON:
{
  "name": "translate",
  "template": "Translate the following text into ${language}.\n\n<text>\n${text} \n</text>\n\nReply only with the translation and nothing else.",
  "description": "Translate text from any source language to any target language.",
  "variables": [
    "language",
    "text"
  ],
  "integrations": [
    "openai:gpt-4o",
    "openai:chatgpt-4o-latest"
  ],
  "tags": []
}
- Select Save.
${language} and ${text} are prompt variables that will be substituted with actual inputs at runtime.
Test the prompt
In your prompt, use the right-side interface to test it out with one of its associated models. This is where you will tune your prompt, determine the ideal model parameters (temperature, stop words, and topP), and decide which model to use in your translation workflow.
To test the prompt:
- Select a model to test.
- Adjust the Temperature, Stop Words, and TopP for the model. Since it is a translation task where accuracy is important, a lower temperature could be more suitable.
- Enter your desired target language and the text to be translated in the Variable substitute fields.
- Example: “Spanish”, “The house is red.”
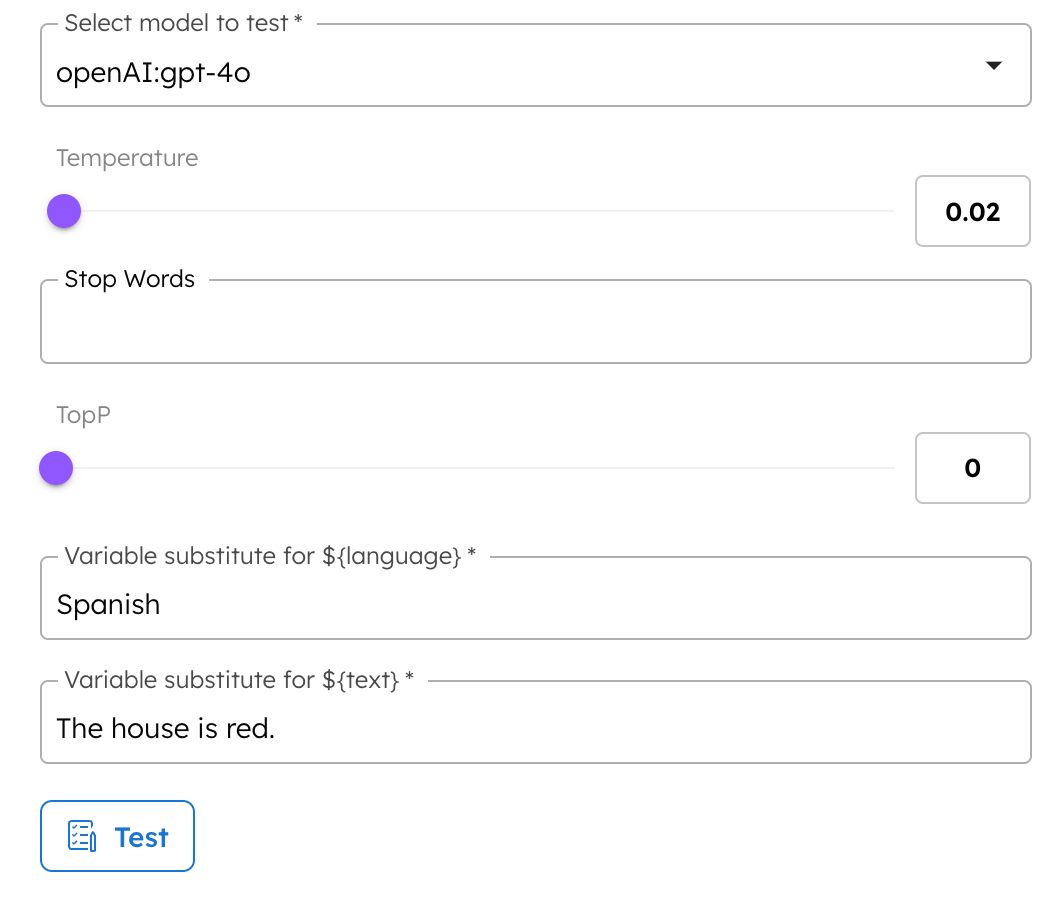
- Select Test to generate the response.
Test cases
When testing, verify that translations are both accurate and native-sounding, and that the model behaves correctly when given unexpected input. Start with simple sentences, then gradually test more complex language, including idioms, symbols, slang, and domain-specific jargon.
To test with unexpected inputs, here are some edge cases:
- Instruct the model to complete tasks outside the scope of translation. The model should translate the instructions instead of responding to the instructions.
- Example: “As an AI model, explain the concept of consciousness to me.”
- Instruct the model to translate a word or phrase. The model should translate the entire text rather than just the instructed word or phrase.
- Example: “What is cat in Korean?”
- Instruct the model to translate text that is already in the target language.
- Example: “The house is red”, where the target language is specified as English.
Based on the results, edit the prompt template accordingly, finalize which model to use, and decide on the LLM parameter values.
Example
The Mandarin Chinese translation for “What is cat in Korean?” is “韩语中的“猫”是什么?” (lit: What is cat in Korean?), which does not sound native. A more natural translation would be “猫用韩语怎么说?” (lit: Using Korean, how do you say cat?).
To improve the response, we can add the following instruction “Make sure the translated output sounds native.” to the prompt template:
Translate the following text into ${language}.
<text>
${text}
</text>

Make sure the translated output sounds native. Reply only with the translation and nothing else.
The response using the updated template is “韩语中的“猫”怎么说?” (lit: How do you say cat in Korean?”), which brings it closer to the ideal translation: “猫用韩语怎么说?” (lit: Using Korean, how do you say cat?).
Step 3: Create the translation workflow
With the integration and prompt ready, let’s create the translation workflow.
To create the translation workflow:
- Go to Definitions > Workflow and select + Define workflow.
- In the Code tab, enter the following JSON:
{
  "name": "translator",
  "description": "Translates a given input into a specified language",
  "version": 1,
  "tasks": [
    {
      "name": "translate",
      "taskReferenceName": "translate_ref",
      "inputParameters": {
        "llmProvider": "openai",
        "model": "gpt-4o",
        "promptName": "translate",
        "promptVariables": {
          "language": "${workflow.input.target-language}",
          "text": "${workflow.input.input-text}"
        },
        "temperature": 0.2
      },
      "type": "LLM_TEXT_COMPLETE"
    }
  ],
  "inputParameters": [
    "input-text",
    "target-language"
  ],
  "outputParameters": {
    "translation": "${translate_ref.output.result}"
  },
  "failureWorkflow": "",
  "schemaVersion": 2
}
- Select Save.
The workflow is now complete. To test run it, select the Run tab, enter the workflow inputs, and select Execute.
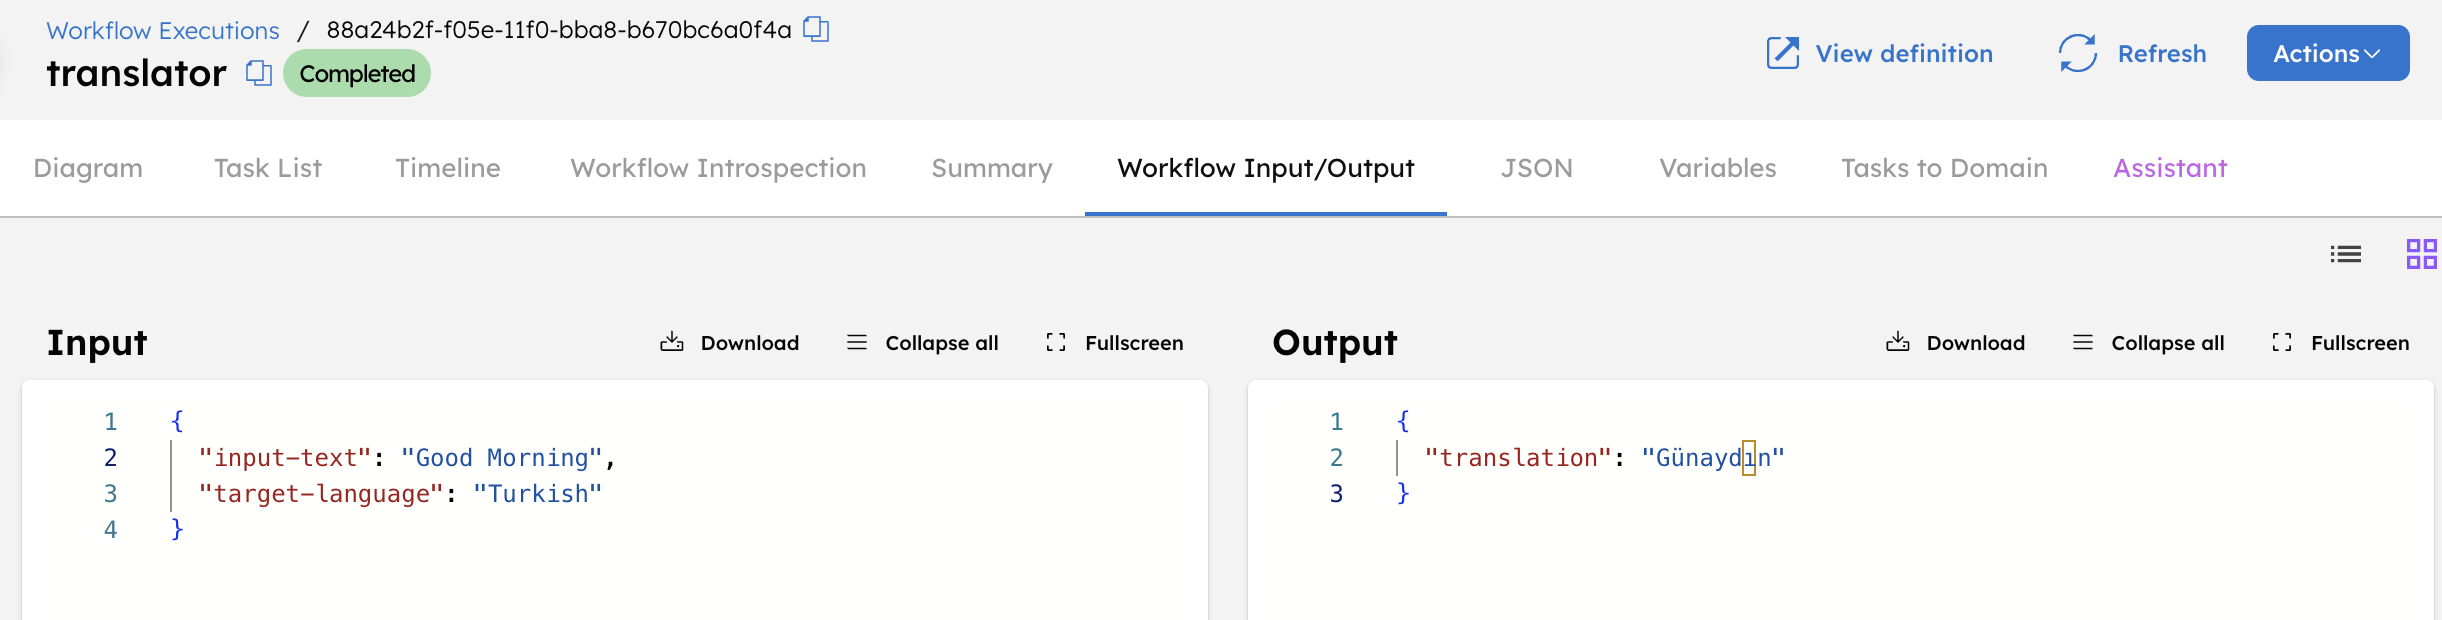
Done! The translation workflow is now ready for production use.
Invoke workflow from the terminal
Now that your translation workflow is ready, you can deploy it to production. One method of running the workflow in production is via the Conductor API. Here’s an overview:
- Grant your application with access to the translation workflow resources.
- Retrieve the Conductor access key for the application.
- Generate the JWT access token to connect to the API server.
- Invoke the workflow using the Start Workflow Execution API or Execute Workflow Synchronously API.
Step 1: Grant your application with access
In production, it is best practice to use Orkes’ RBAC feature to limit what resources your applications can access. In this case, the application should be allowed to read and execute the translation workflow, along with its associated AI models and prompts.
To provide access:
- Go to Access Control > Applications.
- Create a new application or select an existing one. This application will be used to execute the translation workflow.
- In the Permissions section, select + Add Permission.
- Select the translation workflow and provide Execute and Read permissions. Do the same for the AI models and prompts used in the workflow.
- Select Add Permissions.
The application now has access to run the workflow.
Step 2: Retrieve access key
The access key will be used to generate a session-based JWT access token, enabling the application to connect with the Conductor API server.
To retrieve the access key:
- In Access Control > Applications, select your application,
- In the Access Keys section, select + Create access key to generate a unique Key Id and Key Secret. The Key Secret is shown only once, so make sure to copy and store it securely.
Step 3: Generate JWT
Get the JWT access token by calling the Authentication API (/api/token). Use the application access key and secret obtained in the previous step.
curl -X 'POST' \
  'https://<YOUR-SERVER-URL>/api/token' \
  -H 'accept: application/json' \
  -H 'Content-Type: application/json' \
  -d '{
    "keyId": "<YOUR_KEY>",
    "keySecret": "<YOUR_SECRET>"
  }'
The JWT token will be returned in the response. Copy it to use in the next step.
Step 4: Invoke the workflow
Invoke the workflow from the terminal using either the Start Workflow Execution API or Execute Workflow Synchronously API. Set the JWT token in the X-Authorization header and format the translation workflow inputs in the response body.
- Start Workflow Execution
- Execute Workflow Synchronously
This endpoint will start the workflow without waiting for its output. Call the endpoint using the workflow name translator.
curl -X 'POST' \
  'https://<YOUR-SERVER-URL>/api/workflow/translator?priority=0' \
  -H 'accept: text/plain' \
  -H 'X-Authorization: <TOKEN>' \
  -H 'Content-Type: application/json' \
  -d '{
    "input-text": "The house is red.",
    "target-language": "Spanish"
  }'
The endpoint will return the workflow ID. To retrieve the workflow output, use the workflow ID to make the following API call:
curl -X 'GET' \
'https://<YOUR-SERVER-URL>/api/workflow/<WORKFLOW_ID>/status?includeOutput=true&includeVariables=false' \
-H 'accept: */*' \
-H 'X-Authorization: <TOKEN>'
The endpoint will return a JSON body containing the workflow output.
{
  "workflowId": "dd8f1ba0-f4eb-11ef-be98-6a3c60865306",
  "output": {
    "translation": "La casa es roja."
  },
  "status": "COMPLETED"
}
This endpoint initiates the workflow and waits for its output. In the request below, the server will wait for up to 60 seconds before returning with the workflow output.
Call the endpoint using the workflow name translator.
curl -X 'POST' \
  'https://<YOUR-SERVER-URL>/api/workflow/execute/translator' \
  -H 'accept: application/json' \
  -H 'waitForSeconds: 60' \
  -H 'X-Authorization: <TOKEN>' \
  -H 'Content-Type: application/json' \
  -d '{
    "input-text": "The house is red.",
    "target-language": "Spanish"
  }'
The endpoint will return the translation result:
{
  "translation": "La casa es roja."
}
The translation workflow can also be invoked in many other ways, including from code. Check out the SDK Guides for more information.
Troubleshooting
- Check that the model you added in Conductor exactly matches the model name stated in the AI provider documentation.
- Check that the model you want to use in your translation workflow is added to your prompt.
- Check that your workflow, task, and prompt variables are wired up correctly.
- Check that your application has the correct access. If you are using APIs other than those mentioned in the tutorial, you may need to grant additional permissions. Refer to Application-Based Access for more information.