Using SendGrid Event Webhooks in Orkes Conductor
This tutorial shows how to connect SendGrid Event Webhooks to Orkes Conductor. You will learn how to receive events, such as open or click events, within a Conductor workflow and route them for further processing downstream.
In this tutorial, you will:
- Create a workflow that waits for SendGrid webhook events
- Create a webhook in Orkes Conductor to receive SendGrid events
- Configure a webhook event in SendGrid
- Trigger events and observe the workflow execution
To follow along, use the free Orkes Developer Edition.
Step 1: Create the workflow in Conductor
To create the workflow:
- Go to Definitions > Workflow from the left navigation menu on your Conductor cluster.
- Select + Define workflow.
- Select the Code tab on the right and paste the following code:
{
 "name": "sendgridWebhookHandler",
 "description": "Handle SendGrid Event Webhooks",
 "version": 1,
 "tasks": [
   {
     "name": "wait_for_webhook",
     "taskReferenceName": "webhook_ref",
     "inputParameters": {
       "matches": {
         "request[0].event": "${workflow.input.eventType}"
       }
     },
     "type": "WAIT_FOR_WEBHOOK"
   },
   {
     "name": "route_event",
     "taskReferenceName": "switch_ref",
     "inputParameters": {
       "switchCaseValue": "${webhook_ref.output.request[0].event}"
     },
     "type": "SWITCH",
     "decisionCases": {
       "open": [
         {
           "name": "handle_open",
           "taskReferenceName": "handle_open_ref",
           "inputParameters": {
             "http_request": {
               "method": "POST",
               "uri": "https://orkes-api-tester.orkesconductor.com/api",
               "contentType": "application/json",
               "body": "${webhook_ref.output}"
             }
           },
           "type": "HTTP"
         }
       ],
       "click": [
         {
           "name": "handle_click",
           "taskReferenceName": "handle_click_ref",
           "inputParameters": {
             "http_request": {
               "method": "POST",
               "uri": "https://orkes-api-tester.orkesconductor.com/api",
               "contentType": "application/json",
               "body": "${webhook_ref.output}"
             }
           },
           "type": "HTTP"
         }
       ]
     },
     "defaultCase": [],
     "evaluatorType": "value-param",
     "expression": "switchCaseValue"
   }
 ],
 "inputParameters": [
   "eventType"
 ],
 "schemaVersion": 2
}
- Select Save > Confirm.
Your workflow looks like this:
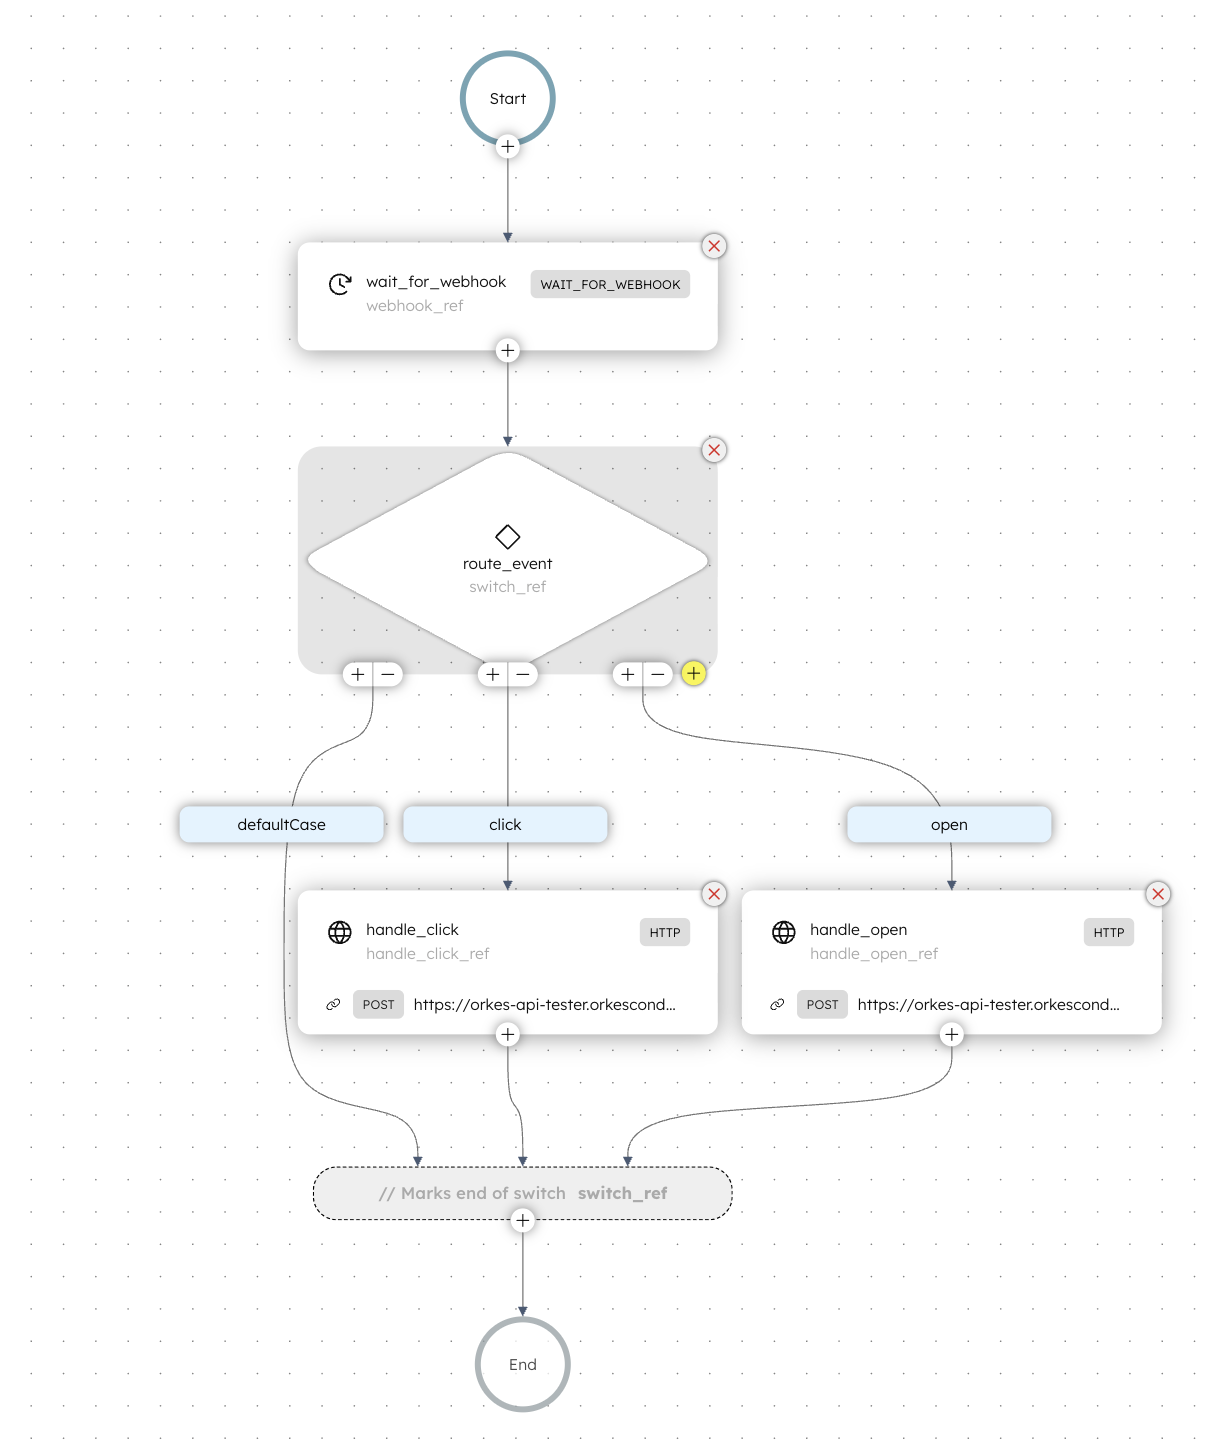
Step 2: Create a webhook in Conductor
Next, create a webhook in Conductor to capture the open and click events sent by SendGrid.
To create a webhook:
- Go to Definitions > Webhook from the left navigation menu on your Conductor cluster.
- Select + New webhook.
- Configure the following parameters:
- In Webhook name, enter a unique name for the webhook.
- In Workflows to receive Webhook event, select the workflow created in Step 1.
- Select the Source platform as SendGrid.
- Leave the Verification key field empty for now. We will add it later.
- Select Save.
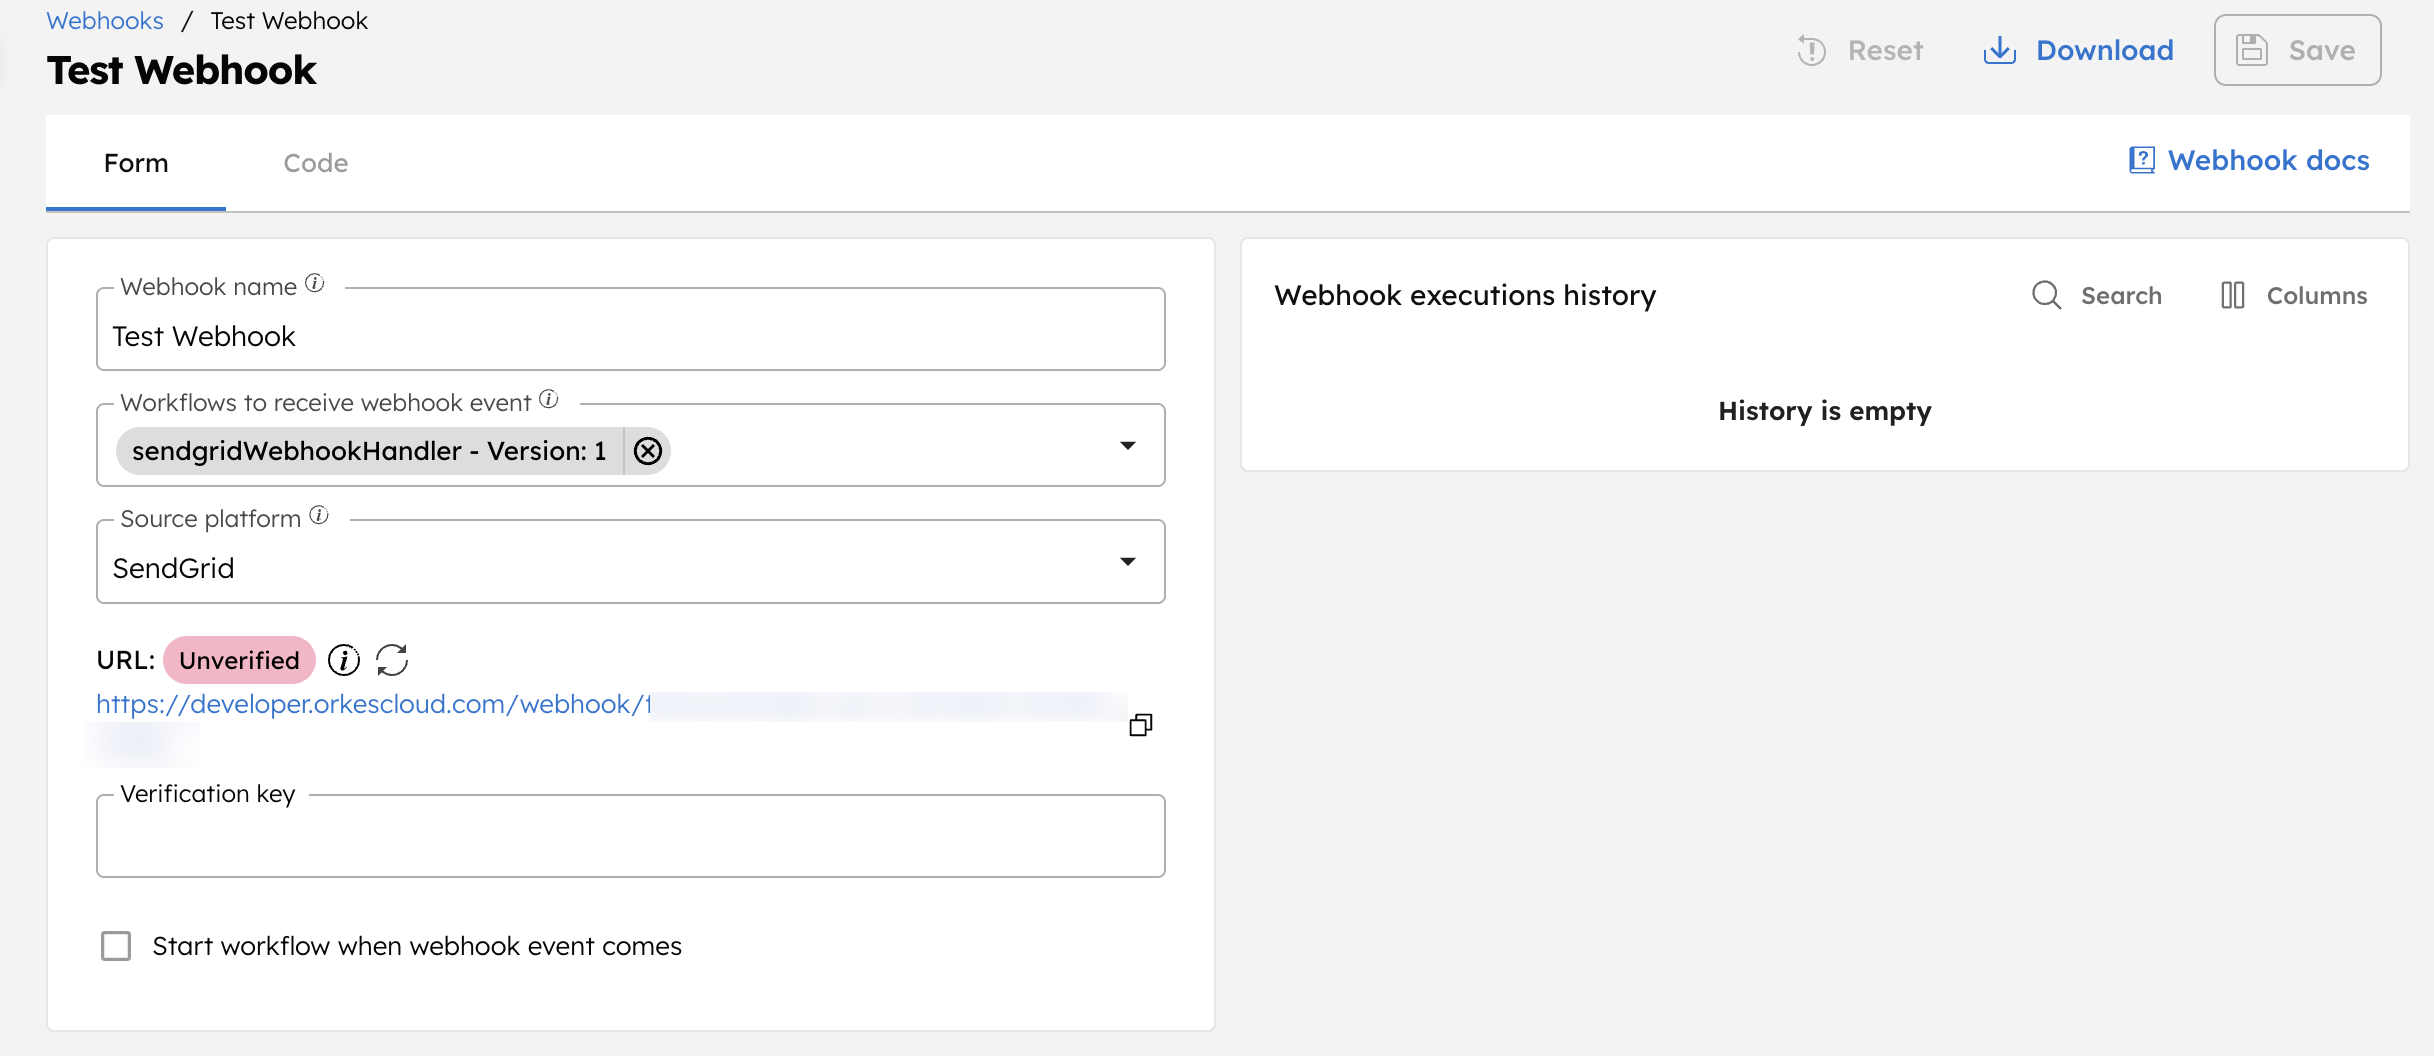
An unverified webhook URL will be generated, which is to be copied to the SendGrid webhook.
Step 3: Configure an event webhook in SendGrid
Next, you must set up an event webhook in SendGrid to send events to your Conductor webhook.
To create an event webhook in SendGrid:
- Go to Settings > Mail Settings from the left menu on your SendGrid console.
- In Webhook Settings > Event Webhooks, select Create new Webhook.
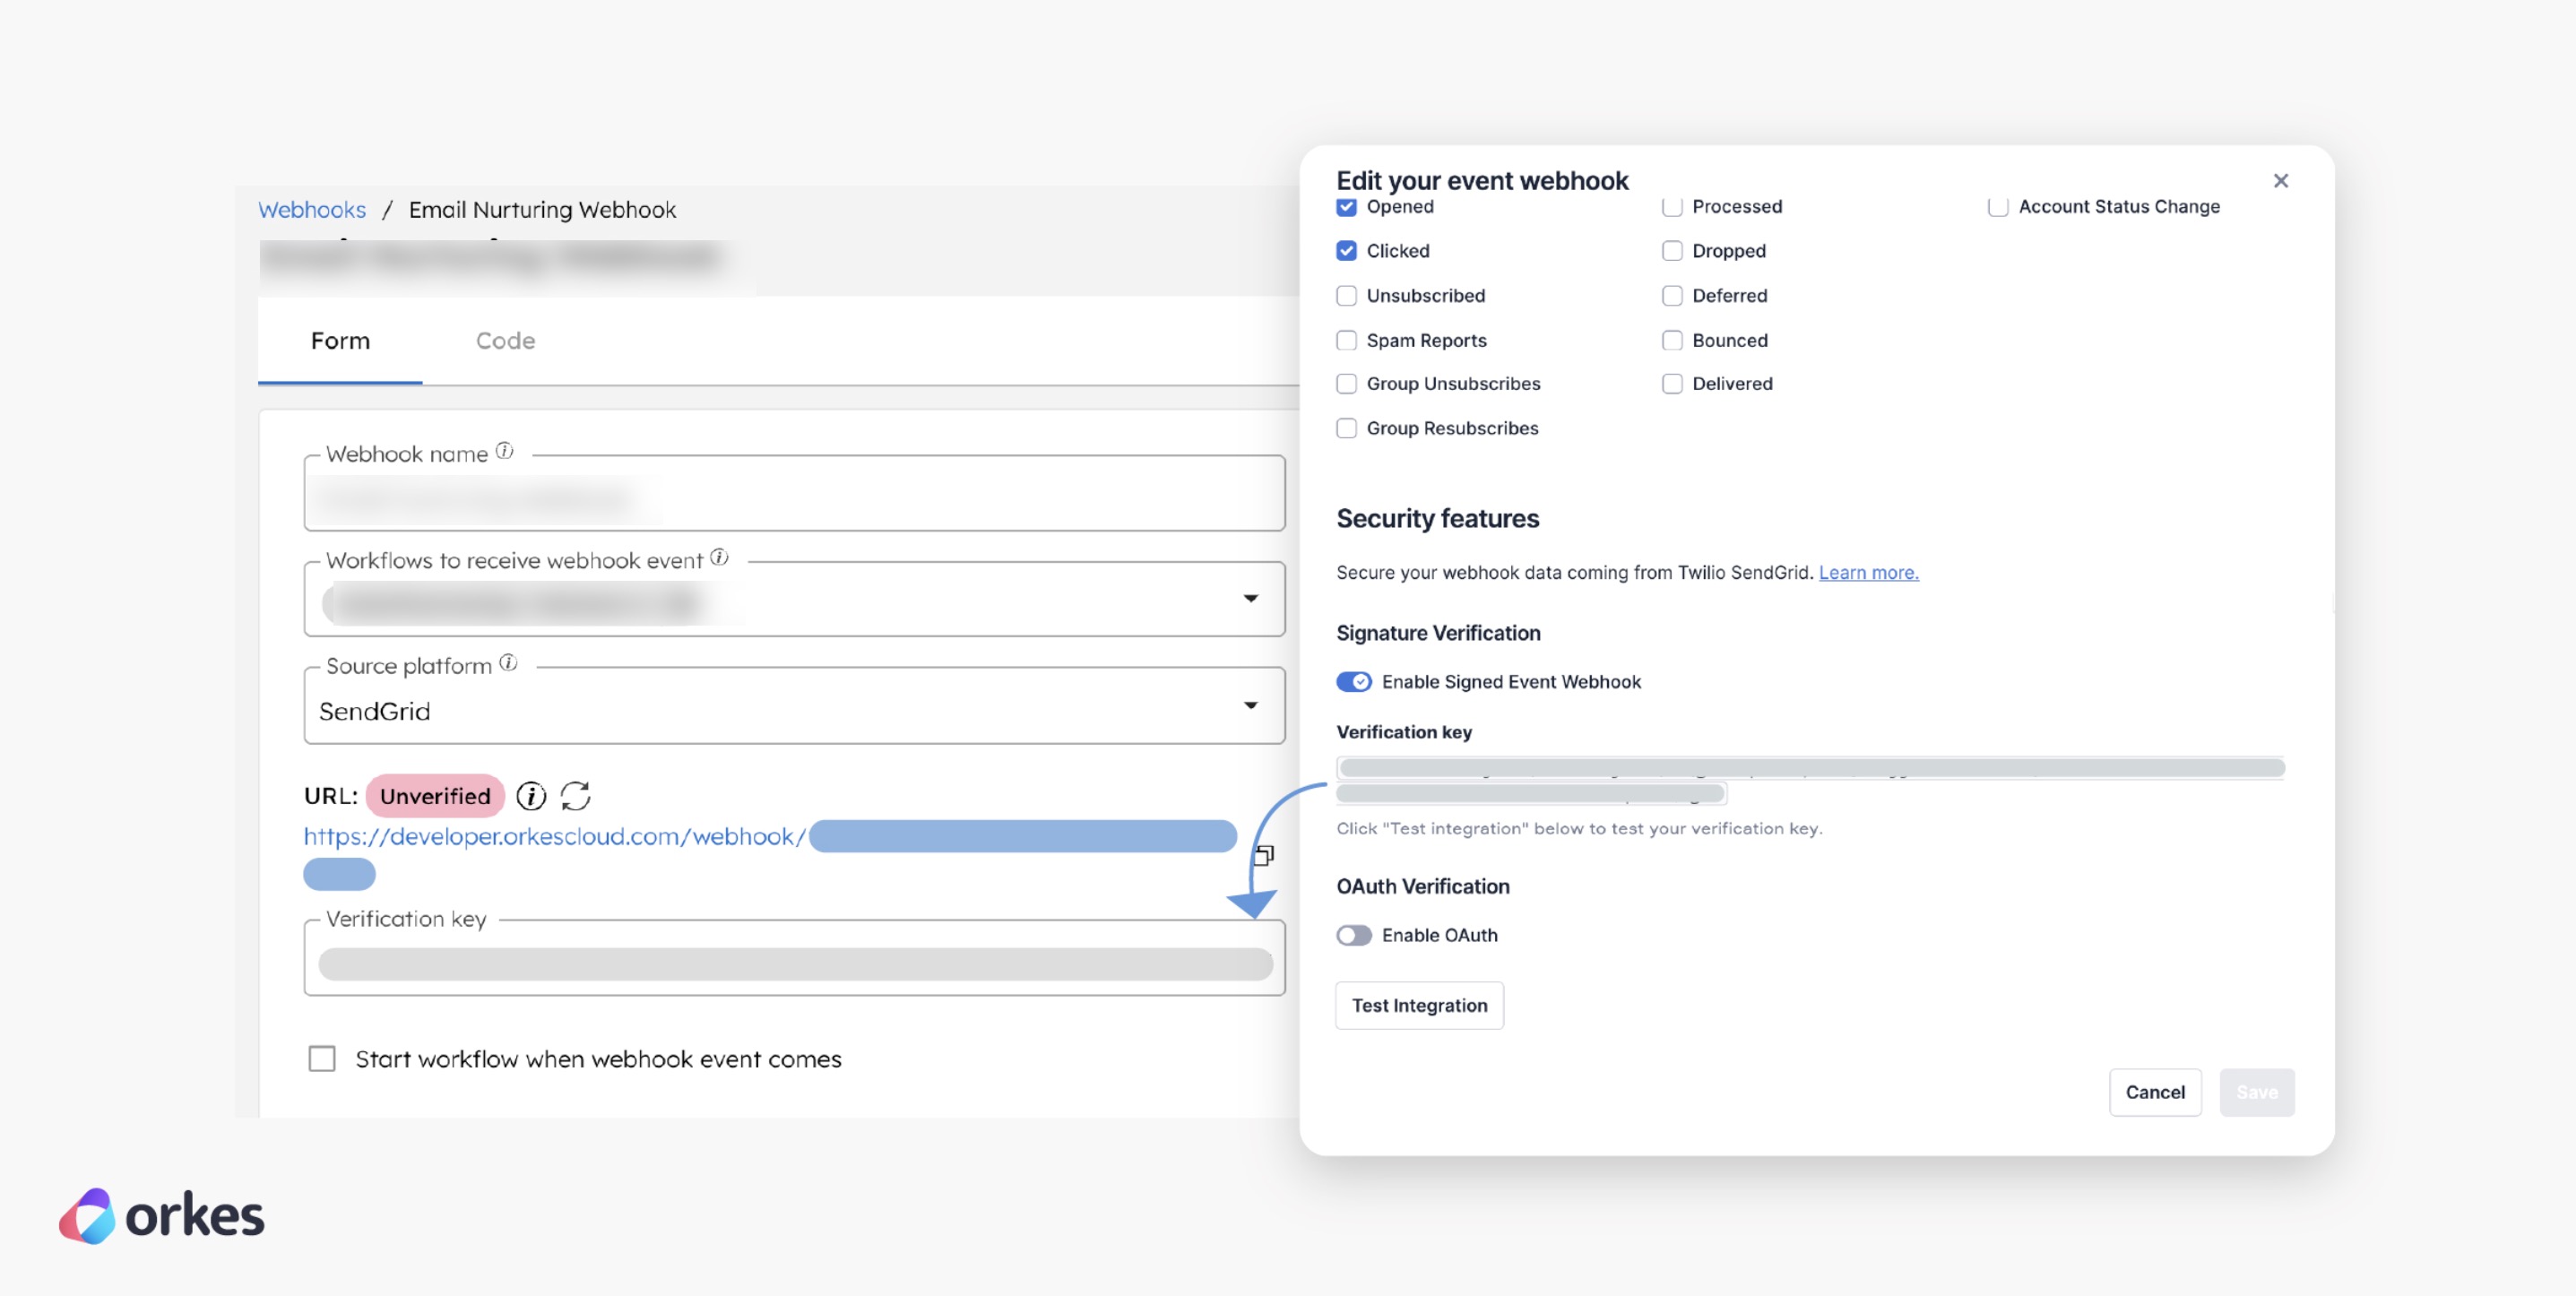
- Configure the following parameters:
- Provide a Friendly Name.
- In Post URL, paste the unverified webhook URL generated in Conductor
- In Actions to be posted, select Opened and Clicked.
- In Signature verification, toggle on Enable Signed Event Webhook.
- Select Save.

- Next, copy the Verification key from SendGrid and paste it into the Conductor webhook.
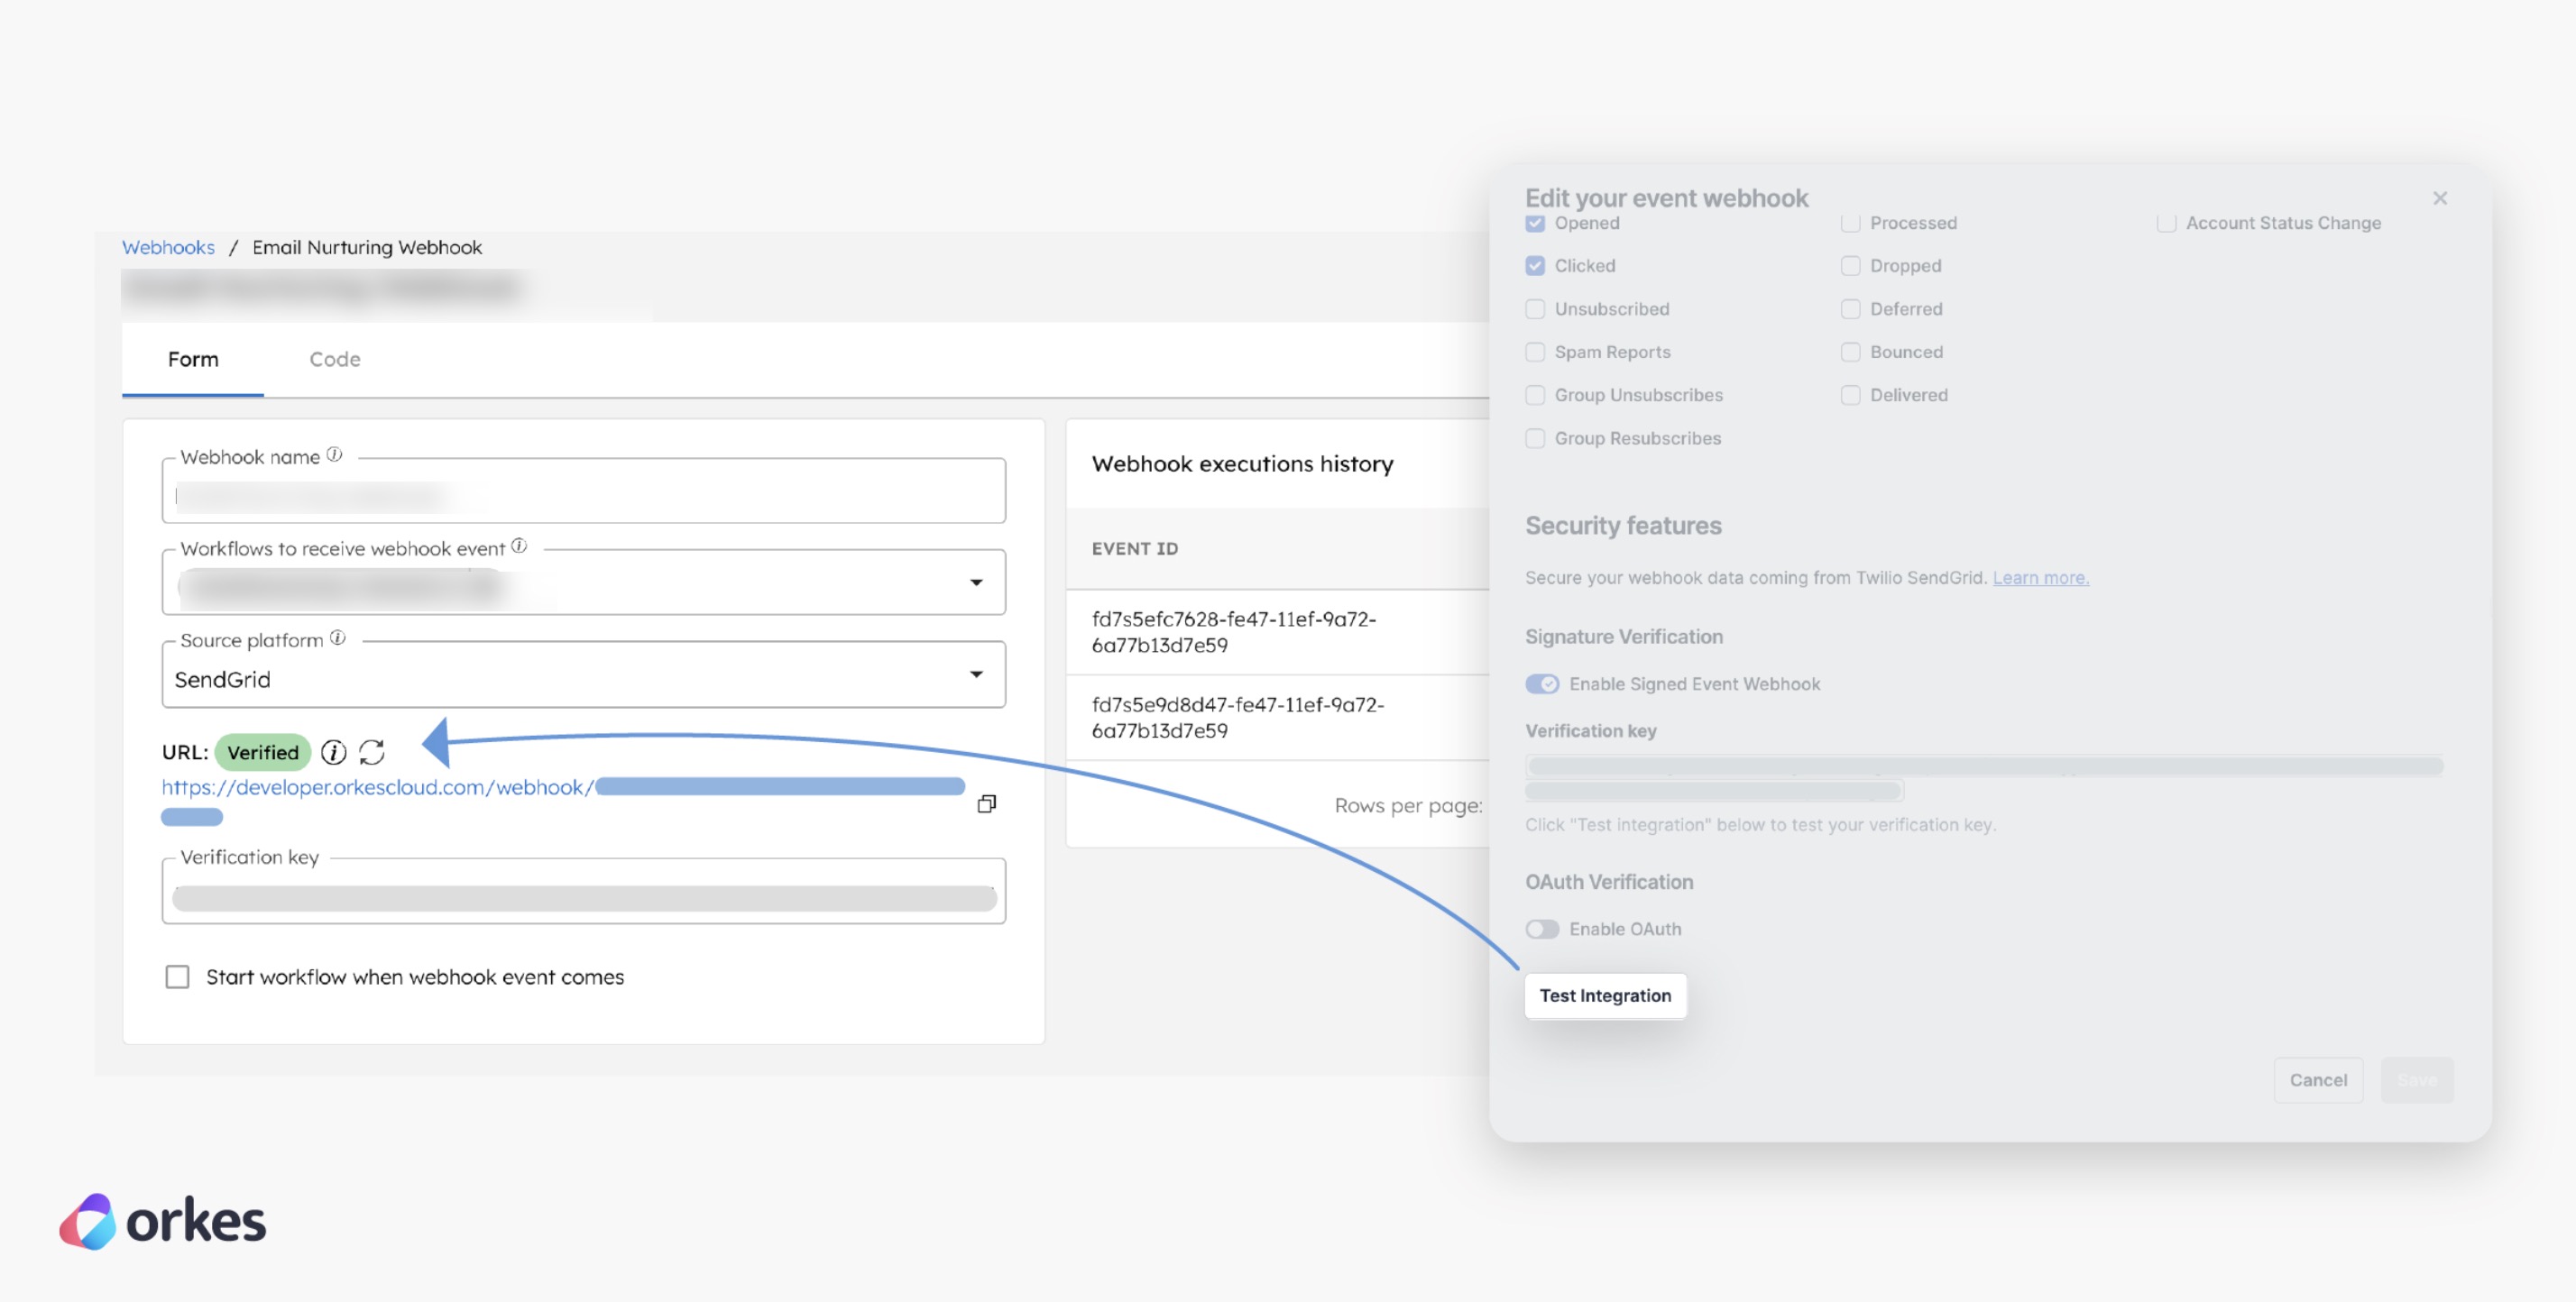
- To verify the webhook URL, go back to SendGrid and select Test Integration. This sends a test event to the Conductor webhook, verifying the URL.
Step 4: Run Conductor workflow
In this example, the Wait for Webhook’s task input matches are wired to the workflow input:
"inputParameters": {
       "matches": {
         "request[0].event": "${workflow.input.eventType}"
       }
     }
Since the webhook is designed to trigger workflow on "opened" or "clicked" events, the SendGrid webhook event payloads are open and click, respectively.
For testing purposes, we’ll start with an open event.
- From the workflow definition, go to the Run tab and enter the input parameter.
{
 "eventType": "open"
}
- Select Execute.
The workflow is now running and waiting for events from SendGrid.
Step 5: Trigger an event from SendGrid
To test incoming events, create a Single Send in SendGrid and send it to a test recipient.
- The sender's email should be verified.
- A recipient list must be created, and it should include at least one email address you have access to.
To create a single send:
- Go to Marketing > Single Send from the left menu on your SendGrid console.
- Select Create a Single Send and draft your email content.
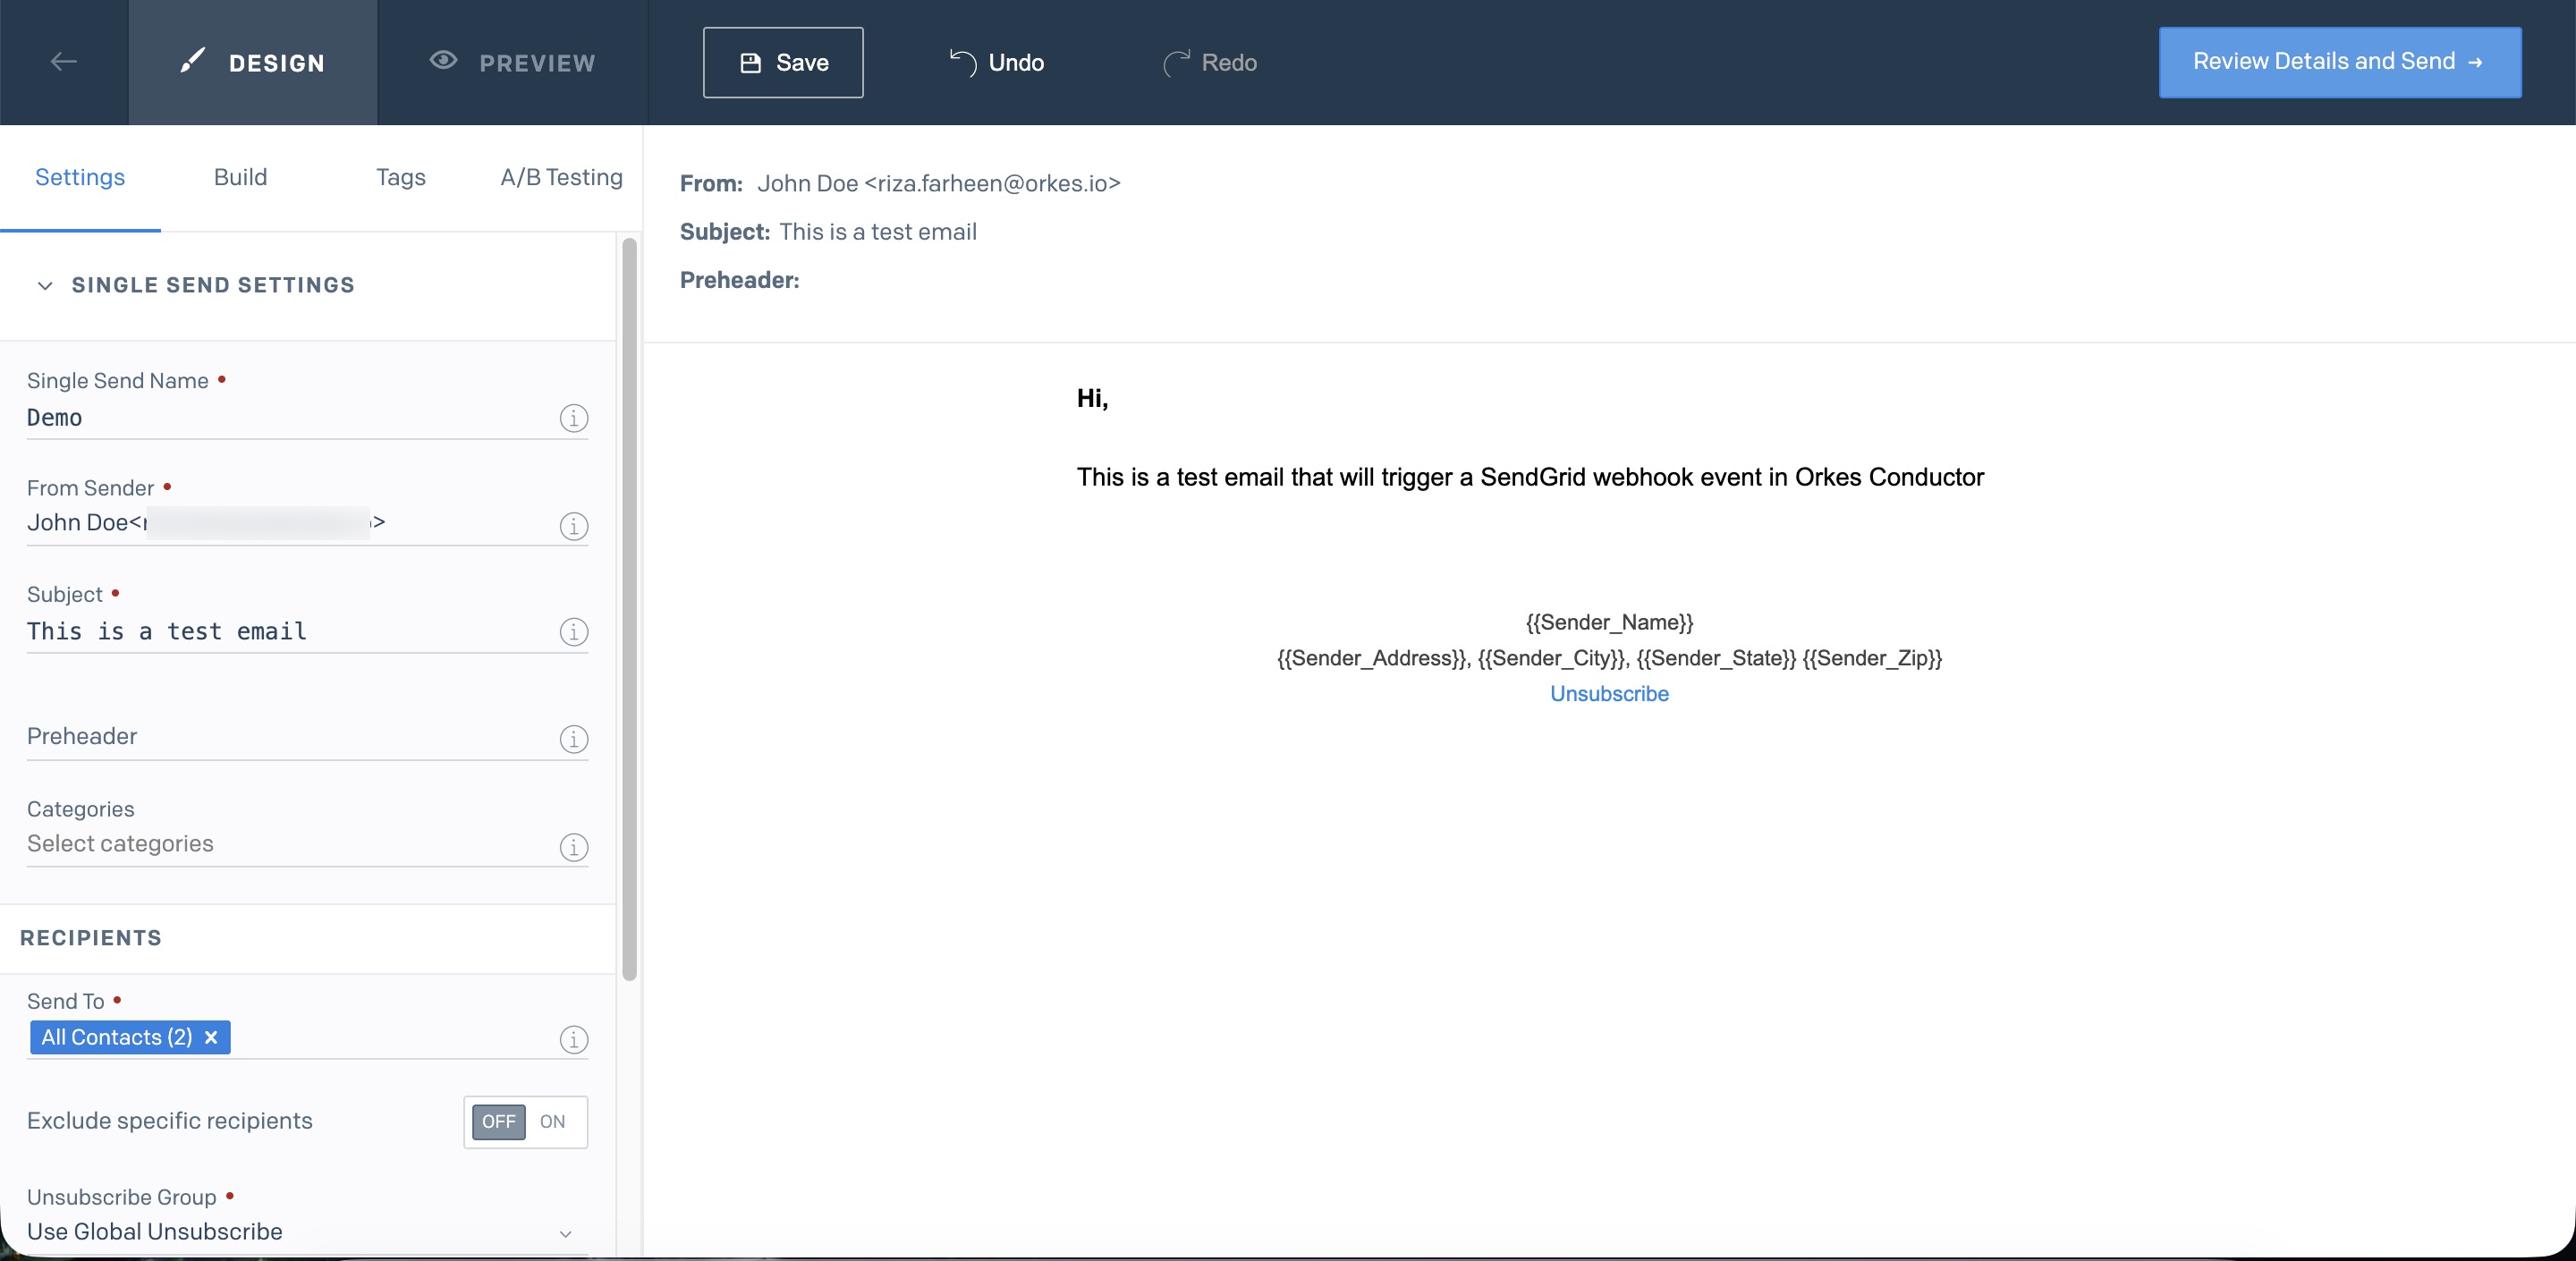
- Review the email content and select Review Details and Send.
If you are testing a click event, ensure to add links in the email draft.
This schedules the email to be sent immediately, typically within 2 minutes.
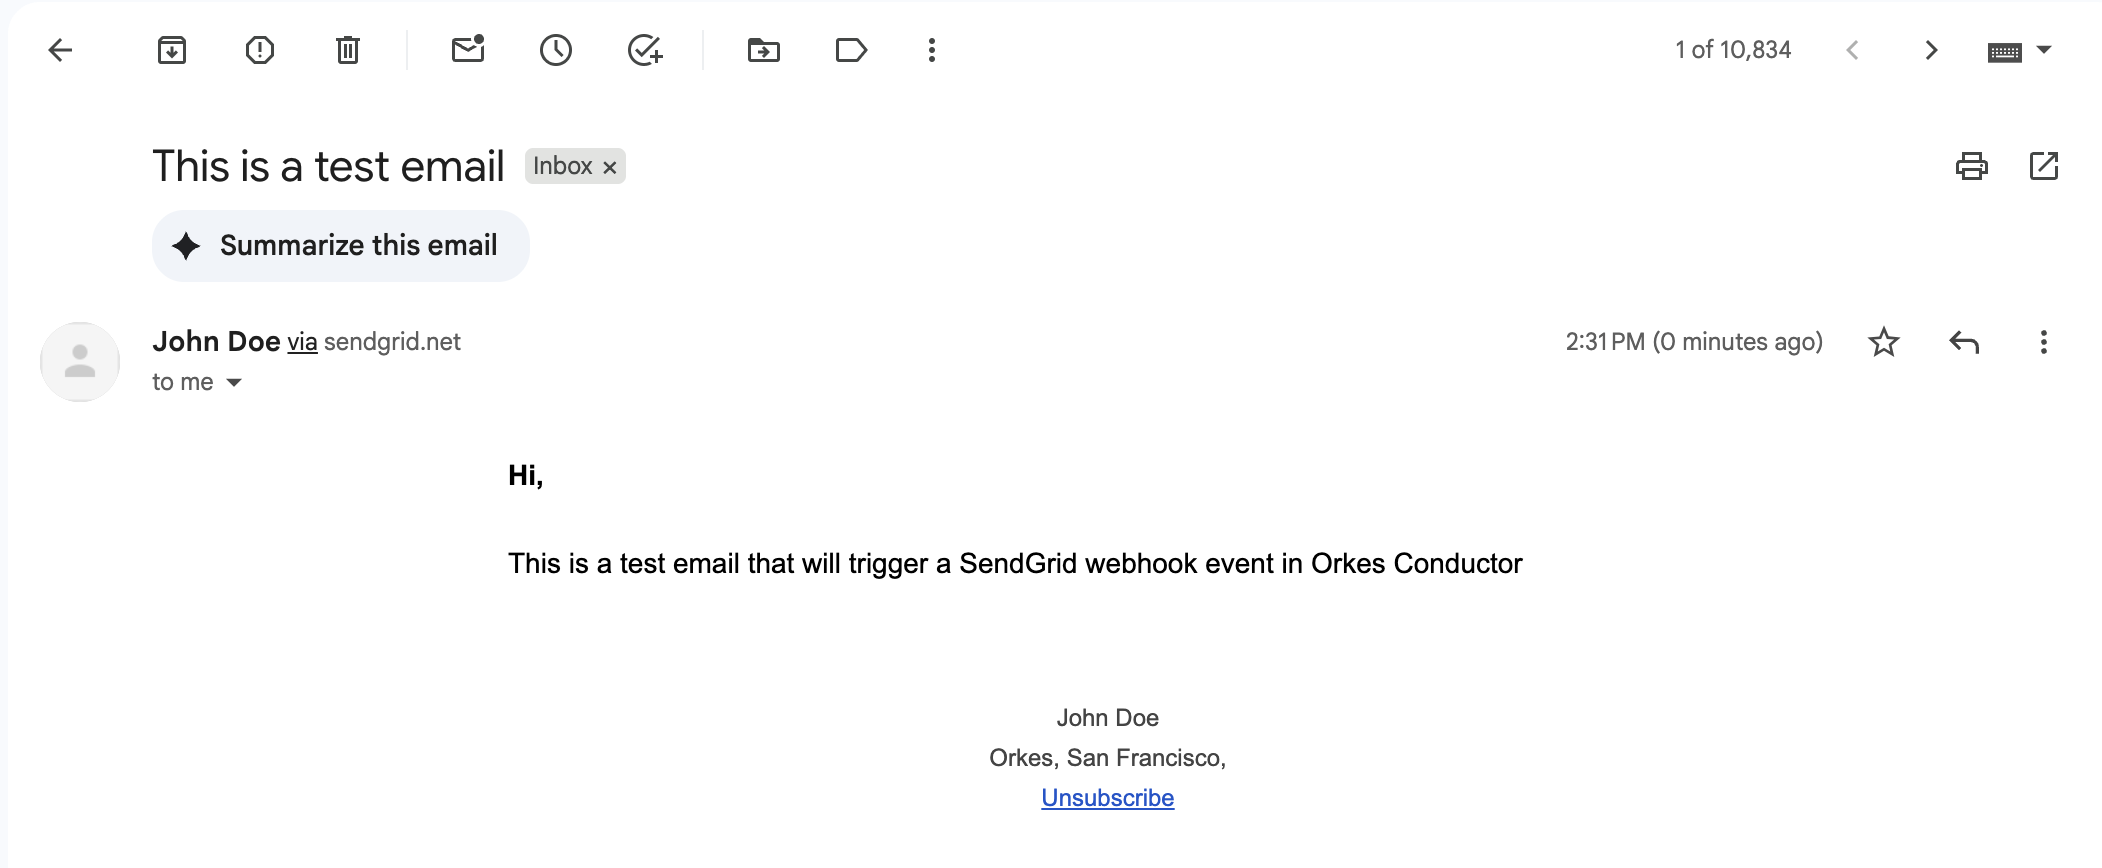
When the recipient opens the email (one of the events configured in the SendGrid webhook), the event triggers and is sent to the Conductor.
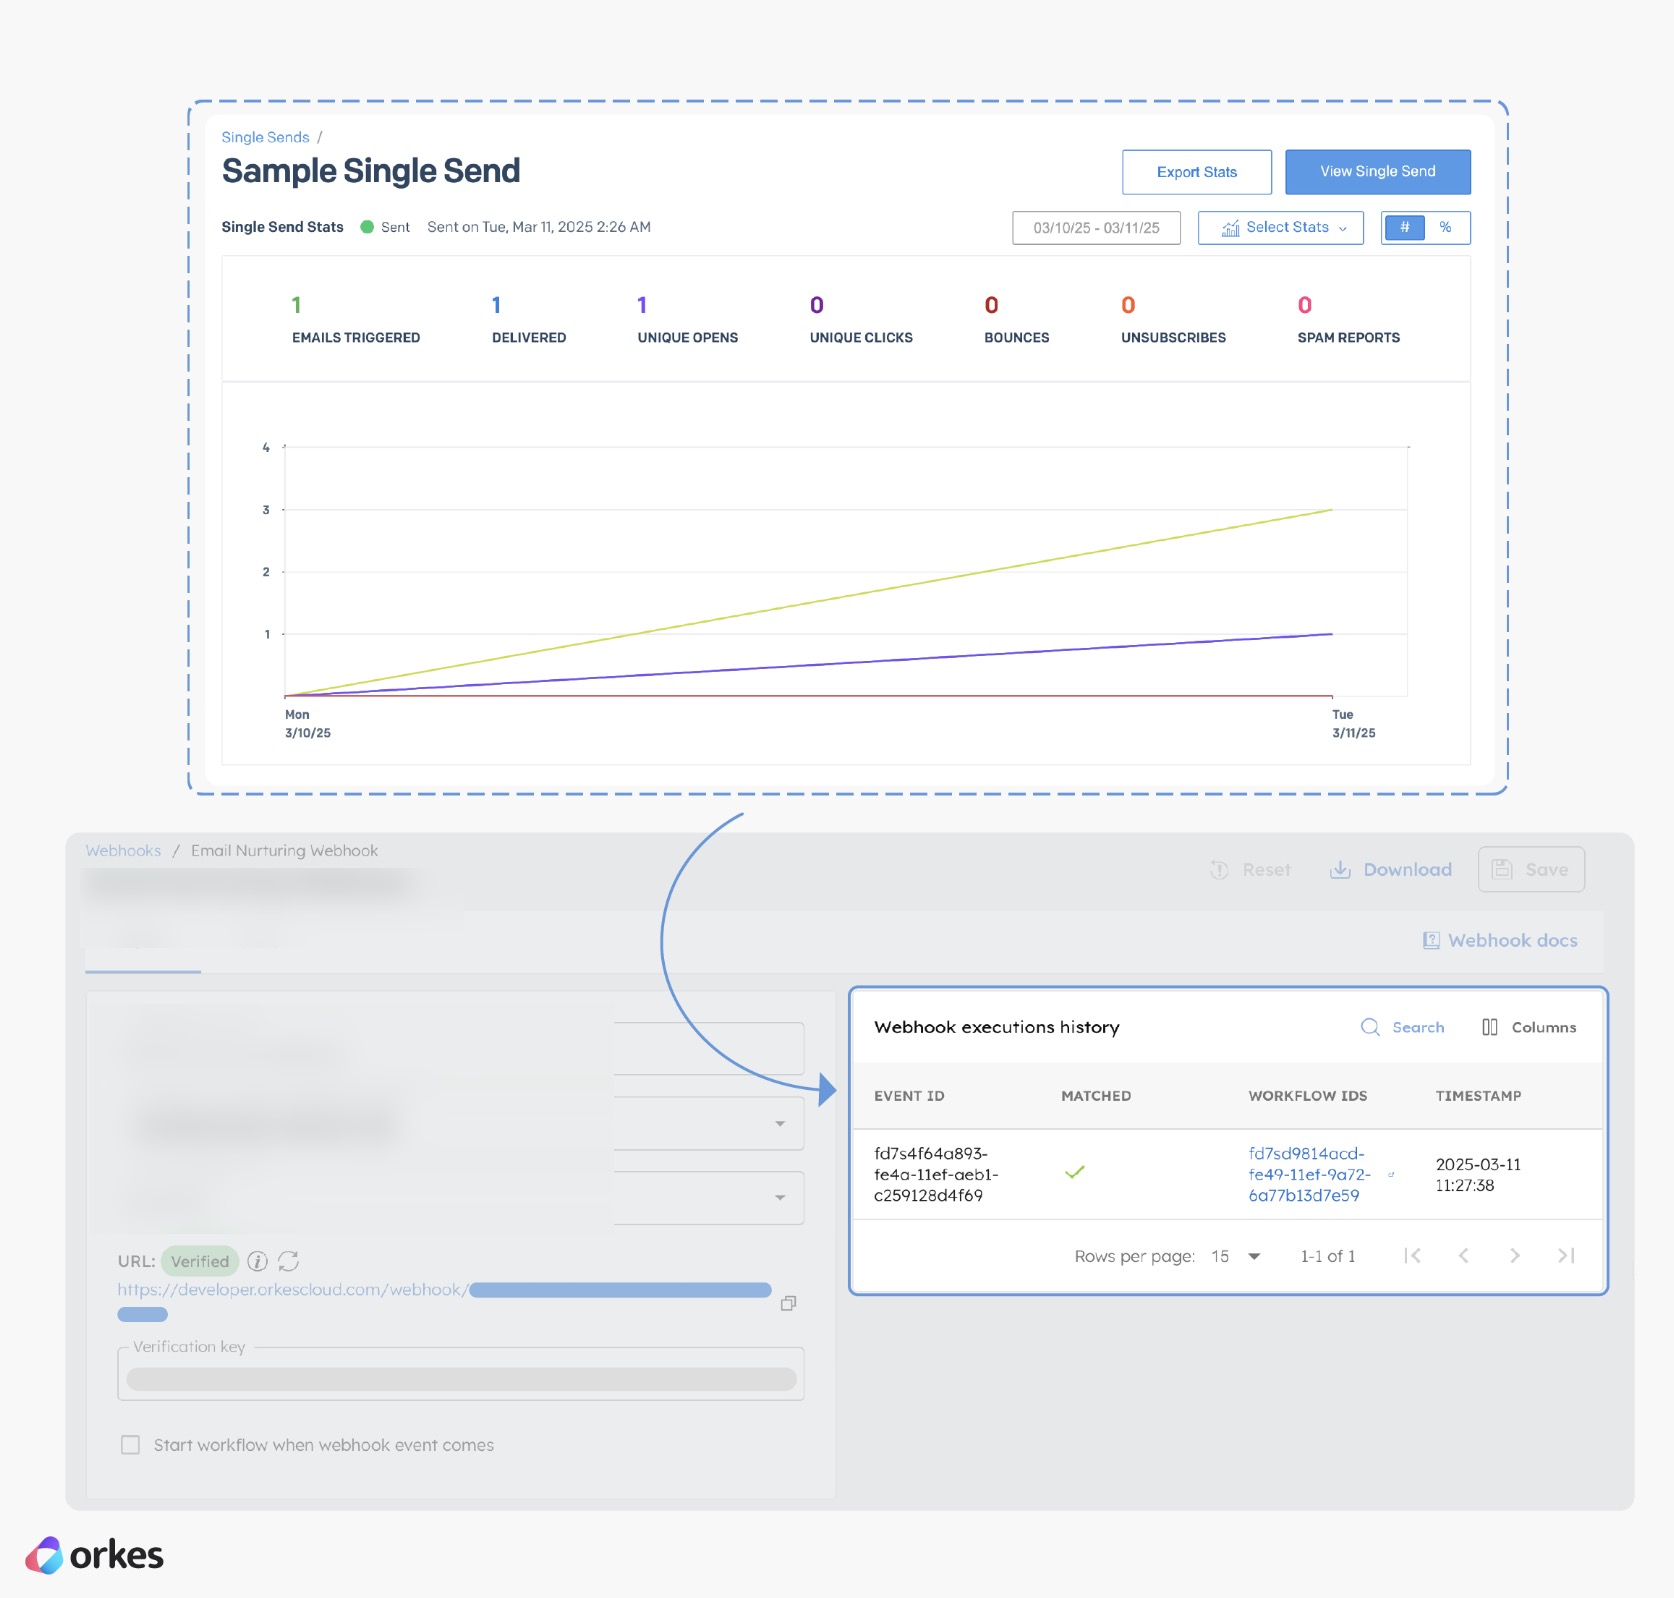
Checking the workflow execution, you can verify that the Wait for Webhook task is completed.
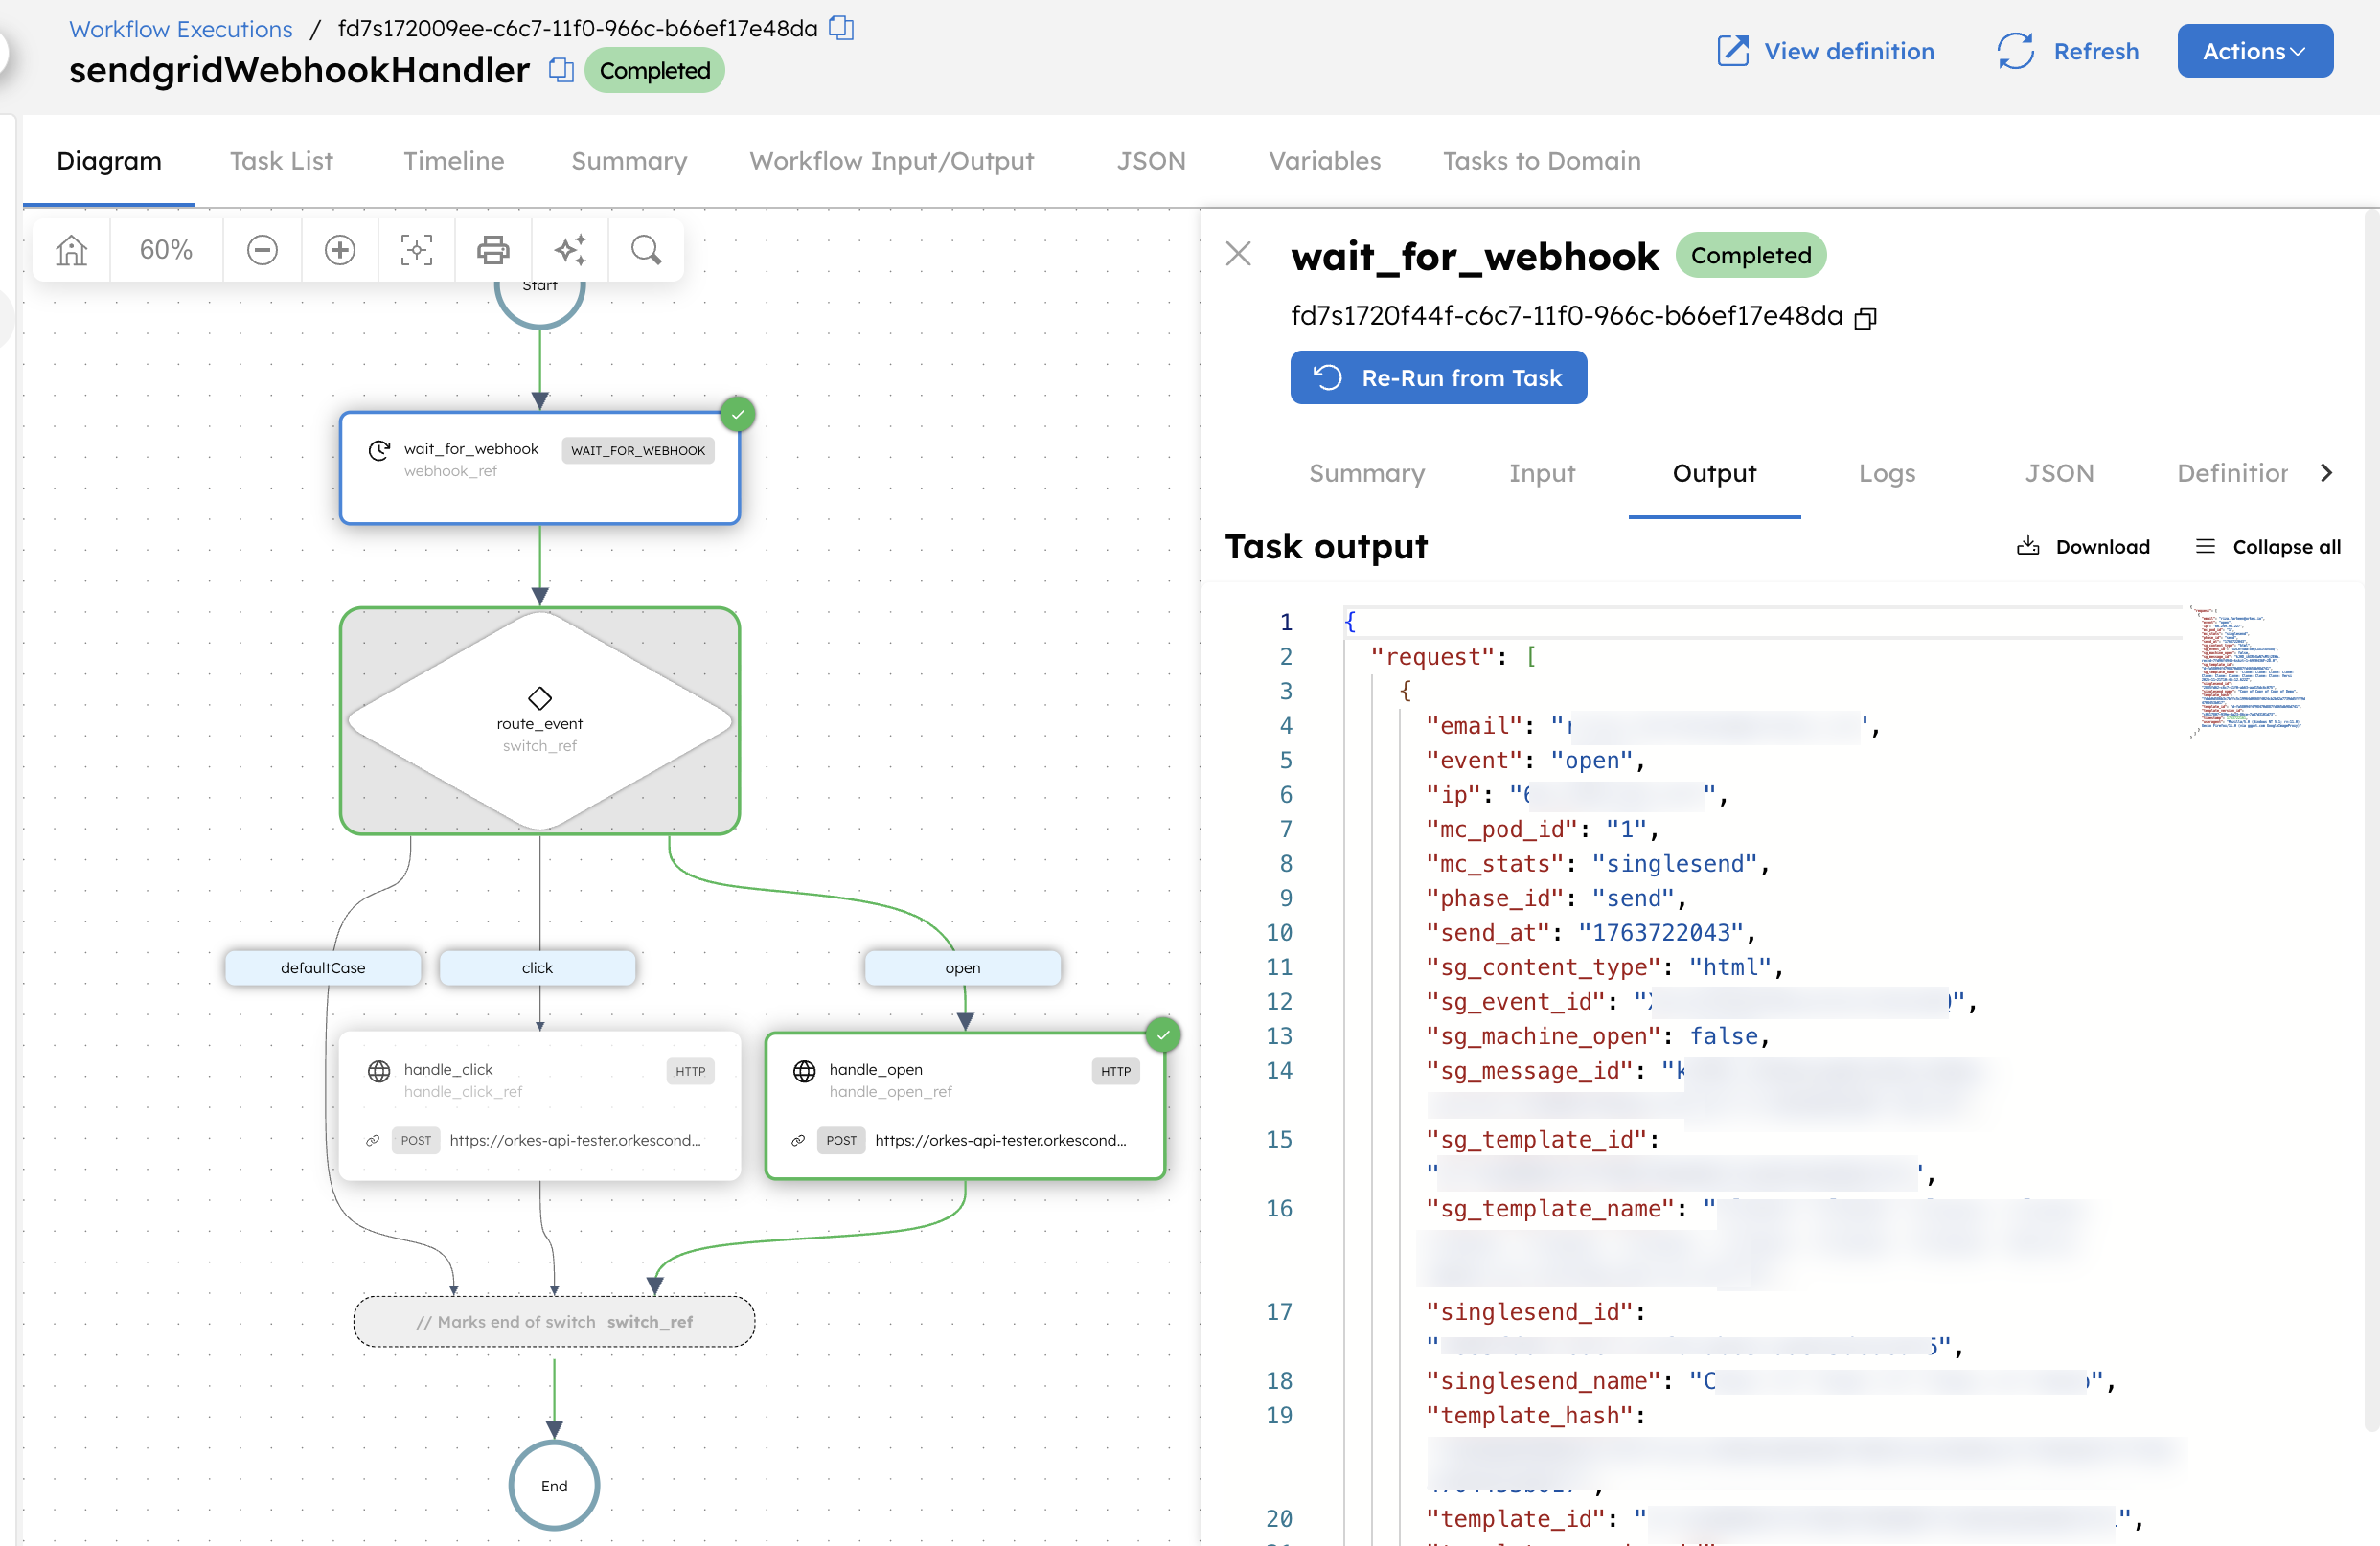
After the Switch task routes the event, the workflow triggers the corresponding HTTP task configured for the open case. In this tutorial, the HTTP endpoints are simple test APIs used only to demonstrate how Conductor forwards the received webhook payload.
In a real-world setup, you can replace these test URLs with your own internal systems, such as an analytics service, a logging endpoint, or any application that needs to react to SendGrid events.
To retest the click case, update your SendGrid email with clickable links, send a new Single Send, and trigger the event using the following input:
{
 "eventType": "click"
}
Workflow modifications
This tutorial demonstrates the basic pattern for receiving SendGrid Event Webhooks in Orkes Conductor and routing them within a workflow. You can extend this pattern to suit your system requirements by:
- Handling additional SendGrid event types, such as delivered, bounced, dropped, or unsubscribed, by adding more branches to the Switch task.
- Forwarding events to your internal services, such as logging pipelines, analytics dashboards, or monitoring systems, by replacing the test HTTP endpoints with your production APIs.
- Enriching or transforming webhook payloads using JSON JQ Transform tasks before sending them to downstream applications.
- Triggering additional automation workflows when specific events occur, for example, starting a remediation flow on bounces or updating user engagement records on clicks.