MCP Gateway: Expose Workflows as MCP tools
Using Conductor’s MCP Gateway, you can expose any workflows as MCP tools for AI agents. Each MCP tool corresponds to a workflow that can perform multi-step operations, coordinate internal systems, and return structured output that AI agents can understand and process. This design allows agents to trigger business actions without manual intervention.
MCP tools are defined as routes within a service. Each route is associated with a workflow that runs when an agent submits a tool request through the Model Context Protocol. Authentication settings determine which clients can invoke MCP tools and how they are authorized.
Here’s an overview of how to expose workflows as MCP services in Conductor:
- Create workflows that represent the actions your AI agents will perform
- Create an application with permission to execute the workflows. This is the service account layer.
- Configure authentication settings for the MCP service.
- Define an MCP service.
- Define and test routes.
- Connect the service with AI agents as an MCP tool.
Step 1: Create workflows that define tool behavior
The MCP Gateway allows you to expose Conductor workflows as APIs that can be called by an MCP tool. Before defining any MCP routes, ensure that the workflows implementing your endpoint logic are already created.
You can create workflows using the Conductor UI, APIs, or SDKs.
Step 2: Create an application in Orkes Conductor
An application in Orkes Conductor serves as the identity that the MCP Gateway uses when executing workflows on behalf of the AI agent.
To create an application:
- Go to Access Control > Applications, and select + Create application.
- Enter a name for the application.
- (Optional) Enable the required Application role based on how the service wants to interact with the application.
- In Permissions, select + Add permission.
- In the Workflow tab, select the workflow created in Step 1 and enable EXECUTE permission.
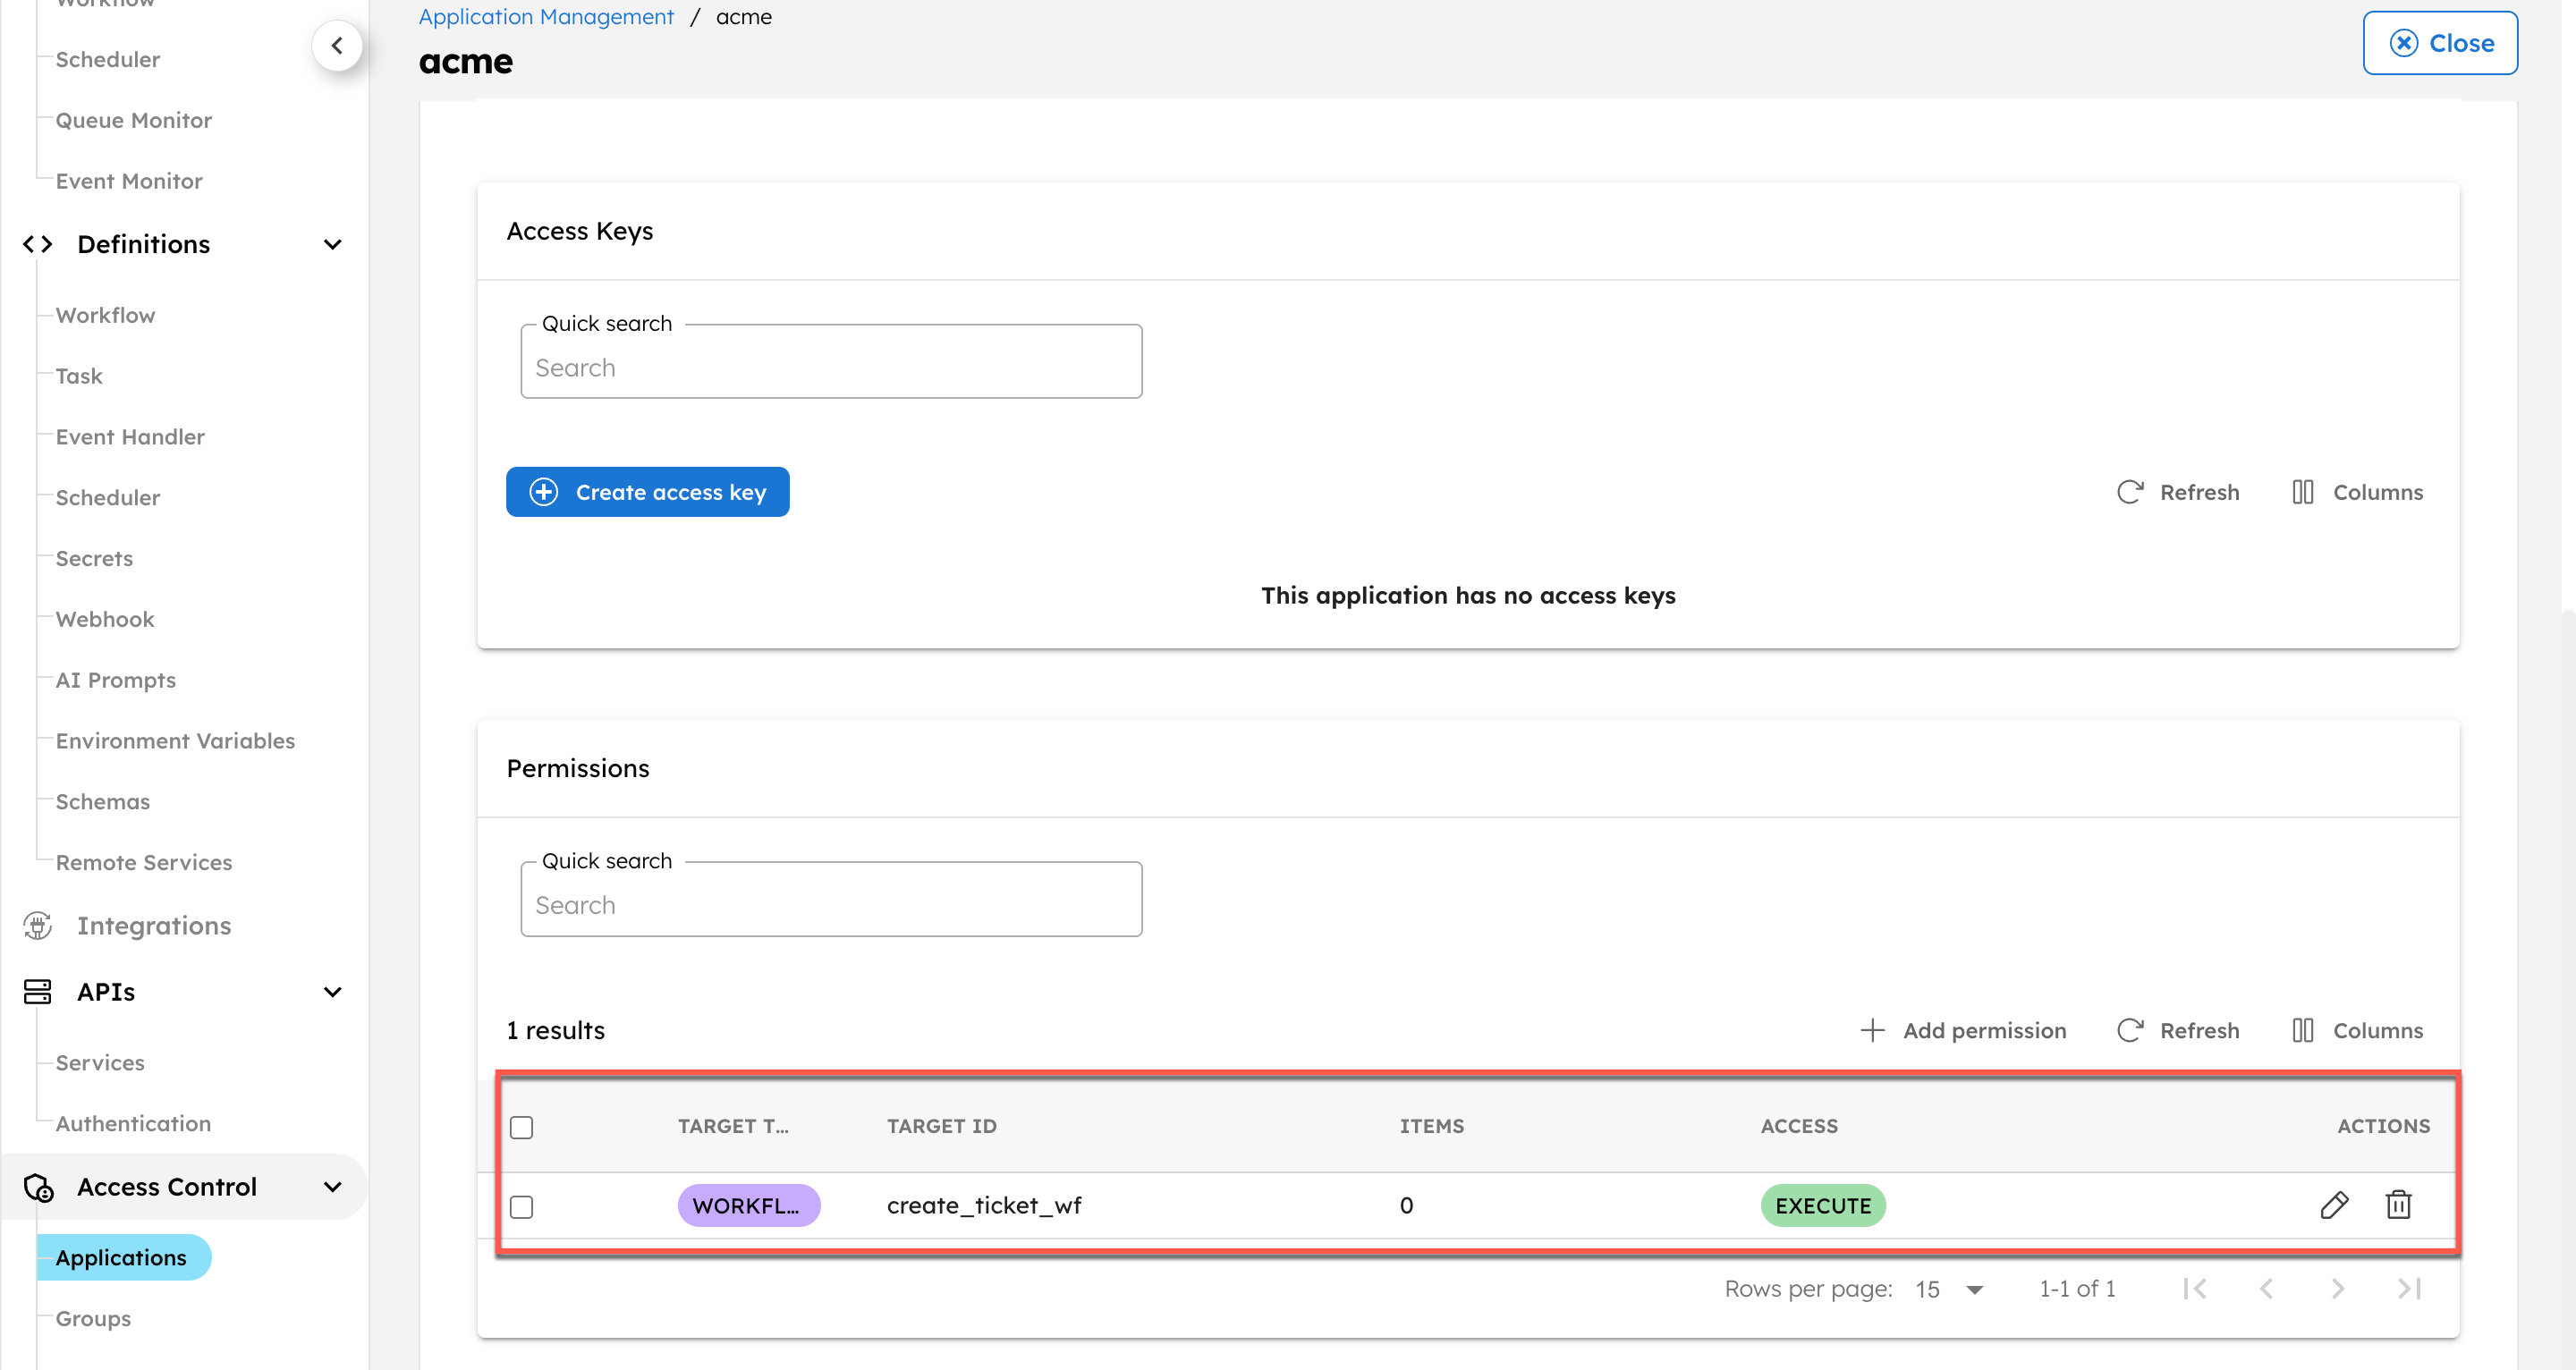
- Save the application.
Step 3: Configure authentication settings
Authentication controls how external agent systems connect to your MCP tools. You can configure these settings at the cluster level and reuse them across multiple services in the MCP Gateway.
To configure authentication settings:
- Go to APIs > Authentication from the left navigation menu on your Conductor cluster.
- Select + New authentication.
- Configure the following parameters:
| Parameter | Description | Required/Optional |
|---|---|---|
| ID | A unique identifier for the authentication configuration. This cannot be renamed once saved. | Required. |
| Authentication Type | The type of authentication to use. Supported values:
| Required. |
| API Key | The API key for authentication. A random key is generated by default. You can also select Generate to create one instantly. Copy and store the key securely for future authentication. | Required if Authentication Type is API Key. |
| Application | Select the application created in Step 2, which generates an access key and JWT token. The MCP Gateway will use this token to authenticate with the Conductor. The service using this authentication will inherit the application’s permissions. | Required. |
- Select Save.
Step 4: Define an MCP service
A service is a logical container for MCP endpoints, referred to as routes. Routes within a service inherit common settings, including the base path, authentication configuration, and CORS (Cross-Origin Resource Sharing) policies. Each route maps to a workflow that the MCP Gateway invokes when the endpoint is called. You must create a service before you can add routes to it.
To define a service:
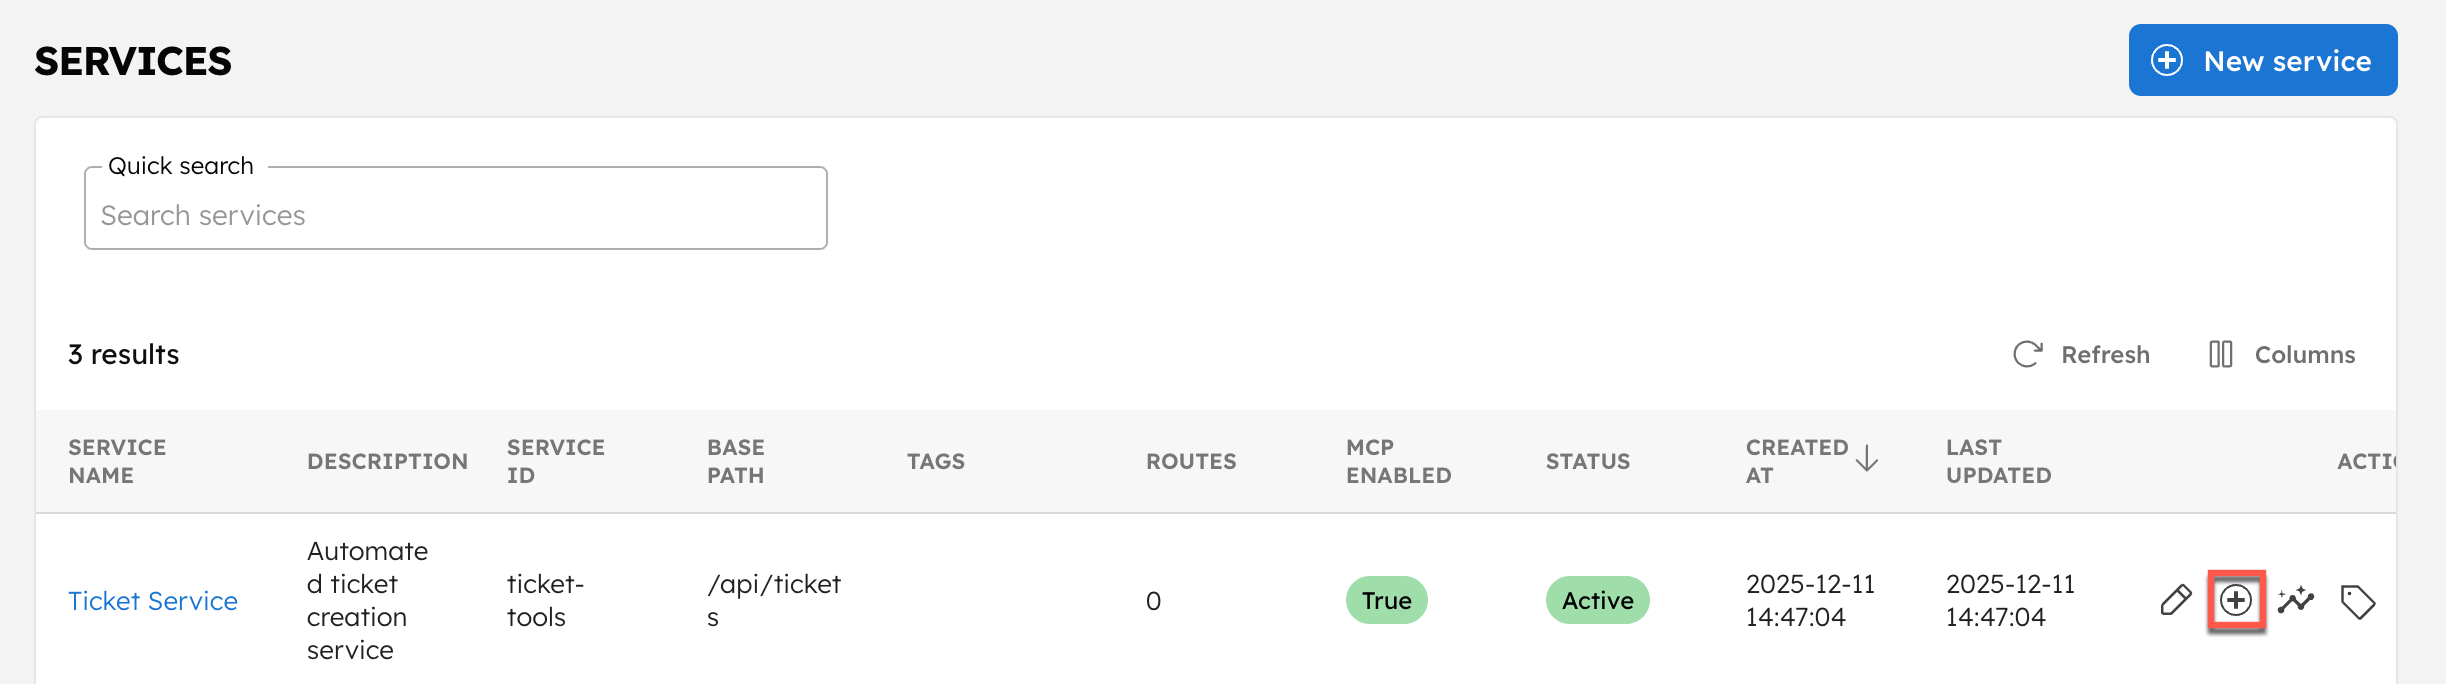
- Go to APIs > Services from the left navigation menu on your Conductor cluster.
- Select + New service.
- Configure the following parameters:
| Parameter | Description | Required/Optional |
|---|---|---|
| Basic information | ||
| Service ID | A unique identifier for the service. Use lowercase letters and hyphens, as this value is used in the API URLs. This cannot be renamed once saved. | Required. |
| Display Name | A user-friendly name for the service. | Required. |
| Service Enabled | Determines whether the service is active. Enabled by default. Switch it off if you do not want to activate the service immediately. | Required. |
| MCP Enabled | Determines whether the MCP is active for this service. Enabled by default. Switch it off if you don’t want to activate the MCP service immediately. | Required. |
| API Configuration | ||
| Base Path | The base path for all routes in the service. The path must start with a forward slash (for example, | Required. |
| Auth Config | The authentication configuration to use for this service. Select the configuration created in the previous step, or select + Create New Auth Config from the dropdown, and configure the authentication settings. | Required. |
| CORS Configuration | ||
| Allowed Origins | The origins (URLs) that can access this service. Press Enter after each URL to add multiple origins. Use * to allow all origins. | Required. |
| Allowed Methods | The HTTP methods that can be used in cross-origin requests. Supported values:
| Required. |
| Allowed Headers | The HTTP headers that can be sent in requests from allowed origins. Press Enter after each header to add multiple headers. Use * to allow all headers. | Required. |
| Additional Information | ||
| Description | A description of the service. | Optional. |
- Select Save.
Step 5: Define and test a route
Each endpoint in a service is defined as a route, and every route maps to a Conductor workflow that implements the endpoint’s logic.
To create a route within a service:
- Go to the Services and select the + button next to the service created.
- Configure the following parameters:
| Parameter | Description | Required/Optional |
|---|---|---|
| Route Definition | ||
| HTTP Method | The HTTP method for the route. Supported methods:
| Required. |
| Path | The path for the request.
| Required. |
| Description | Use this field to describe the purpose and behavior of the route. When the route is exposed as an MCP tool, this description is provided to AI models to help them understand when and how to use the endpoint. Include details such as what the route does, expected inputs, output format, and typical use cases to ensure the model can invoke the route accurately. | Optional. |
| Workflow Configuration | ||
| Workflow Name | The workflow to be triggered by the route. | Required. |
| Version | The version of the workflow to use. If unspecified, the latest version will be used. | Required. |
| Wait Until Tasks | The task to wait for before returning a response. The API will return the output of this task, instead of the workflow output. This is useful if the workflow contains tasks that take a long time to complete, but a response from the API is required before the connection times out. | Optional. |
| Timeout (seconds) | The duration in seconds to wait before returning a response. | Optional. |
| Schema | ||
| Input Schema | The input schema for the request.
| Optional. |
| Output Schema | The output schema for the request.
| Optional. |
| Query Parameters | ||
| Parameter Name | The query parameter that can be accepted by the endpoint. Can contain only letters, numbers, underscores, and hyphens. Enable Required if the parameters are mandatory. | Optional. |
| Transformation Scripts | ||
| Pre-request Script | A JavaScript function to transform the incoming request payload before passing it to the workflow. The returned object becomes the workflow input. Use Example | Optional. |
| Test Pre-request Script | Test the input processing script. To test the payload:
| N/A |
| Post-response Script | A JavaScript function to transform the final workflow output before it is returned in the API response. The returned object is sent as the API response. Use Example | Optional. |
| Test Post-response Script | Test the output processing script. To test the payload:
| N/A |
| Cache Configuration | ||
| Cache Key | Enables caching for a route. When caching is enabled, Conductor stores responses for repeated requests and returns the cached result for matching inputs until the entry expires. | Optional. |
| TTL (Time To Live) in Seconds | Set how long the cached value remains valid. | Optional. |
| Rate Limit Configuration | ||
| Rate Limit Key | Key used to identify the rate limit scope for this route. Can be passed as a variable. | Optional. |
| Concurrent Execution Limit | Maximum number of concurrent executions allowed for this route. | Optional. |
- Select Save.
Test a route
You can test route behavior directly from the Conductor UI before exposing it as an MCP tool.
Run a test request
To test a route:
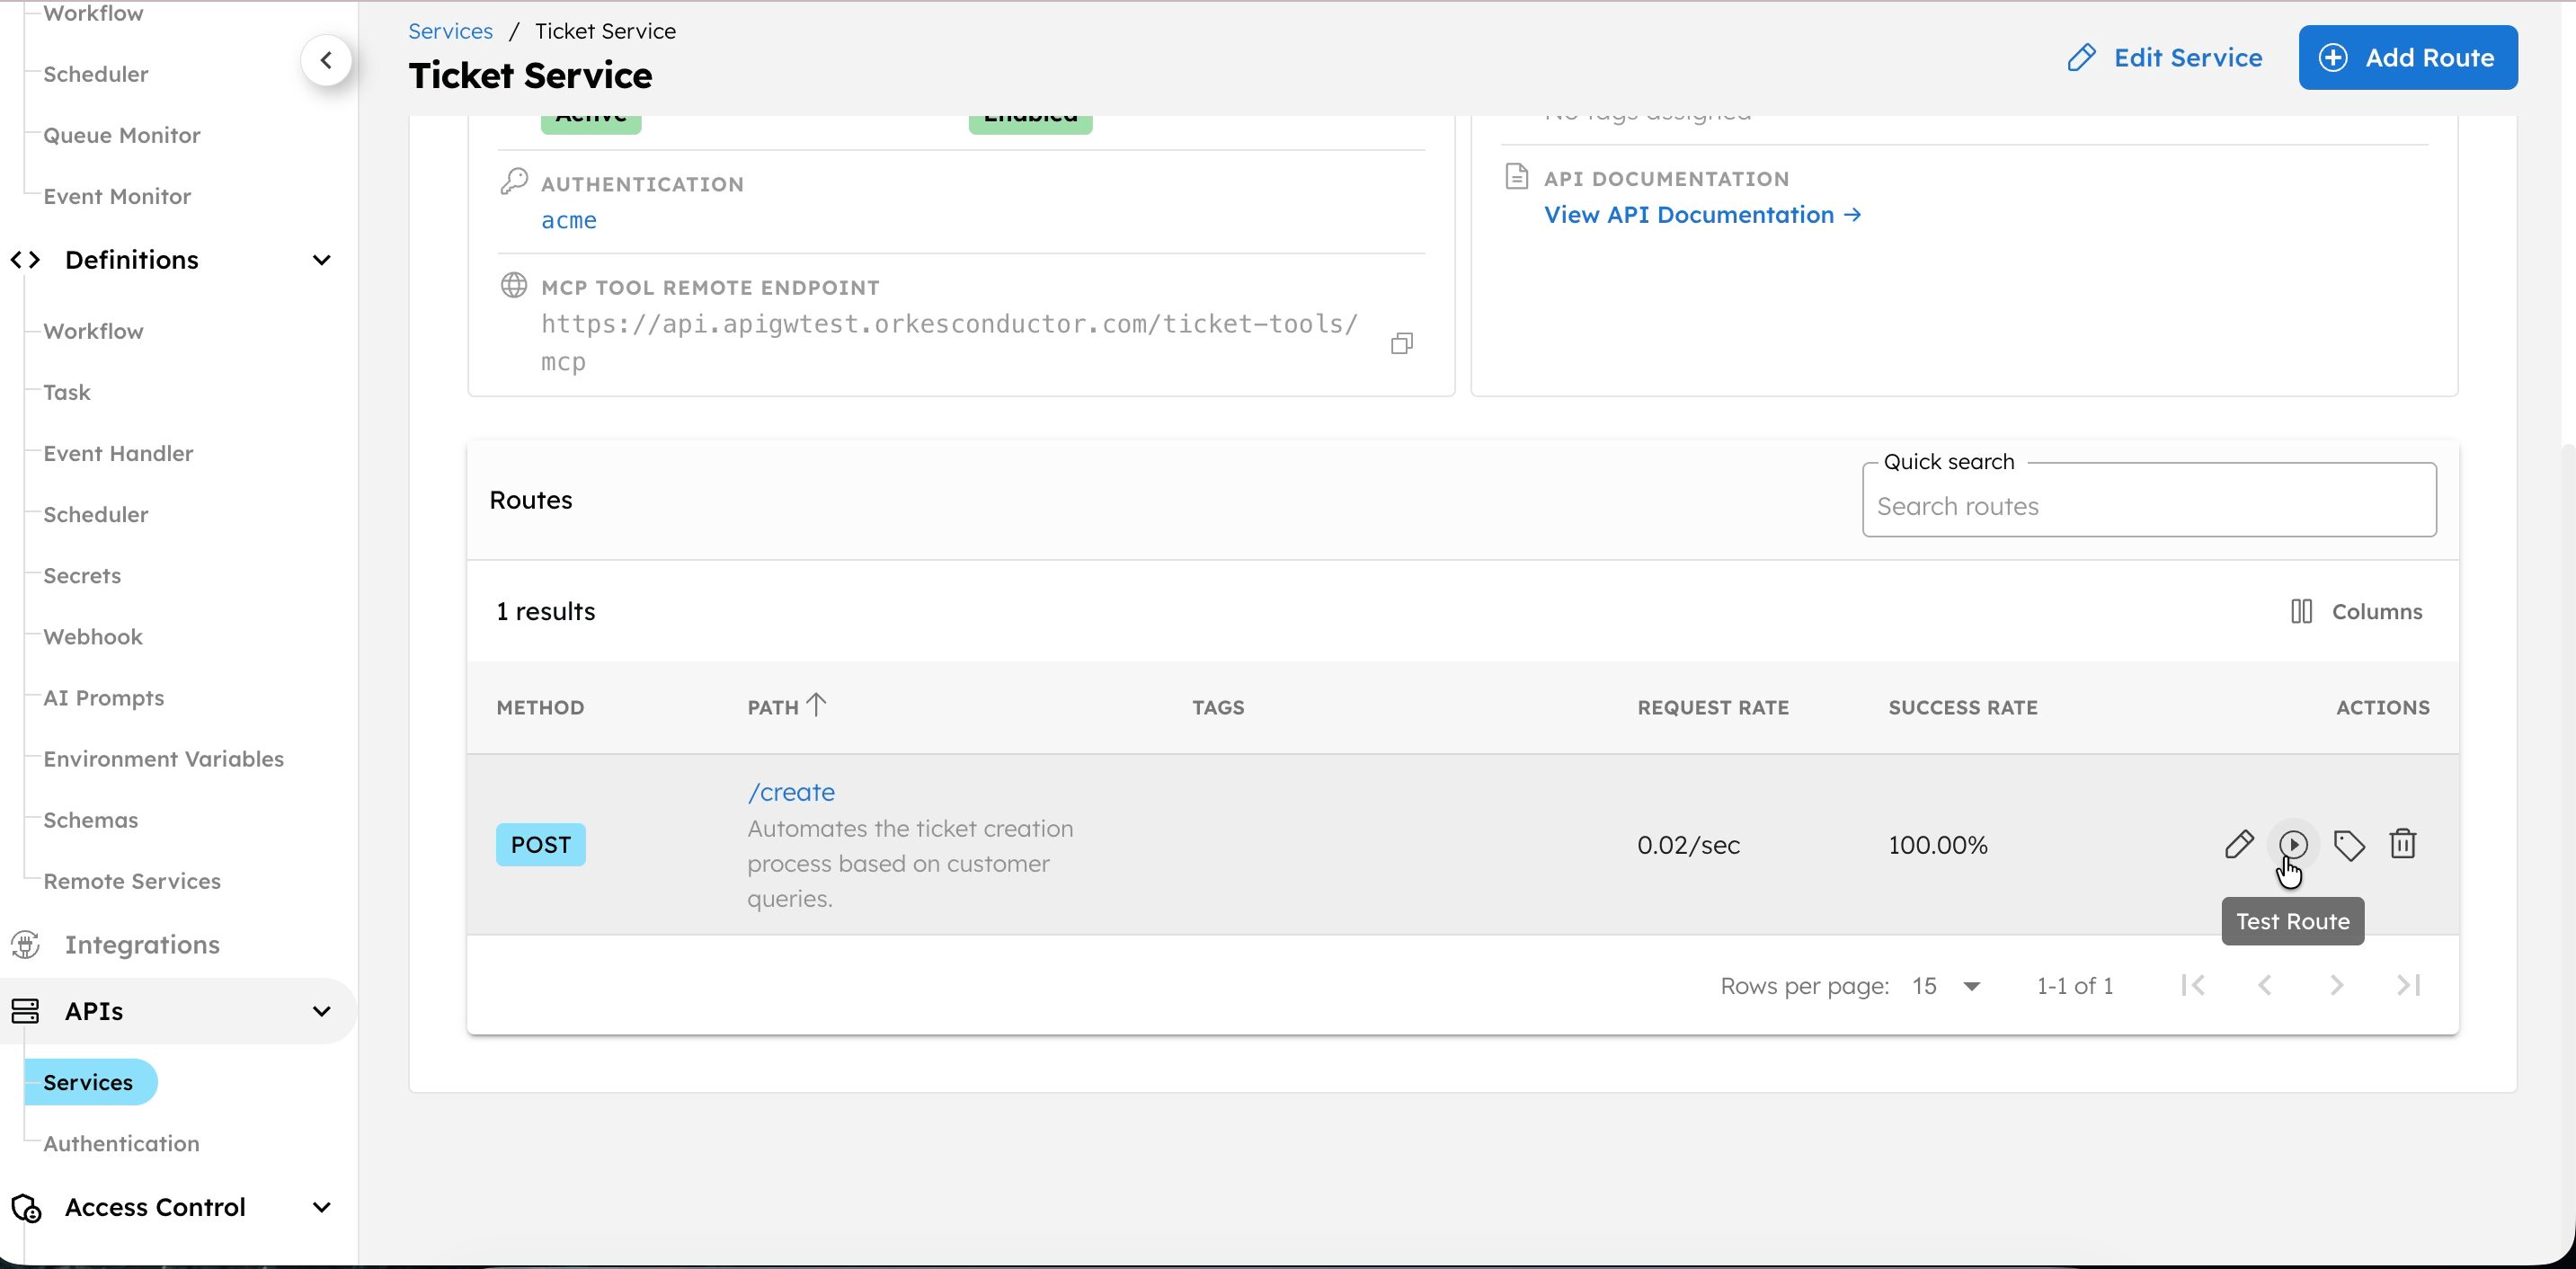
- Go to the APIs > Services, and select the service.
- In Routes, select the play icon next to the route to test.
- In Path Parameters, enter any required parameters for the endpoint.
- (If Authentication is using an API key) Replace *** with the API key copied in Step 3.
- In Body, enter the request payload as expected by the workflow.
- Select Test Route.
- Review the Response to verify the route works as expected.
Verify workflow execution
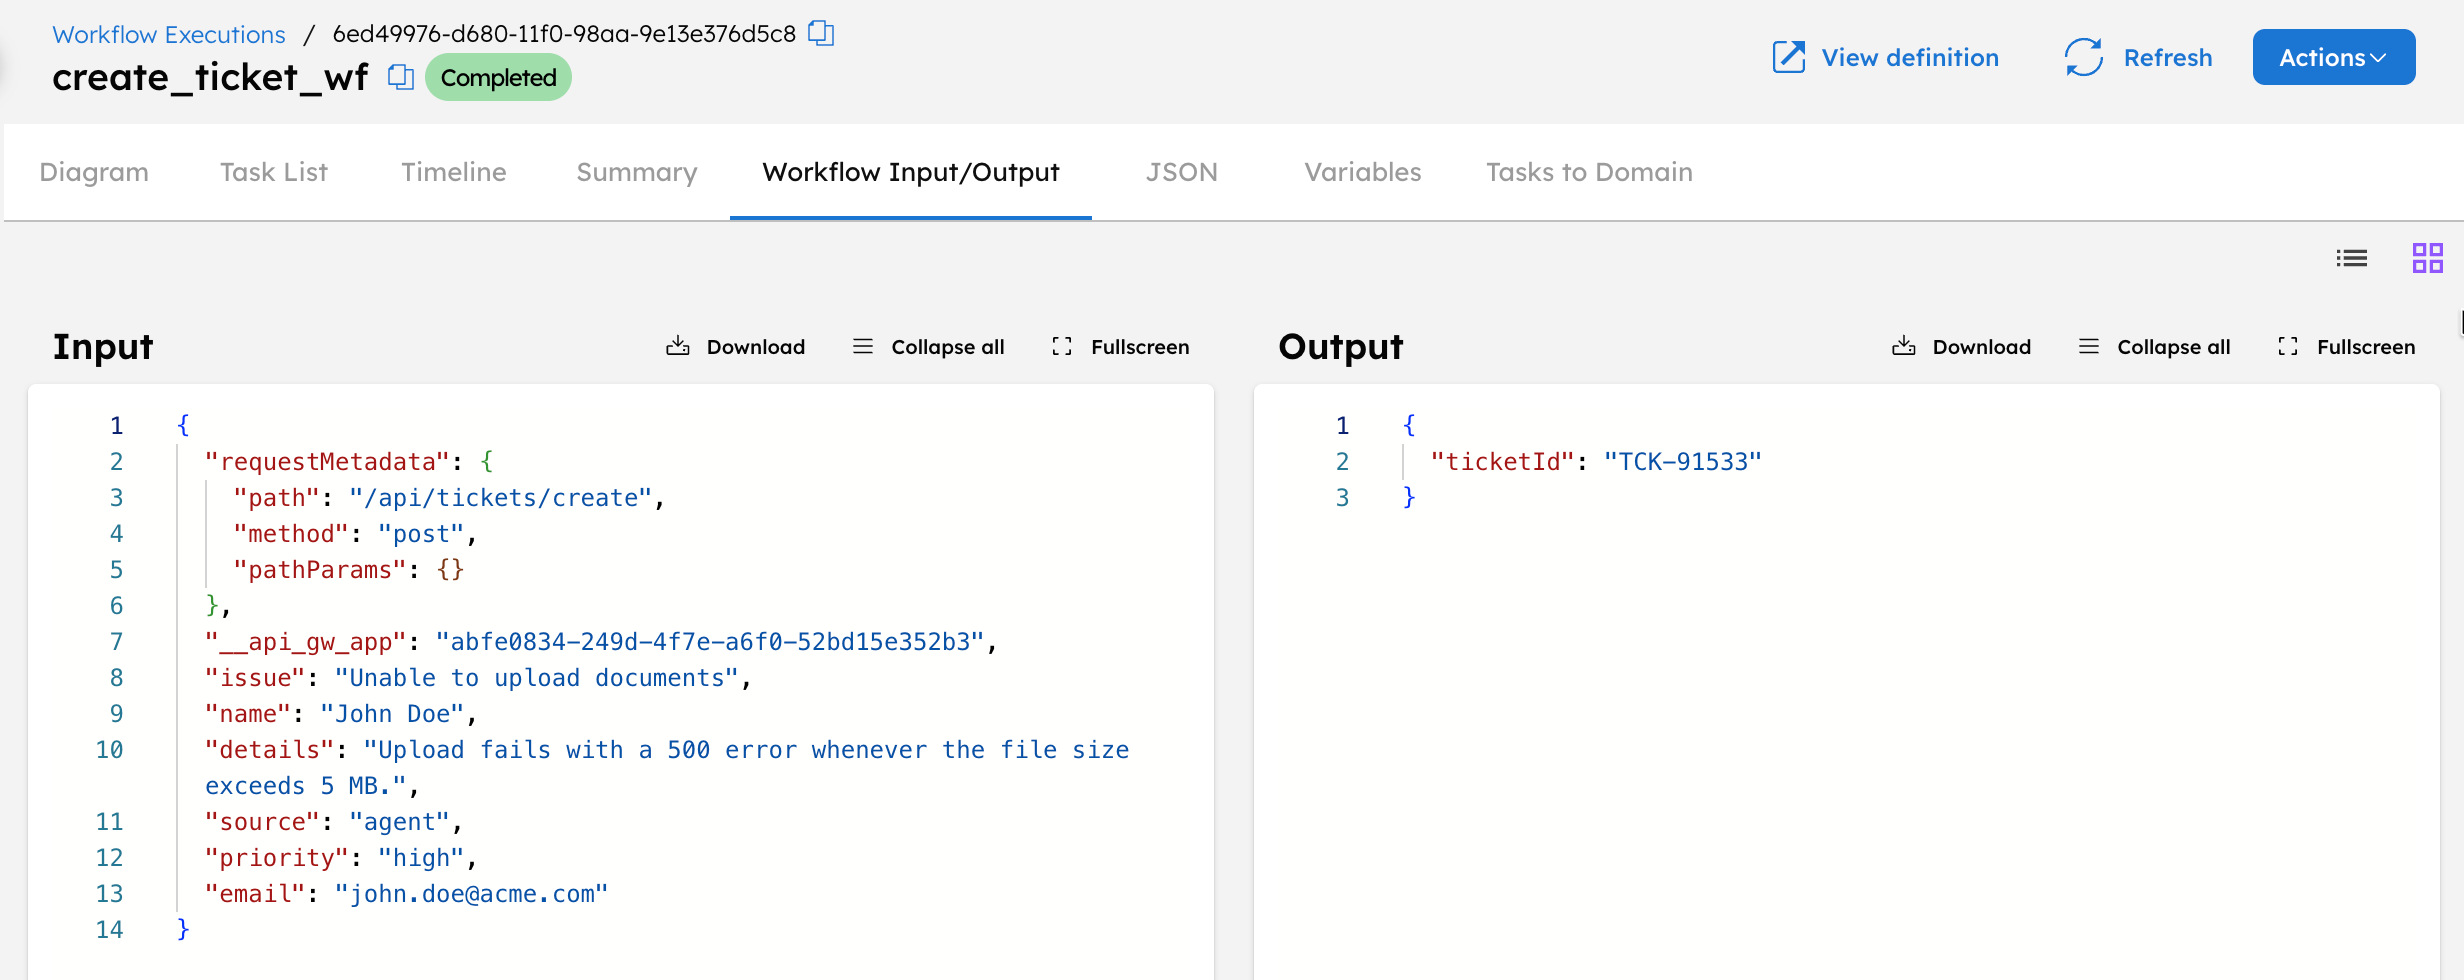
To confirm that the route triggered the workflow:
- Go to Executions > Workflow in your Conductor cluster and verify that the workflow is completed successfully.

- Select the Workflow ID to view the complete execution, including the workflow input and output.
View endpoint details
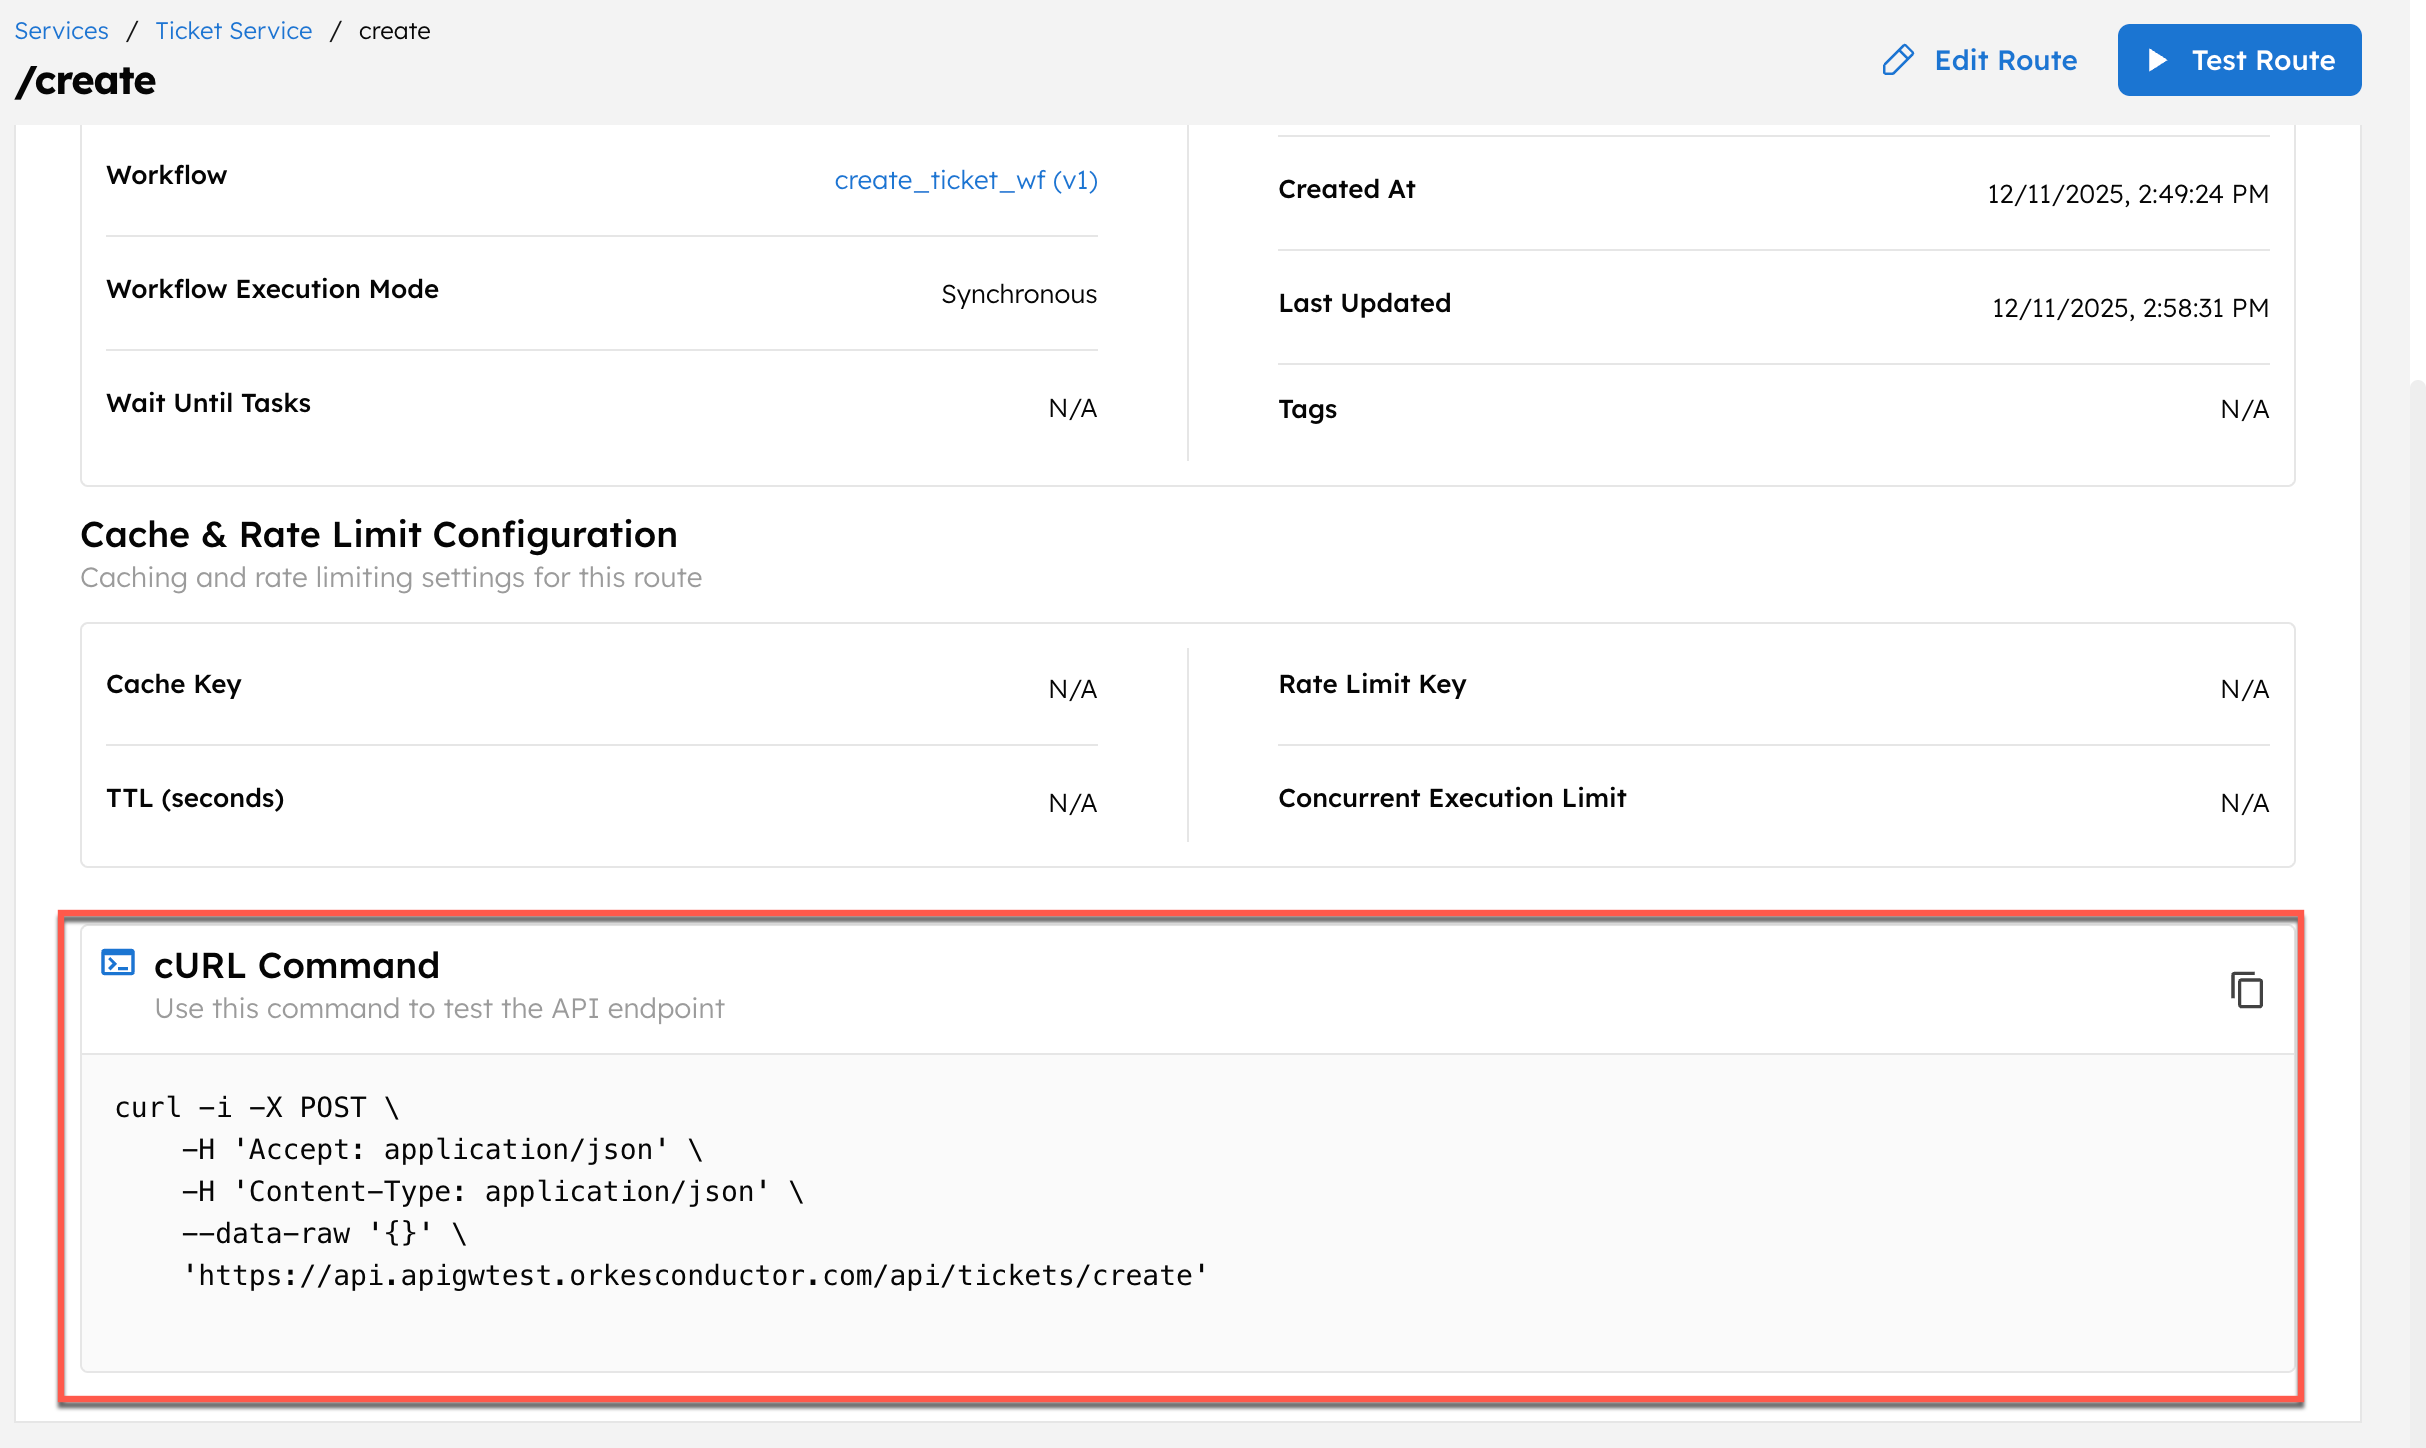
To get the cURL command:
- Go to APIs > Services, and select your service.
- Select a route to open its details.
- You can get the cURL command for the actual endpoint here.
To view the OpenAPI documentation for the endpoint:
- Go to APIs > Services, and select the service.
- In Metadata & Resources, select View API documentation.

Step 6: Connect the service with AI agents as an MCP tool
Next, you can connect this MCP service to your preferred AI tool as an MCP tool. You need the MCP endpoint URL for this.
To get the MCP tool endpoint:
- Go to APIs > Services, and select the service.
- In Configuration, copy the MCP Tool Remote Endpoint.

Use this as the MCP server endpoint when you configure your AI tool.
For example, you can use tools like Orkes MCP Workbench for testing and debugging your MCP endpoints before integrating them with an AI tool.
Verify using Orkes MCP Workbench
To test the endpoint in Orkes MCP Workbench:
- Access Orkes MCP Workbench.
- In Connections, select + Add.
- In URL, enter the MCP Tool Remote Endpoint copied from Conductor.
- In Type, select Streamable HTTP (Stateless).
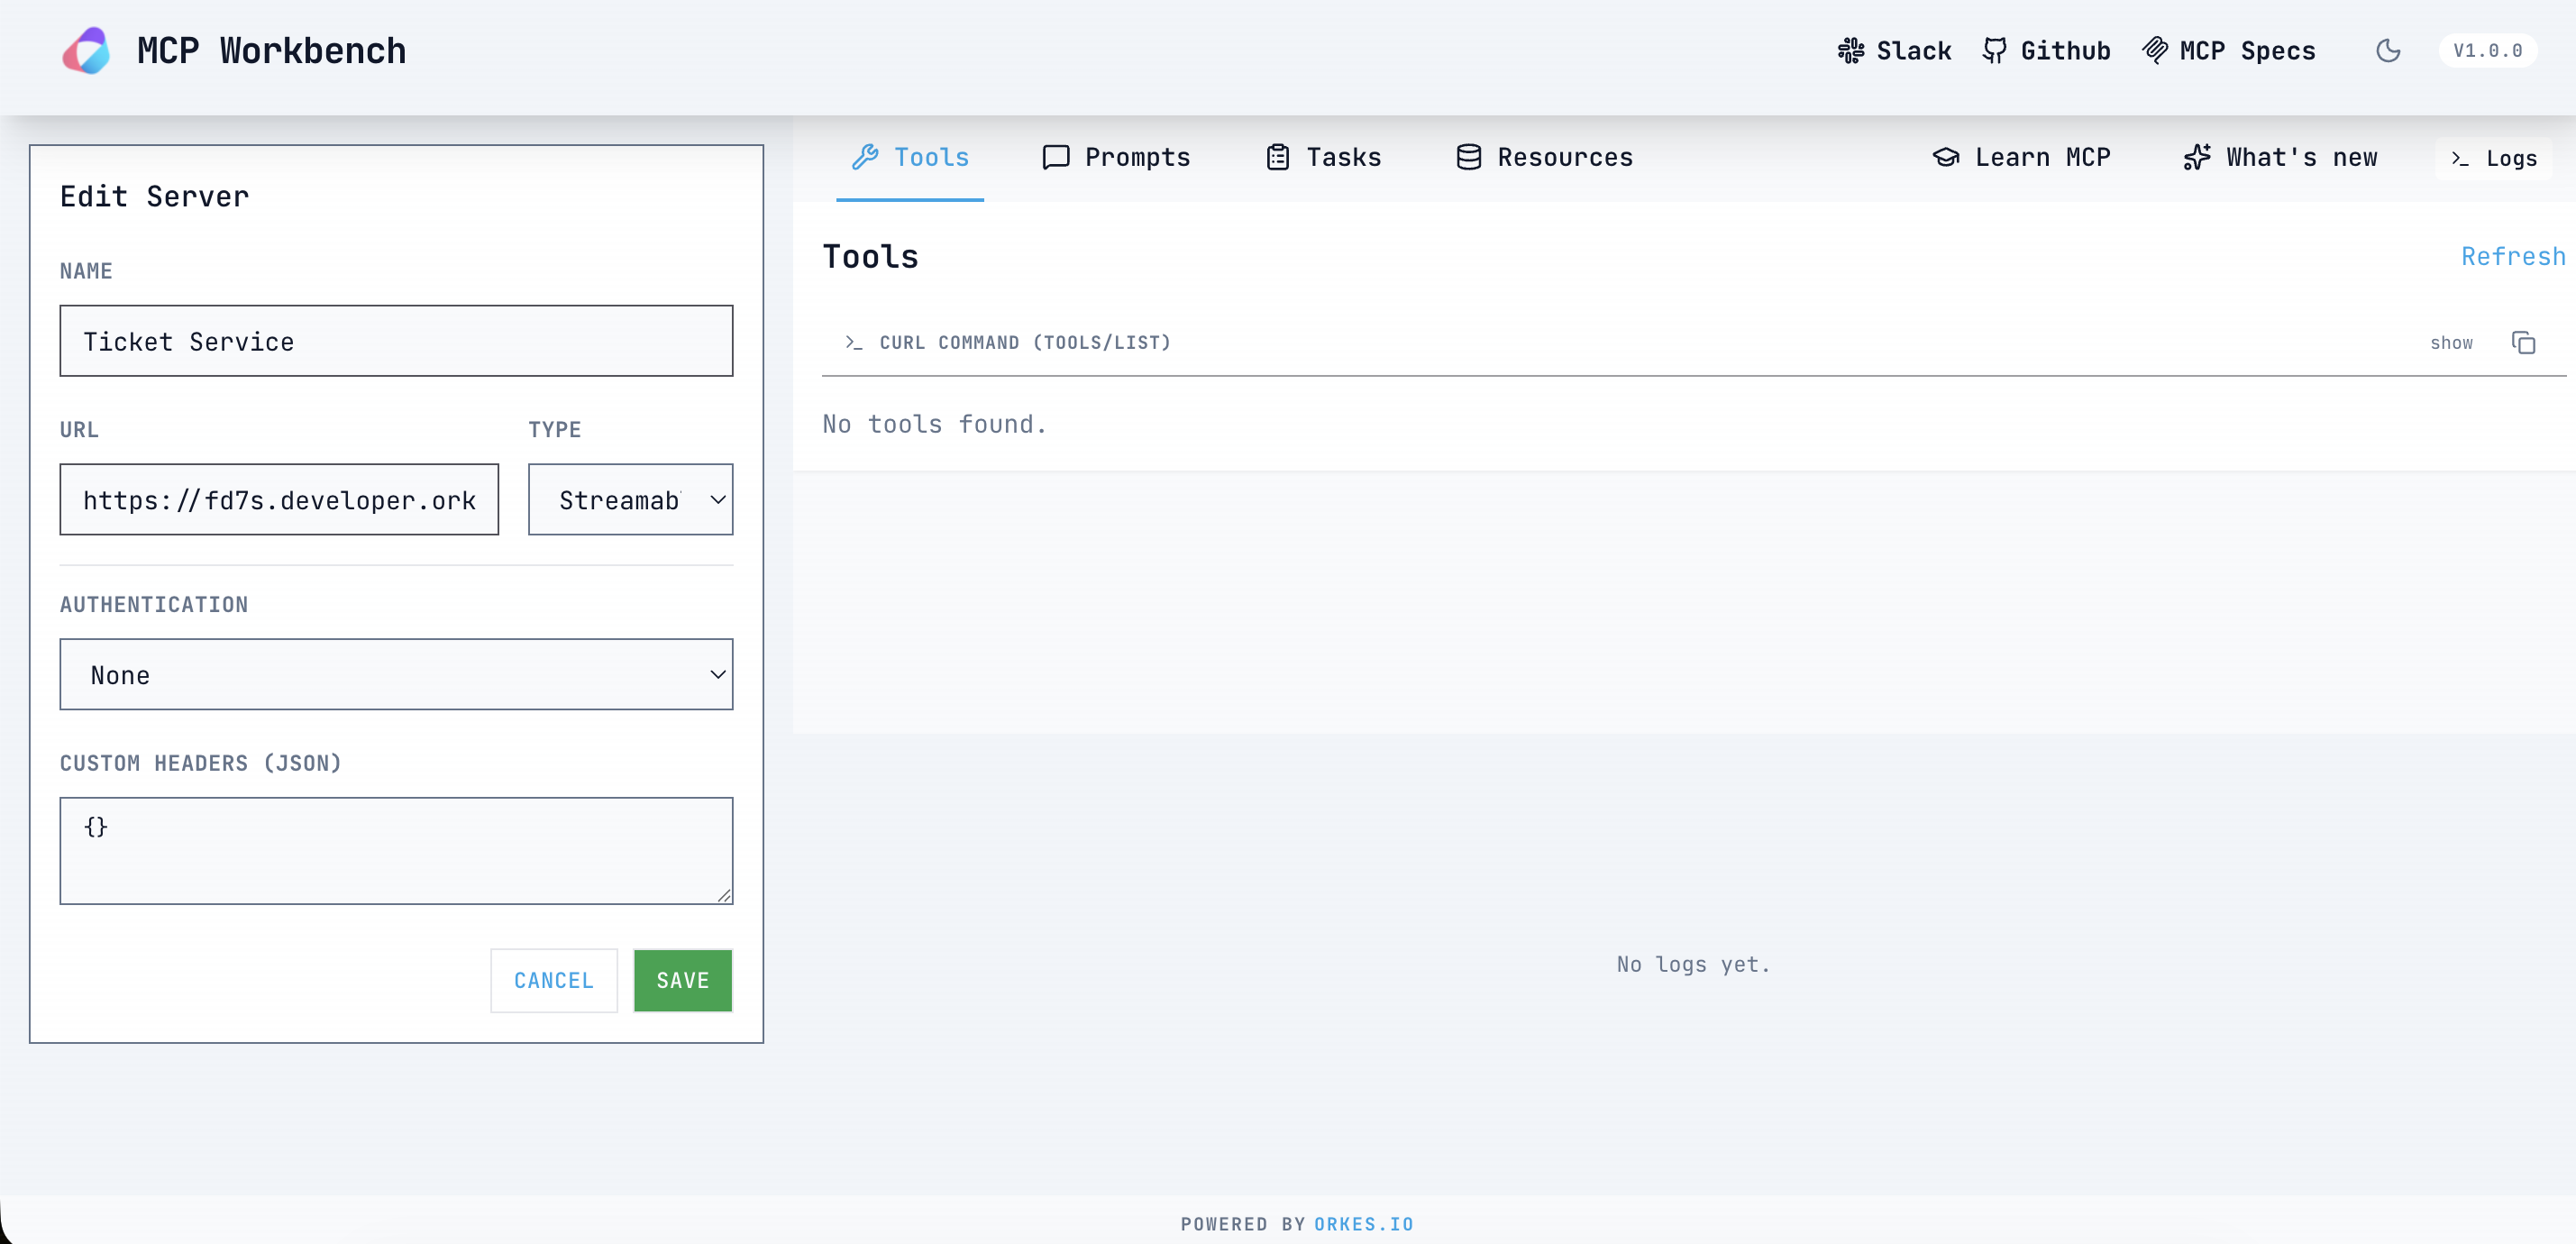
- Leave authentication empty if the service uses no authentication. If the service requires authentication, provide the required key.
- Select Save, and then select Connect.
If the connection is successful, the tools exposed by the service become visible. In Select Tool, all available tools from the service are listed.
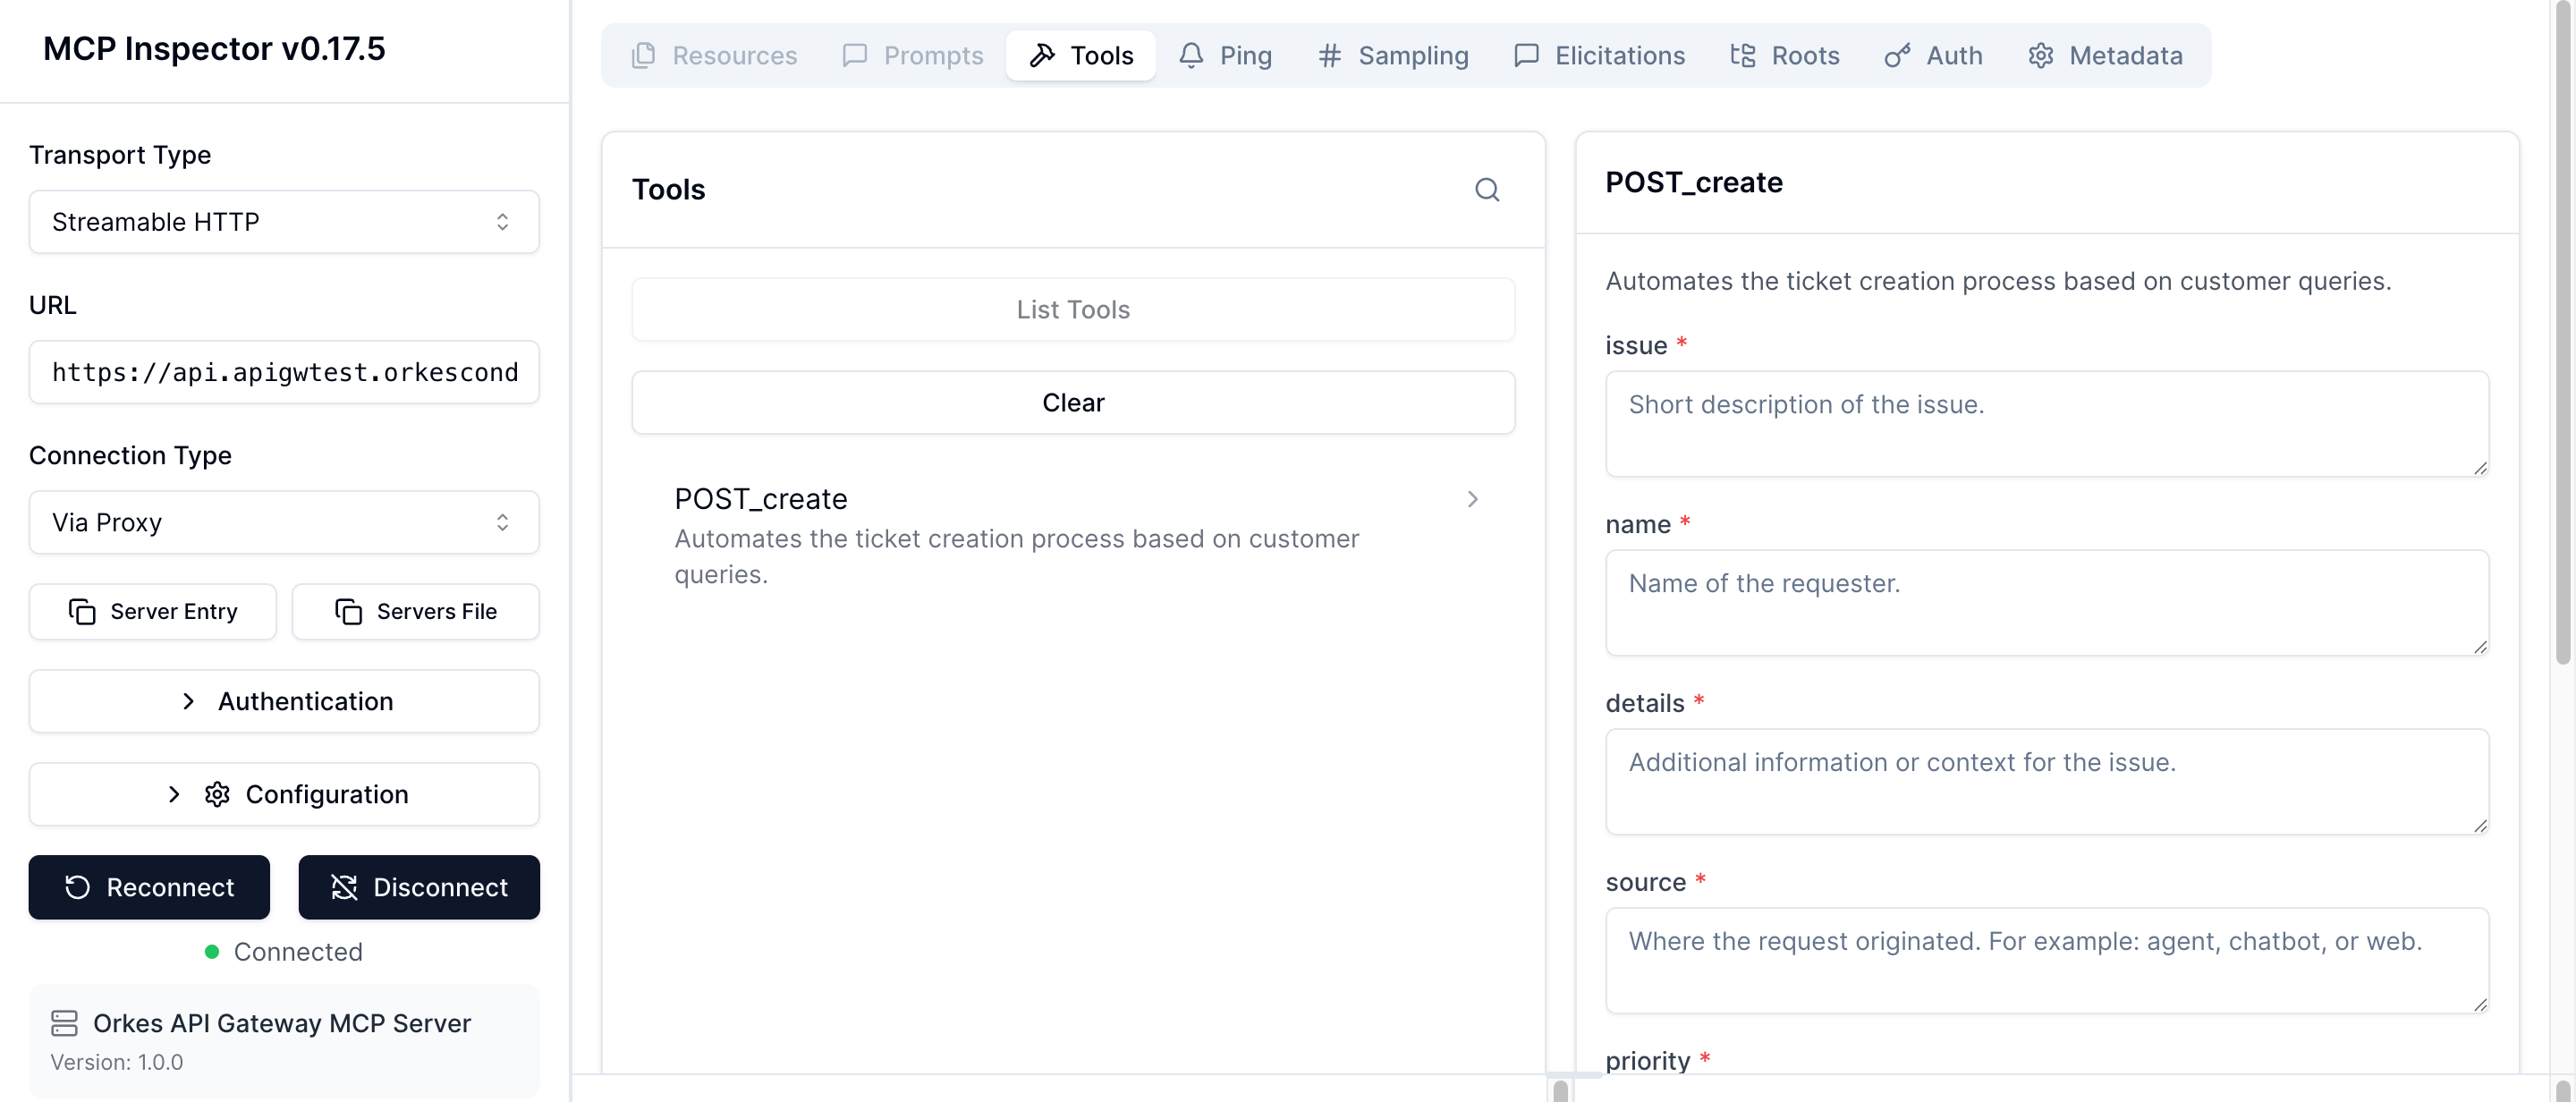
Each route in the service appears as an MCP tool. You can select a tool, provide input, and call it directly from the Inspector.
Each tool call triggers the workflow mapped to that route. This validation step helps ensure that your MCP service is correctly configured before connecting it to an AI agent.
Examples
See an example of a ticket service called an MCP tool.
Next steps
To learn how to monitor service and route performance, see Gateway Metrics.