Build a Pull Request Summary Workflow
This tutorial shows how to build a simple workflow in Orkes Conductor that converts a technical pull request description into a concise, stakeholder-friendly summary.
Product managers and non-technical stakeholders often need to understand what changed without reading implementation details. This workflow automates the translation using LLM Chat Complete and an AI Prompt.
In this tutorial, you will:
- Integrate an AI model provider
- Create and test the prompt for summarizing pull request descriptions
- Build a workflow that generates stakeholder-friendly summaries
- Run the workflow and verify the output
By the end of this tutorial, you will have a workflow that accepts a pull request description and returns a short, easy-to-understand summary.
To follow along, ensure you have access to the free Orkes Developer Edition.
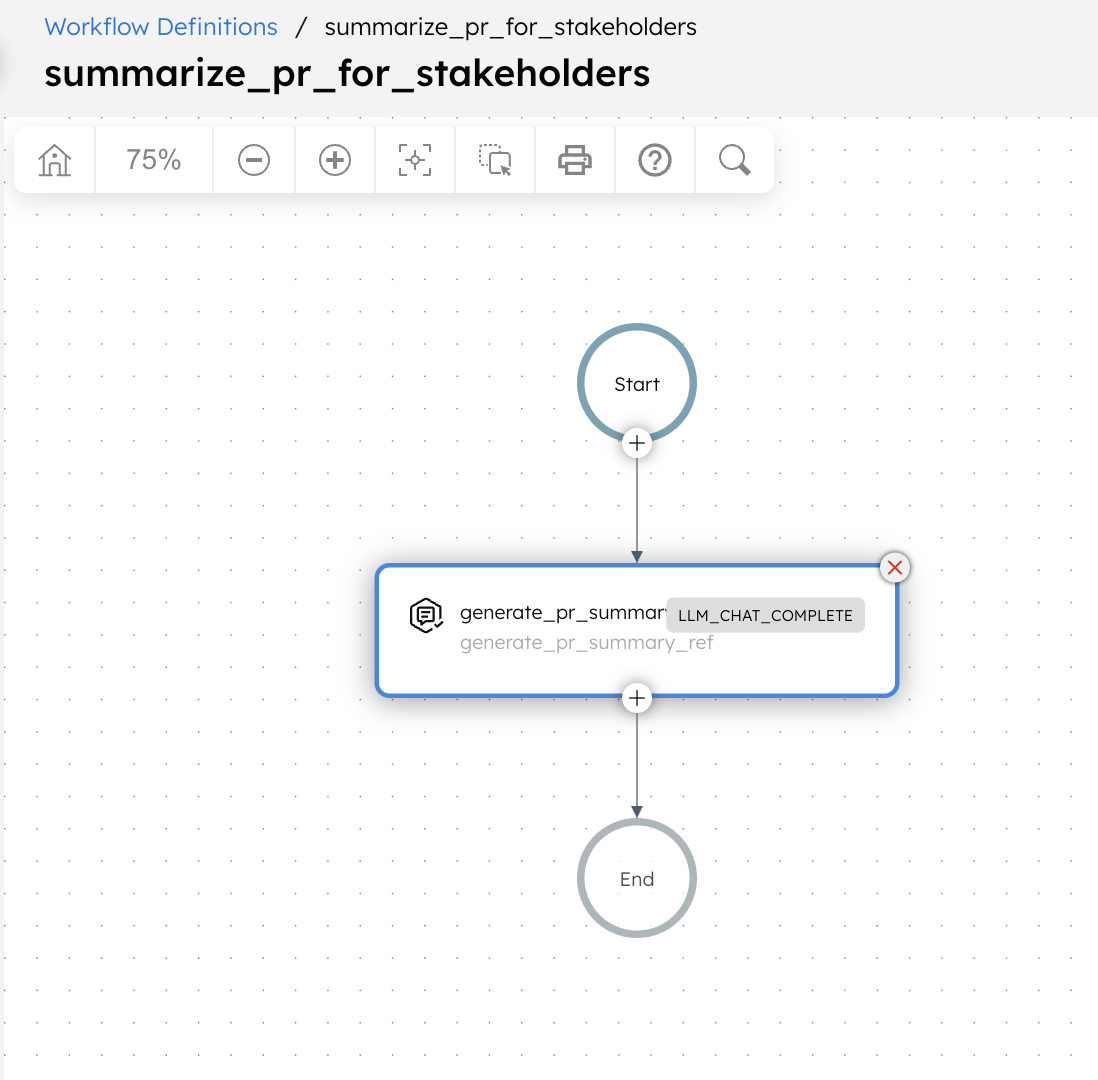
The pull request summary workflow
This workflow converts a technical pull request description into a high-level summary suitable for product managers, QA, or other stakeholders.
Here is the workflow that you’ll build in this tutorial:
Workflow input:
- pullRequestDescription: The pull request description written by an engineer.
Workflow logic:
- The workflow has a single LLM Chat Complete task that processes the pull request description using a predefined AI prompt.
- The AI prompt instructs the language model to focus on what changed and why the change matters, while avoiding code-level or implementation-specific details.
- The workflow then returns the generated summary as the final output.
Workflow output:
- summary: A concise, stakeholder-friendly summary of the pull request.
Step 1: Integrate an AI model provider
Add an OpenAI integration to your Conductor cluster, then add the required model.
Add OpenAI integration
To add an OpenAI integration:
- Get your OpenAI API Key from OpenAI’s platform.
- Go to Integrations from the left navigation menu on your Conductor cluster.
- Select + New integration.
- Create the integration by providing the following mandatory parameters:
- Integration name: “openAI”
- API Key:
<YOUR_OPENAI_API_KEY> - Description: “OpenAI Integration”
- Ensure that the Active toggle is switched on, then select Save.
The OpenAI integration has been added. The next step is to add a specific model.
Add models
To add a model:
- In the Integrations page, select the + button next to your newly-created OpenAI integration.
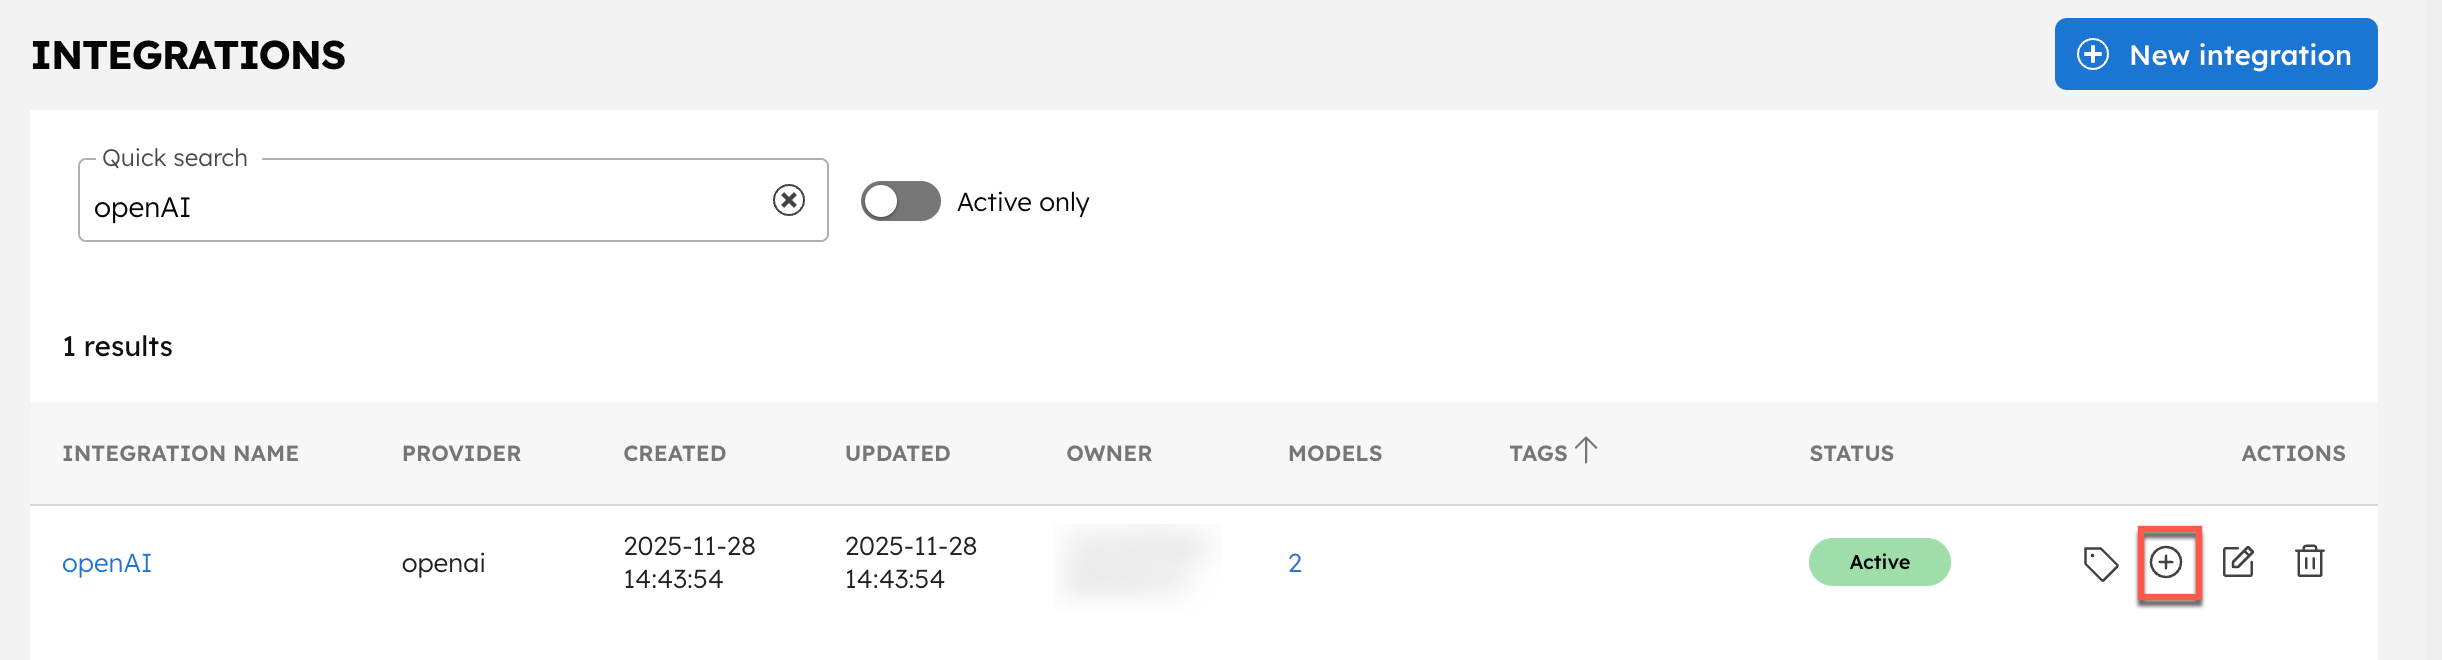
- Select + New model.
- Enter the Model Name as “chatgpt-4o-latest” and an optional description like “OpenAI’s chatgpt-4o-latest model”.
- Ensure that the Active toggle is switched on and select Save.
The integration is now ready to use. The next step is to create an AI prompt for the LLM Chat Complete task, which the workflow uses for summarization.
Step 2: Create and test the AI prompt
In this step, you define the prompt that controls how pull request descriptions are summarized.
Create the prompt
To create an AI prompt:
- Go to Definitions > AI Prompts from the left navigation menu on your Conductor cluster.
- Select + Add AI prompt.
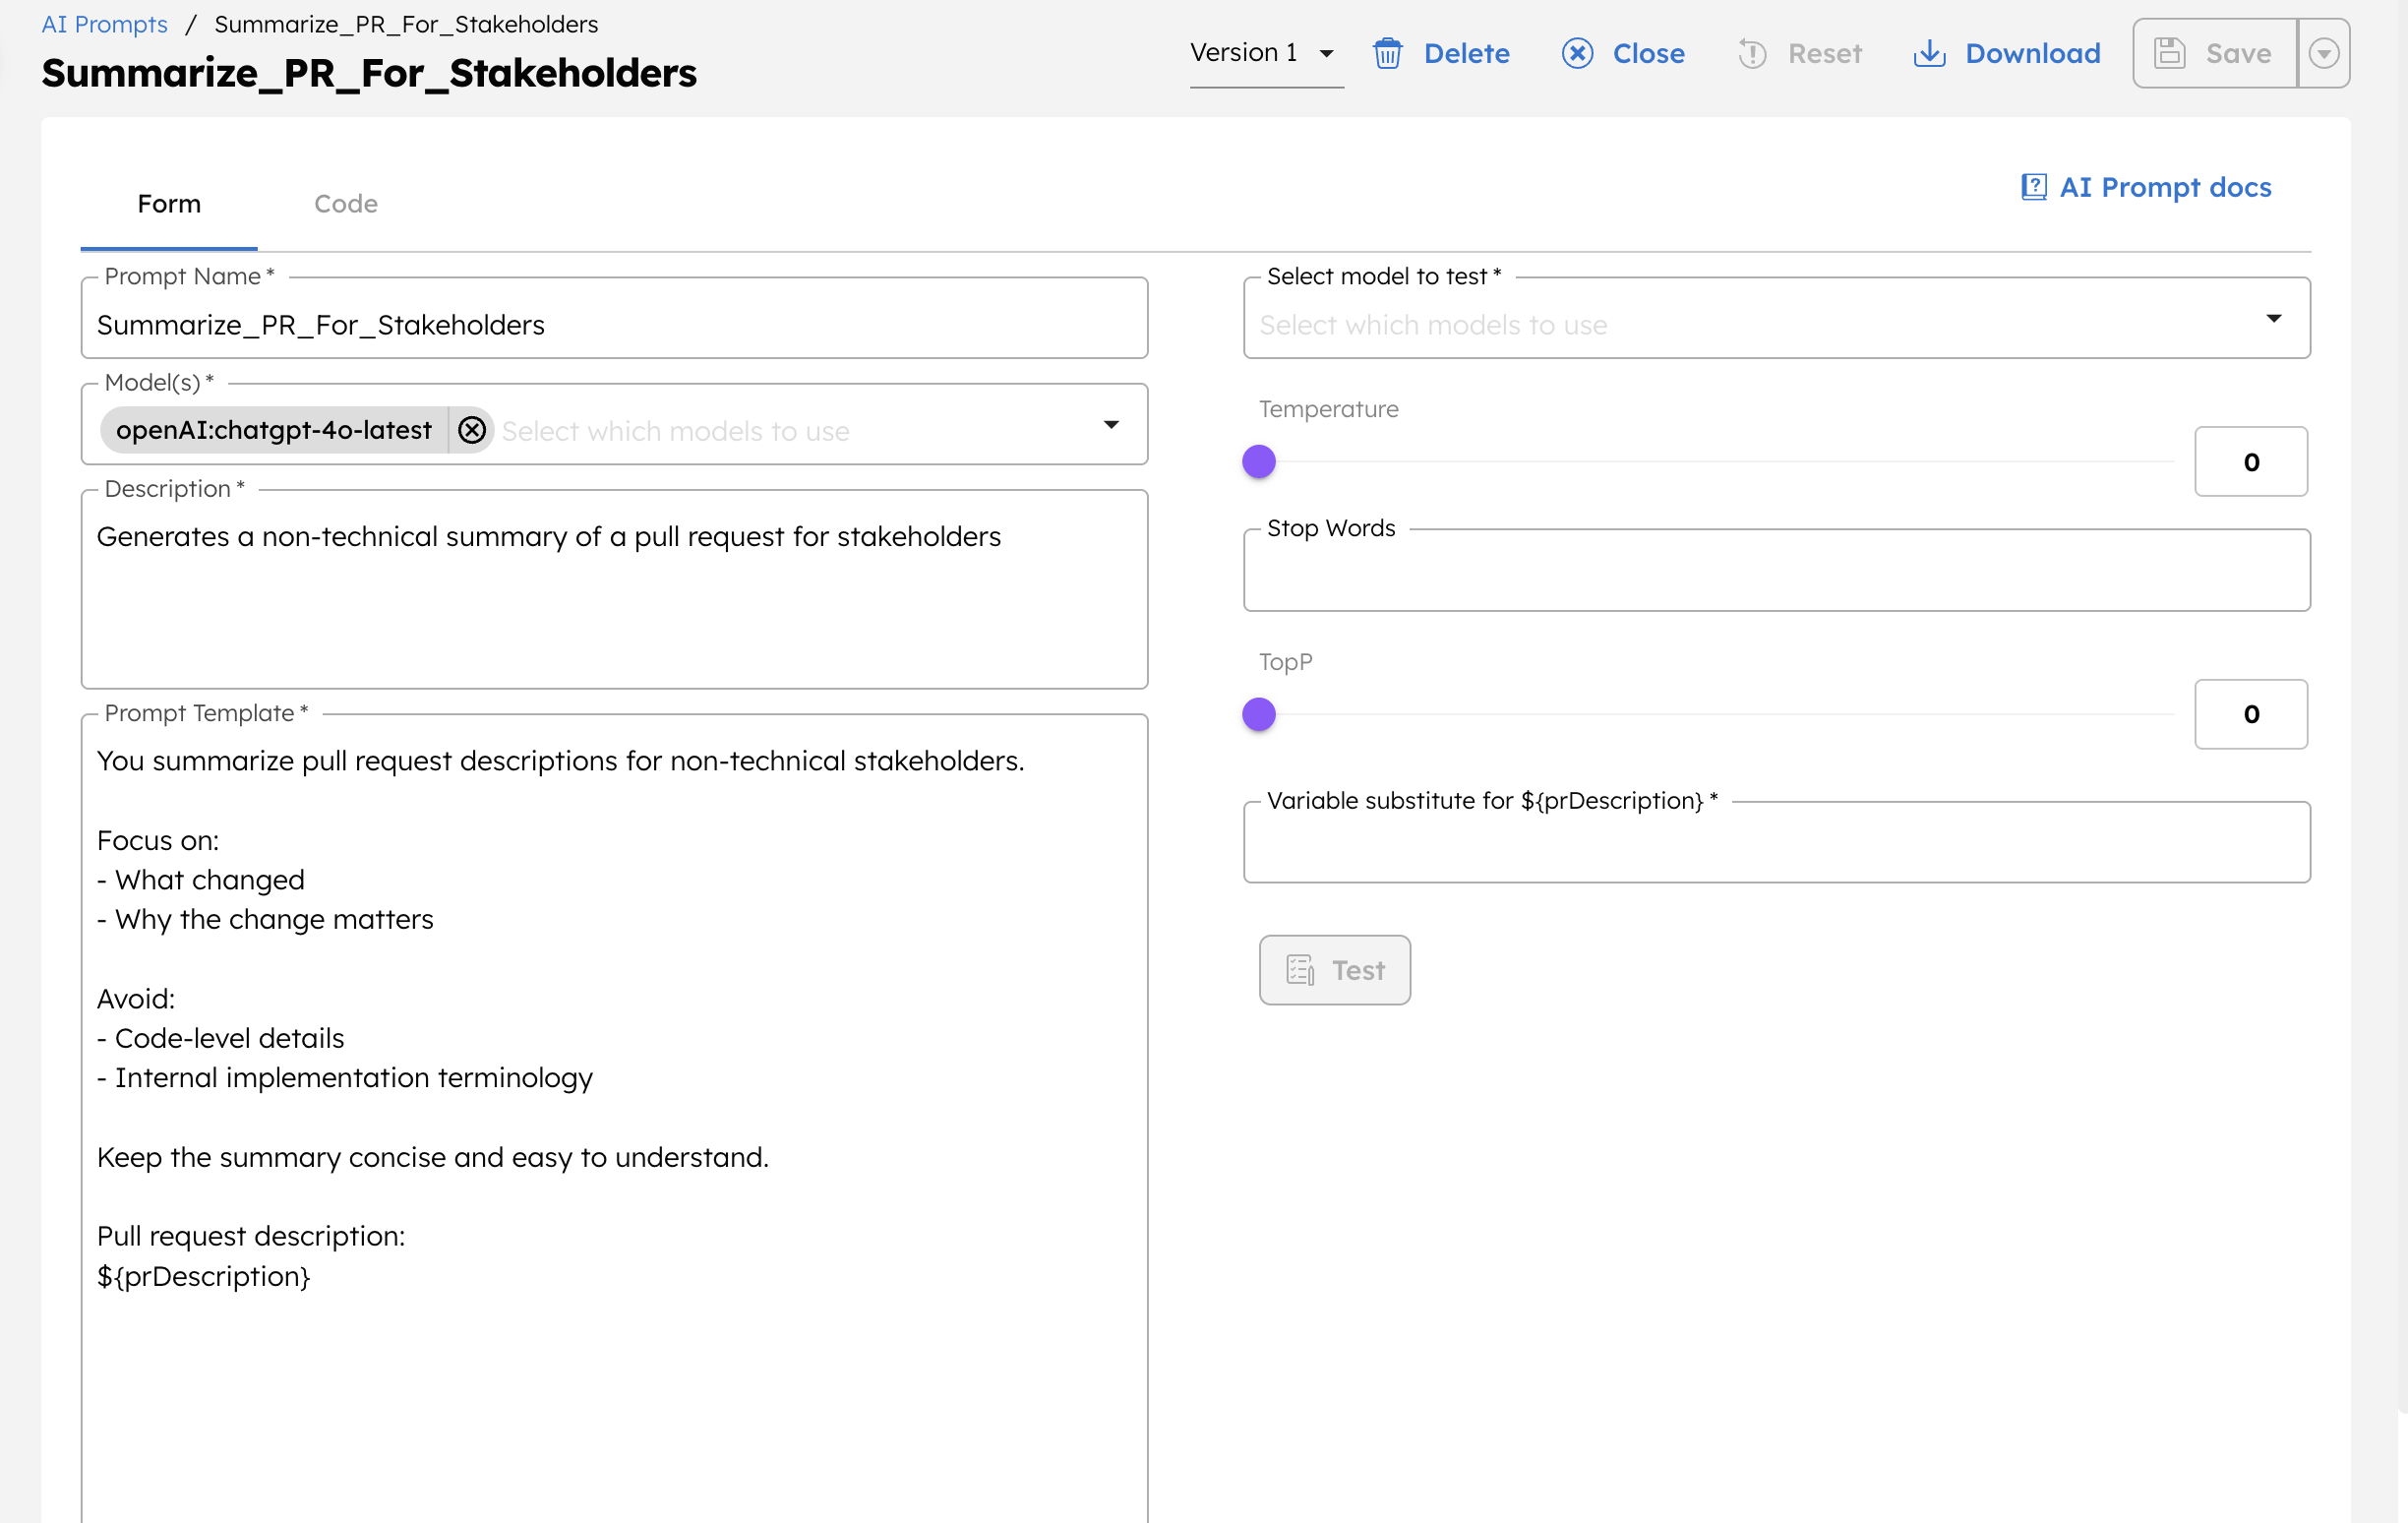
- In Prompt Name, enter a unique name for your prompt, such as Summarize_PR_For_Stakeholders.
- In Model(s), select the OpenAI integration you configured earlier. The dropdown lists the integration and its available models. Choose openAI:chatgpt-4o-latest for this prompt.
- Enter a Description of what the prompt does. For example: “Generates a non-technical summary of a pull request for stakeholders.”
- In Prompt Template, enter the following prompt:
You summarize pull request descriptions for non-technical stakeholders.

Focus on:
- What changed
- Why the change matters

Avoid:
- Code-level details
- Internal implementation terminology

Keep the summary concise and easy to understand.

Pull request description:
${prDescription}
- Select Save > Confirm save.
This saves your prompt.
Here, ${prDescription} is defined as a variable that will be provided by the workflow input. You can use the prompt testing panel to validate and refine the prompt before using it in a workflow.
Test the prompt
Use the built-in testing interface to validate the prompt behavior before adding it to a workflow.
To test the prompt:
- Select a model to test.
- Adjust the Temperature, Stop Words, and TopP for the model. For summarization tasks where accuracy and consistency are crucial, a lower temperature is typically more suitable.
- In the variable input fields, enter a sample pull request description.
- Select Test to generate the response.
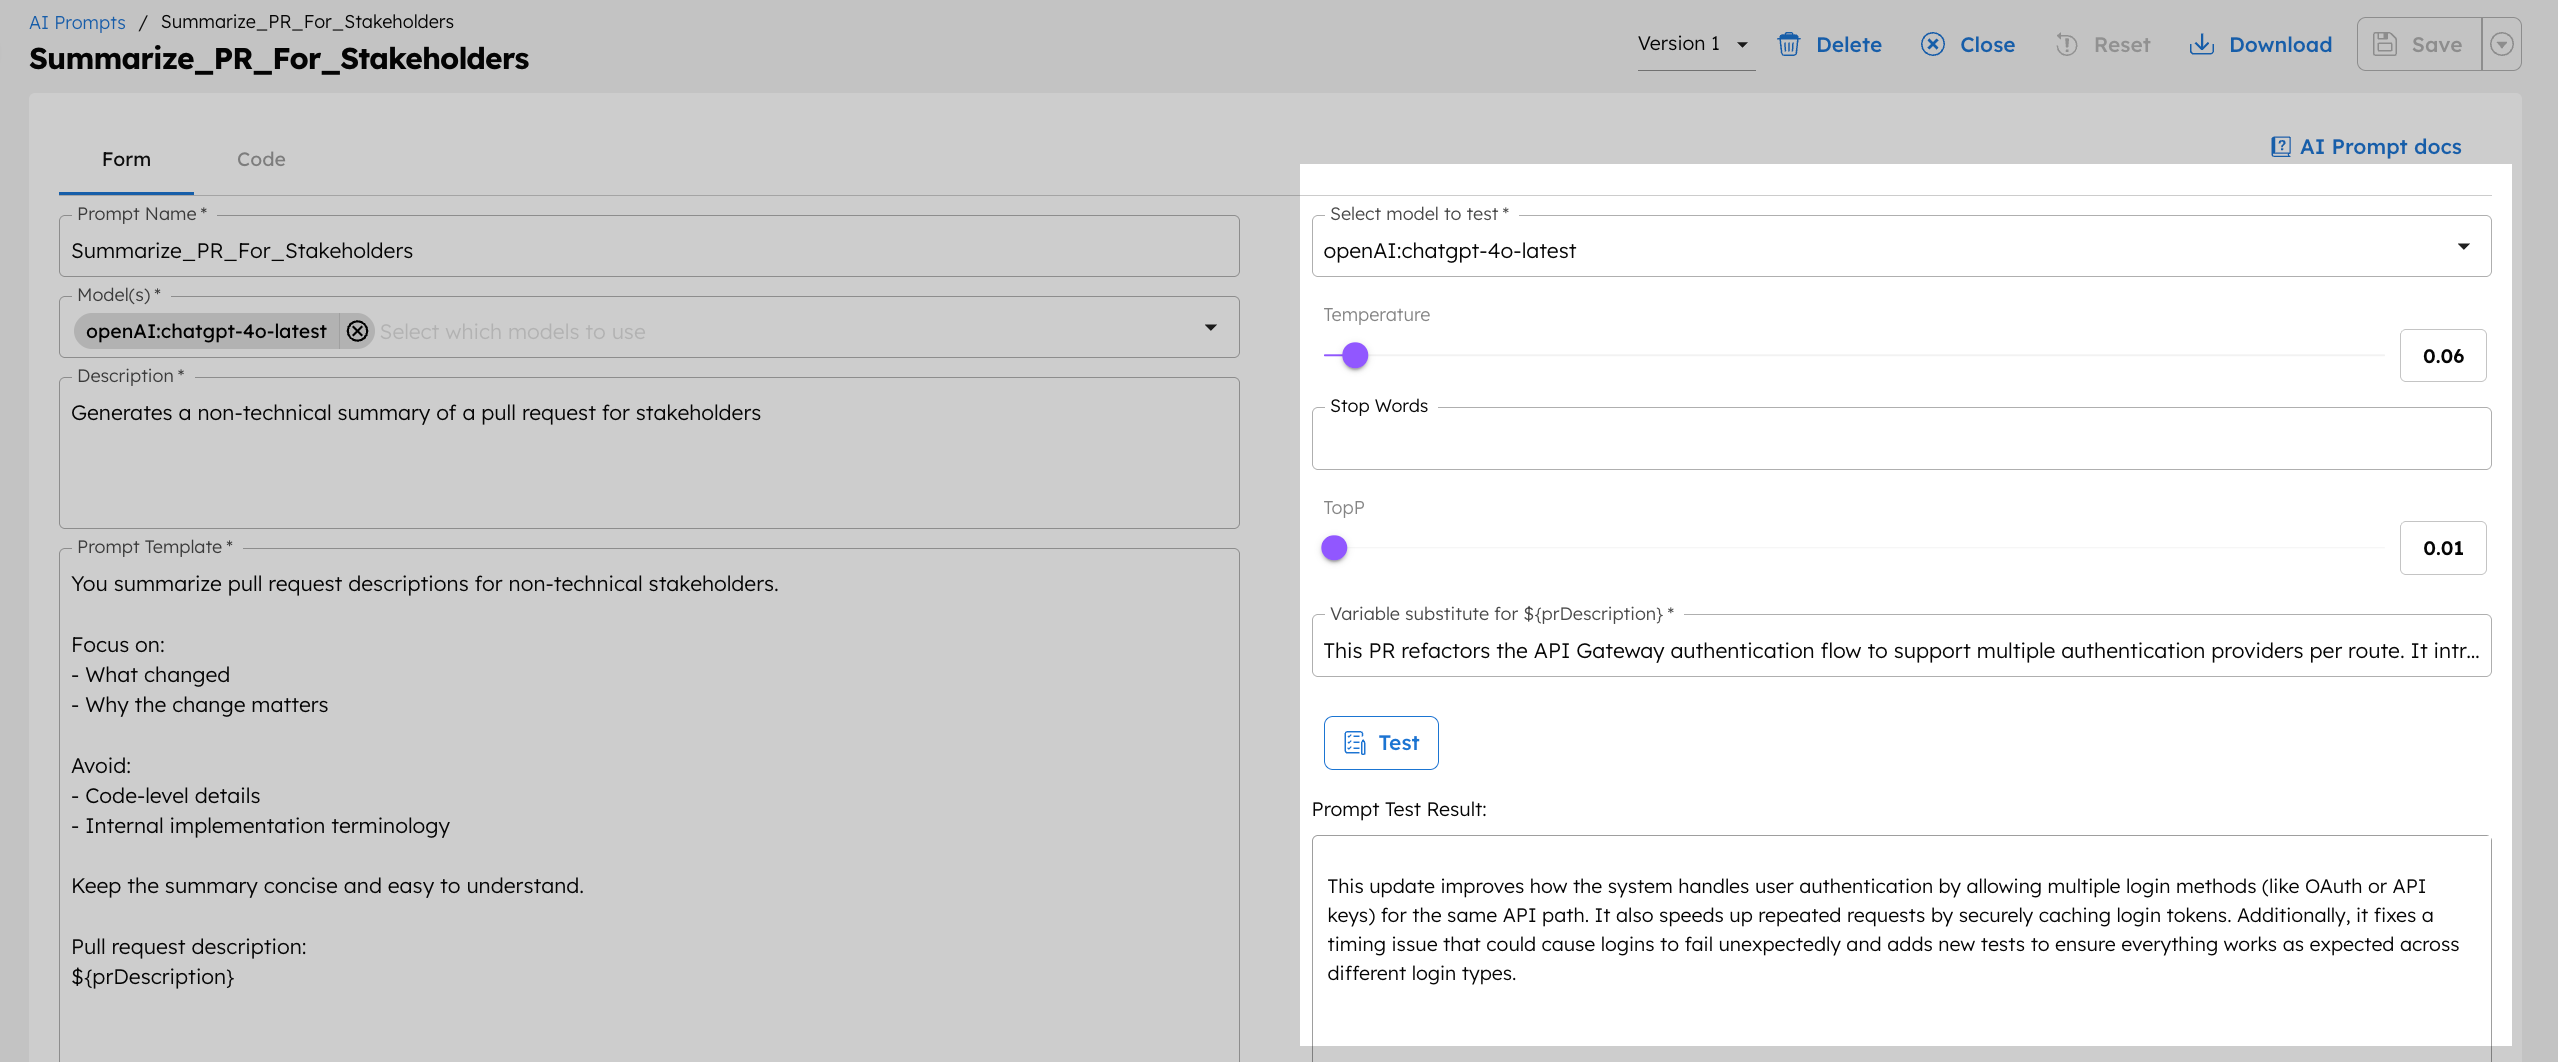
When testing, evaluate:
- Whether the summary is accurate and easy to understand
- Whether the output avoids implementation details
- How the prompt behaves with longer, shorter, or less structured input
Start with simple descriptions, then test more complex or jargon-heavy pull requests to ensure the prompt consistently produces reliable summaries.
Based on the results, refine the prompt template, finalize the model selection, and decide on the parameter values to use in your workflow.
Step 3: Create the pull request summary workflow
In this step, you create a workflow that uses the AI prompt to generate a stakeholder-friendly summary from a pull request description.
To create a workflow:
- Go to Definitions > Workflow and select + Define workflow.
- In the Code tab, paste the following JSON:
{
 "name": "summarize_pr_for_stakeholders",
 "description": "Summarize a pull request description for non-technical stakeholders",
 "version": 1,
 "tasks": [
   {
     "name": "generate_pr_summary",
     "taskReferenceName": "generate_pr_summary_ref",
     "inputParameters": {
       "llmProvider": "<YOUR-LLM-PROVIDER>",
       "model": "<YOUR-LLM-MODEL>",
       "instructions": "<YOUR-AI-PROMPT>",
       "messages": [
         {
           "role": "user",
           "message": "${workflow.input.pullRequestDescription}"
         }
       ],
       "temperature": 0.2,
       "topP": 0.9,
       "jsonOutput": false,
       "promptVariables": {
         "prDescription": "${workflow.input.pullRequestDescription}"
       }
     },
     "type": "LLM_CHAT_COMPLETE"
   }
 ],
 "inputParameters": [
   "pullRequestDescription"
 ],
 "outputParameters": {
   "summary": "${generate_pr_summary_ref.output.result}"
 },
 "schemaVersion": 2
}
- Select Save > Confirm.
- After saving, update the LLM Chat Complete task with your actual values:
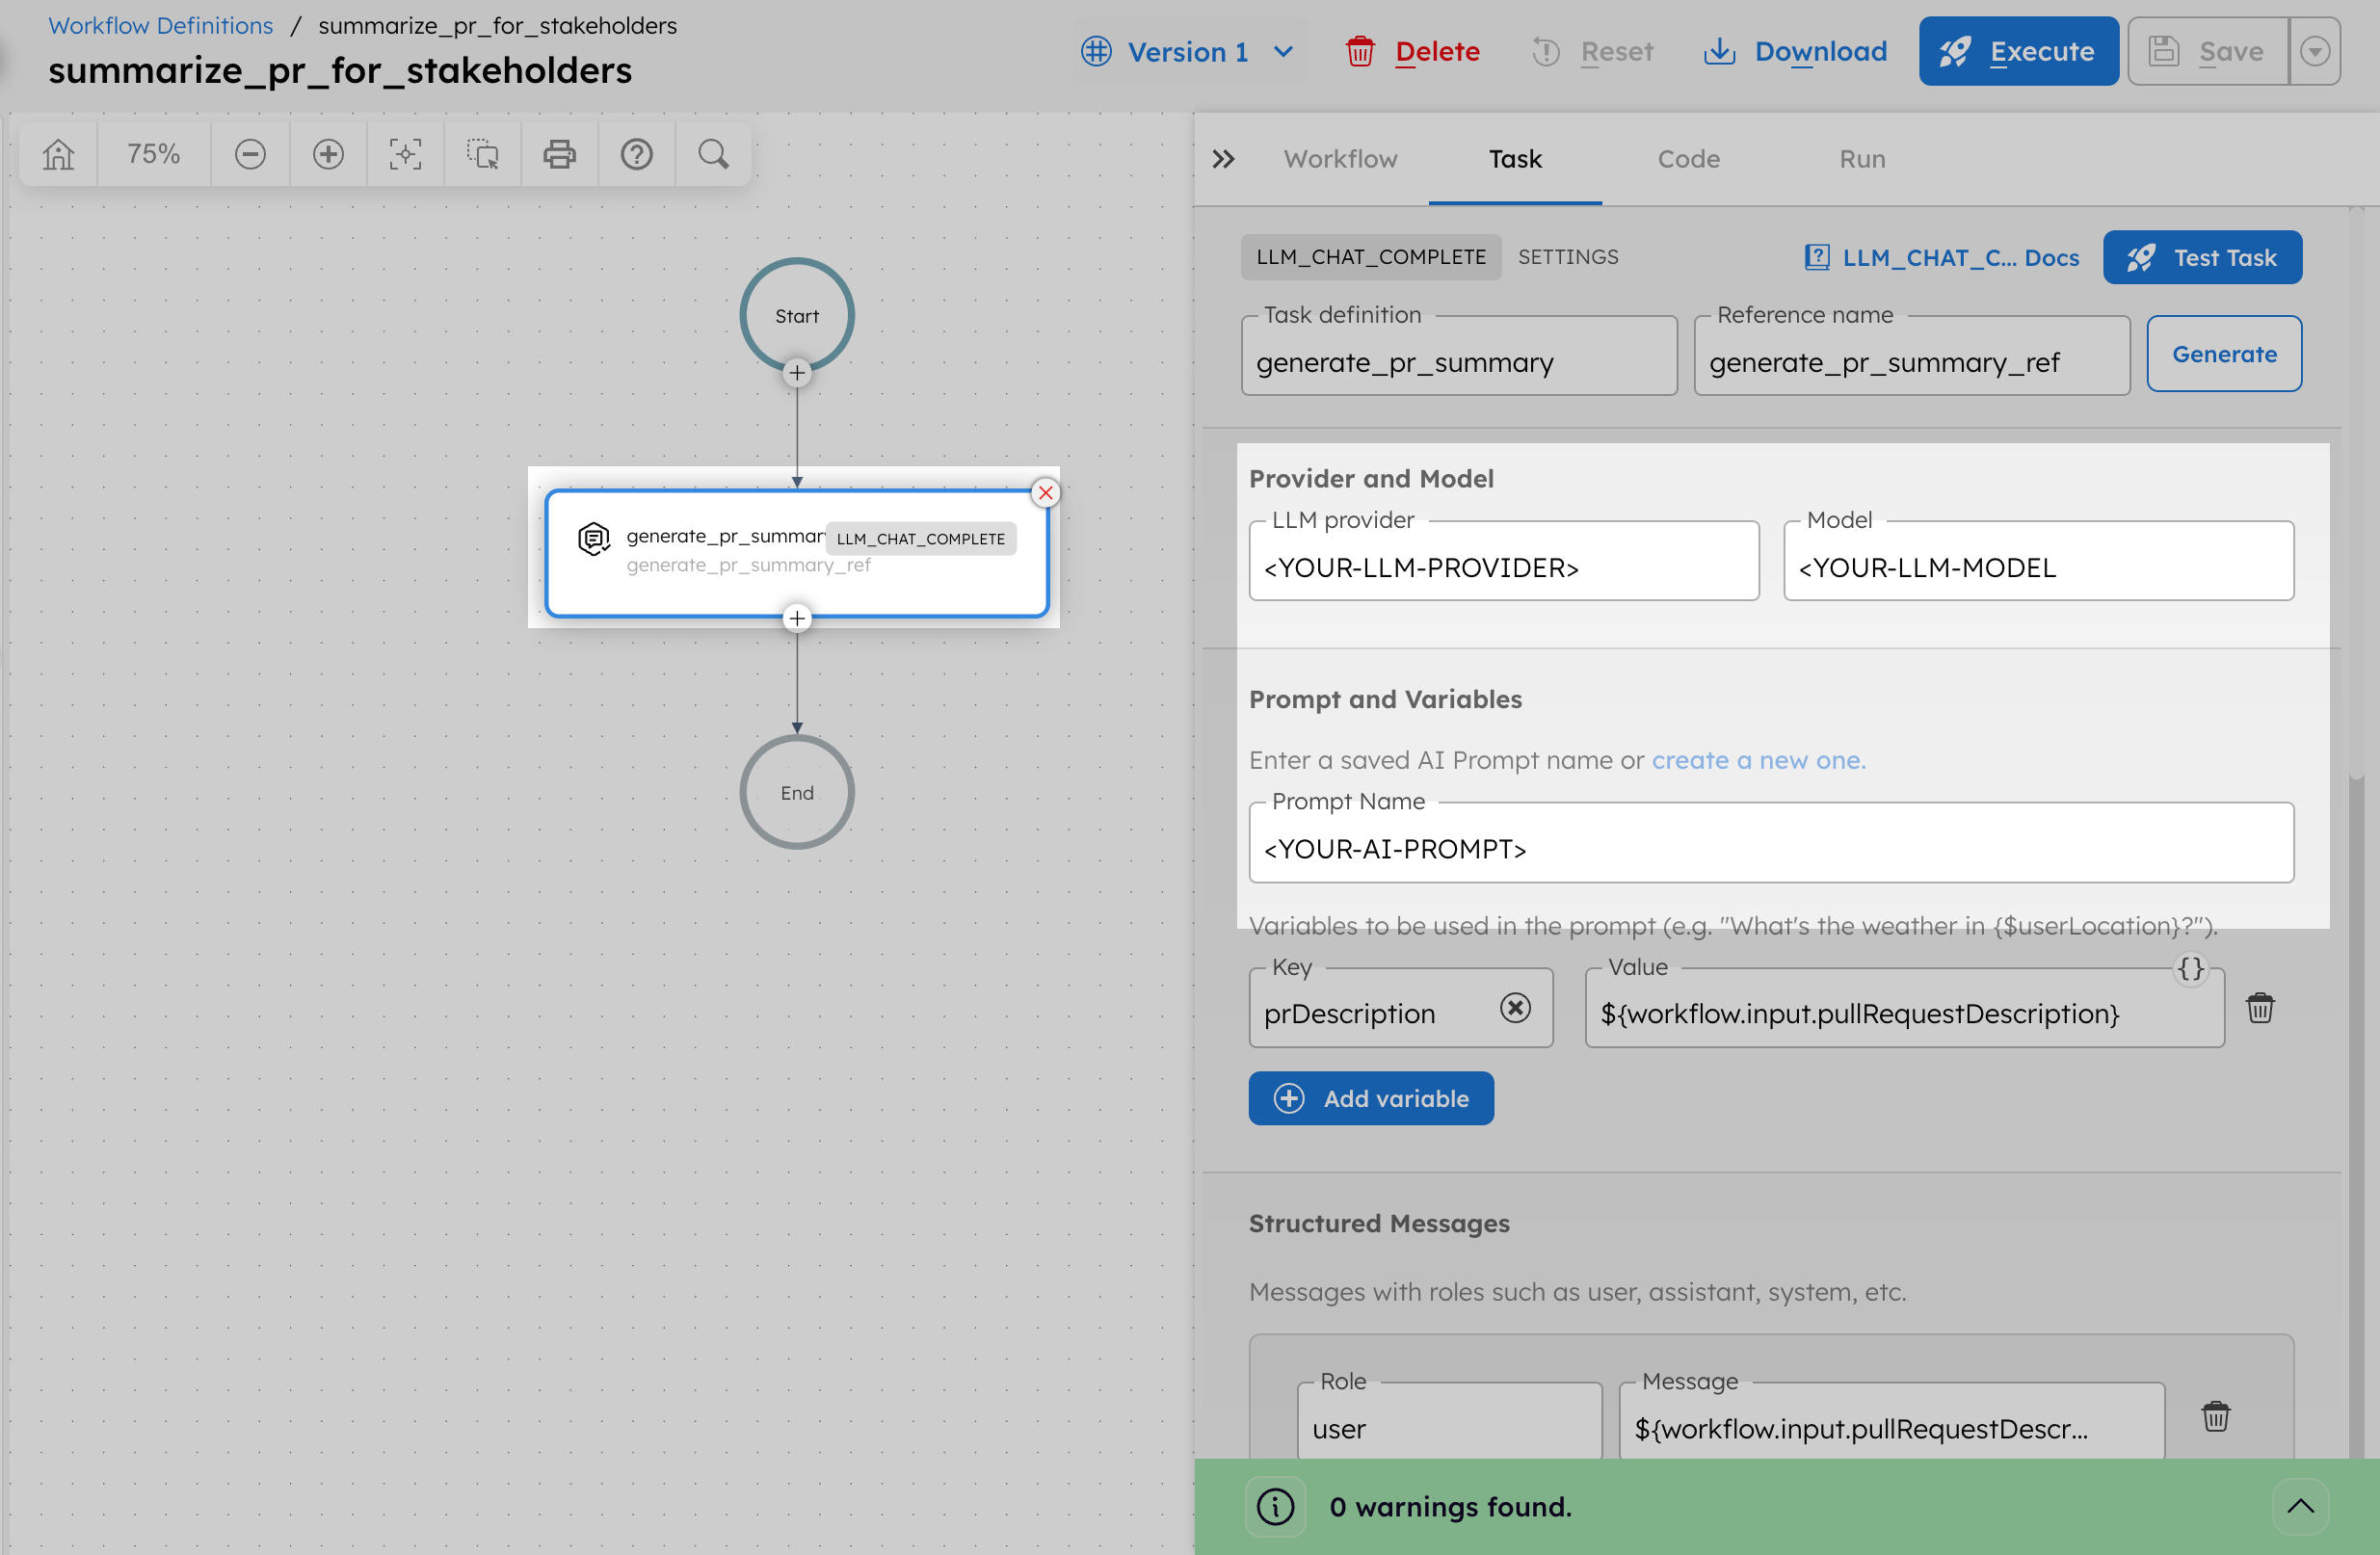
- In LLM provider, replace
<YOUR-LLM-PROVIDER>with your OpenAI integration name created in Step 1. - In Model, replace
<YOUR-LLM-MODEL>withchatgpt-4o-latest. - In Prompt Name, replace
<YOUR-AI-PROMPT>with your prompt created in Step 2. - Make sure to update the promptVariable as follows:
- prDescription -
${workflow.input.pullRequestDescription}
- prDescription -
- Select Save > Confirm.
Step 4: Run the workflow
To run the workflow using Conductor UI:
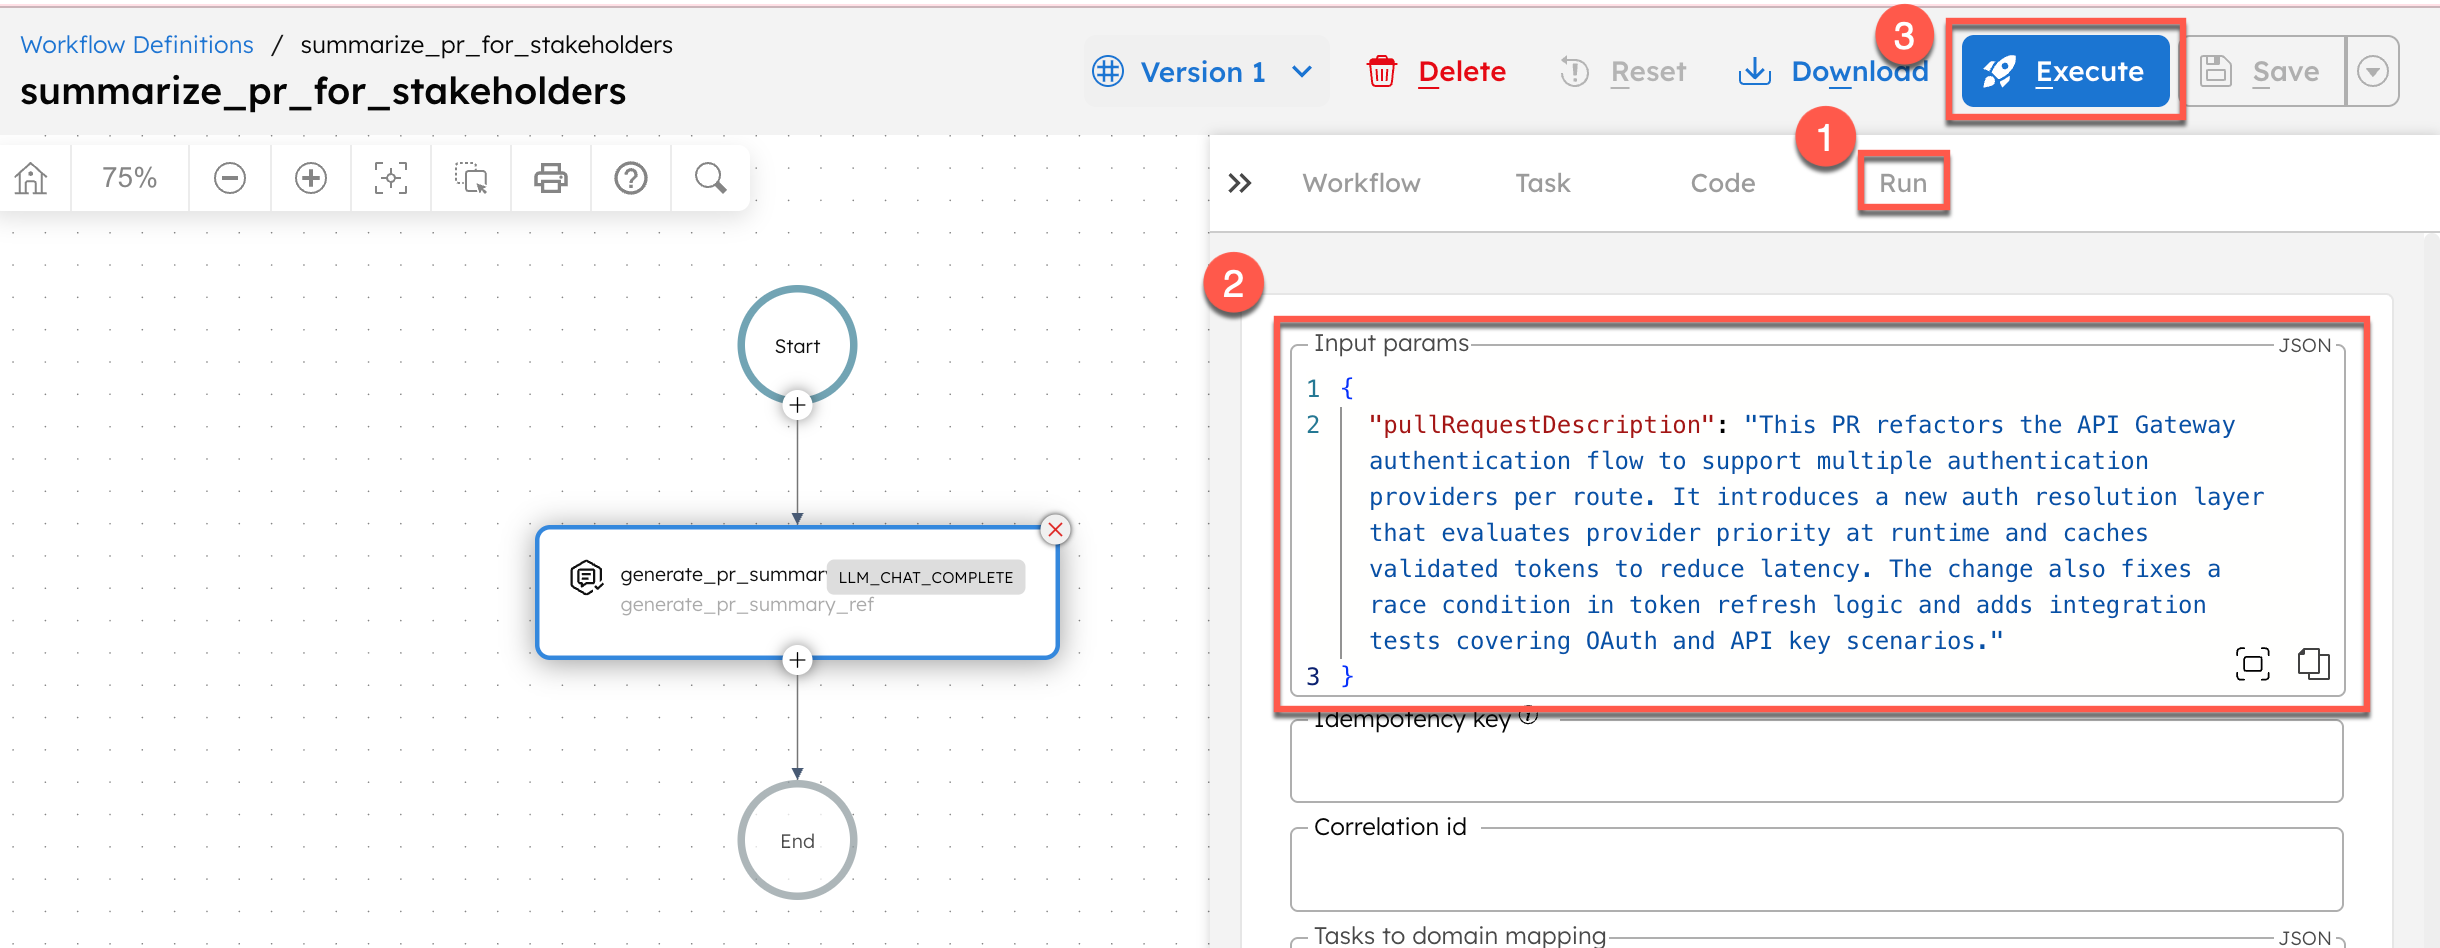
- From your workflow definition, go to the Run tab.
- Enter the Input Params.
// example input params
{
  "pullRequestDescription": "This PR refactors the API Gateway authentication flow to support multiple authentication providers per route. It introduces a new auth resolution layer that evaluates provider priority at runtime and caches validated tokens to reduce latency. The change also fixes a race condition in token refresh logic and adds integration tests covering OAuth and API key scenarios."
}
- Select Execute.
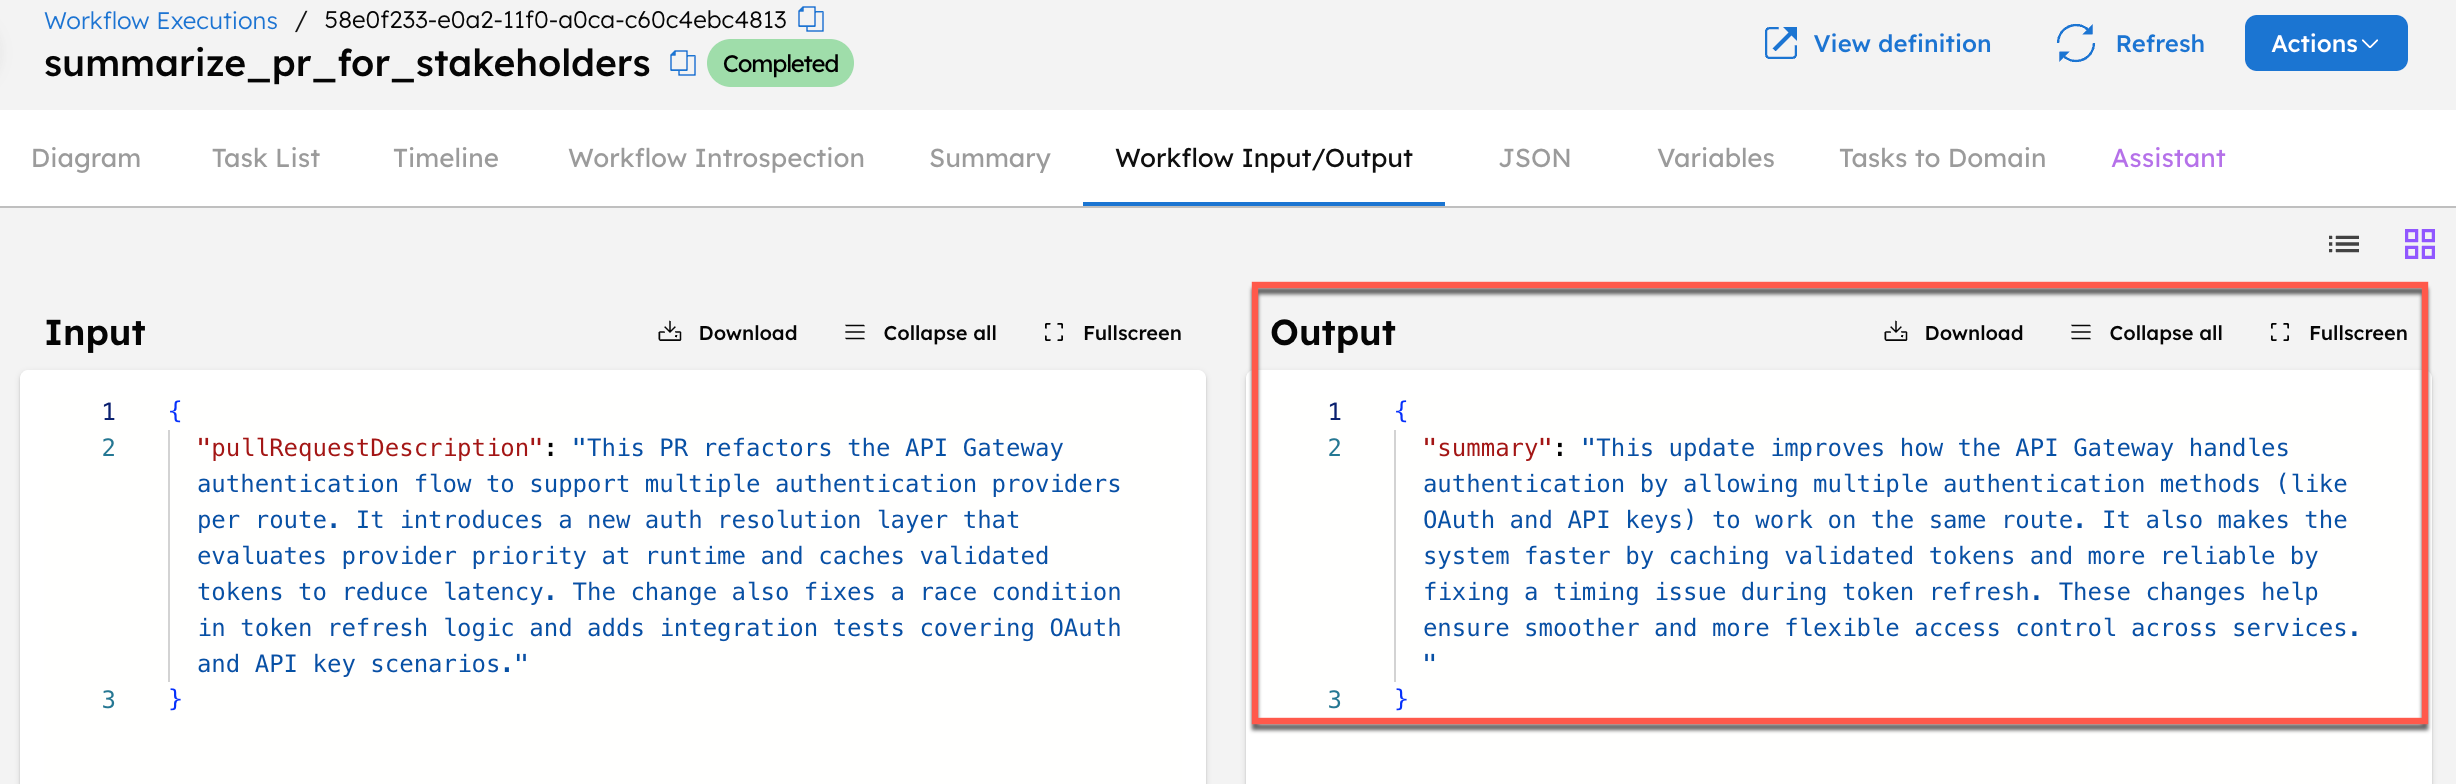
The workflow successfully converts a technical pull request description into a concise summary that can be shared with non-technical stakeholders.
You can also use the LLM Text Complete task for simple prompt-based text generation. LLM Chat Complete can be used when you need chat-style instructions and role-based context, which provides better control over how the model interprets and completes the job.