Build a Text Indexing and Search Workflow
This tutorial shows how to build a text-based knowledge base in Orkes Conductor by indexing text and retrieving it using LLM tasks.
The solution uses two workflows:
- One workflow indexes text into a vector database.
- A second workflow searches the indexed content and generates an answer using the top result.
In this tutorial, you will:
- Integrate an AI model provider
- Integrate Pinecone as the vector database
- Build a workflow to index text using LLM Index Text task
- Build a workflow to search indexed text and generate an answer
- Run the workflows and verify the response
To follow along, ensure you have access to the free Orkes Developer Edition.
The text knowledge base workflows
The tutorial uses two workflows that work together.
- KB_Index_Text: Indexes text content into a vector database.
- KB_Search_And_Answer: Searches the indexed content and generates an answer using the top match.
Workflow 1: Index text into the knowledge base
This workflow indexes a block of text into Pinecone using an embedding model. The workflow does not return the indexed content. Its purpose is to make the text available for semantic search.
Here is how the workflow looks like:

Workflow input:
- docId: A unique identifier for the indexed text.
- text: The text content to index.
- title: A title for the content.
- source: The source of the text, such as a document name or URL.
Workflow logic:
The workflow uses an LLM Index Text task to:
- Generate embeddings from the input text
- Store the embeddings in Pinecone
- Attach metadata, including the original text, for later retrieval
Storing the original text in metadata allows the search workflow to use it directly as answer context.
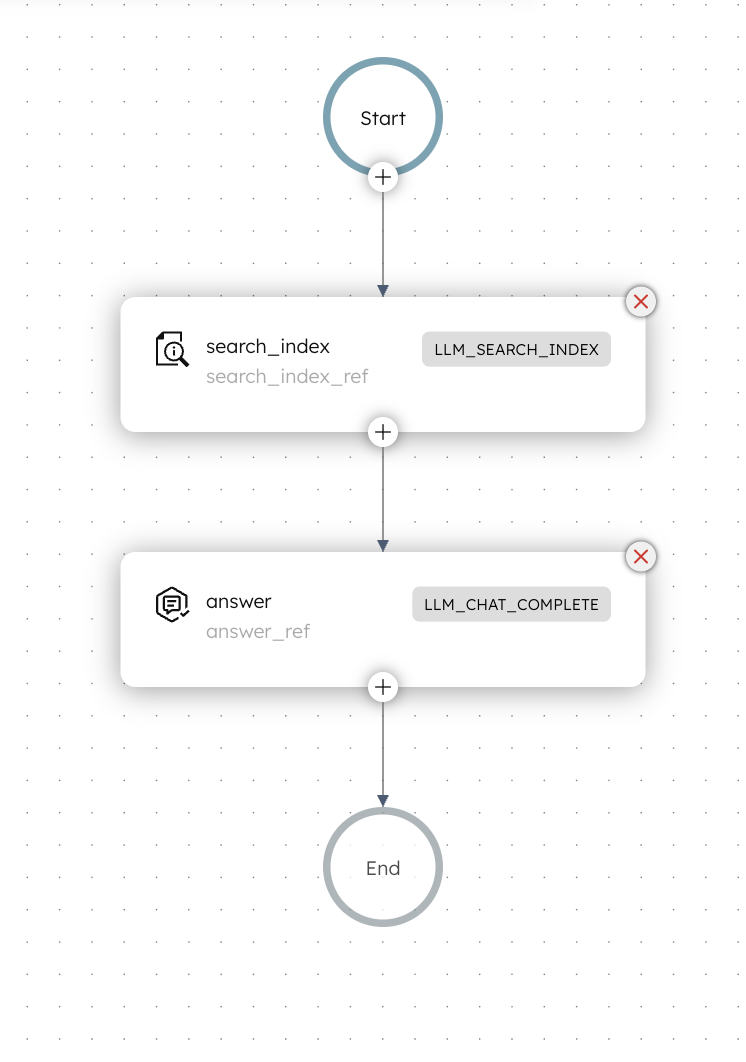
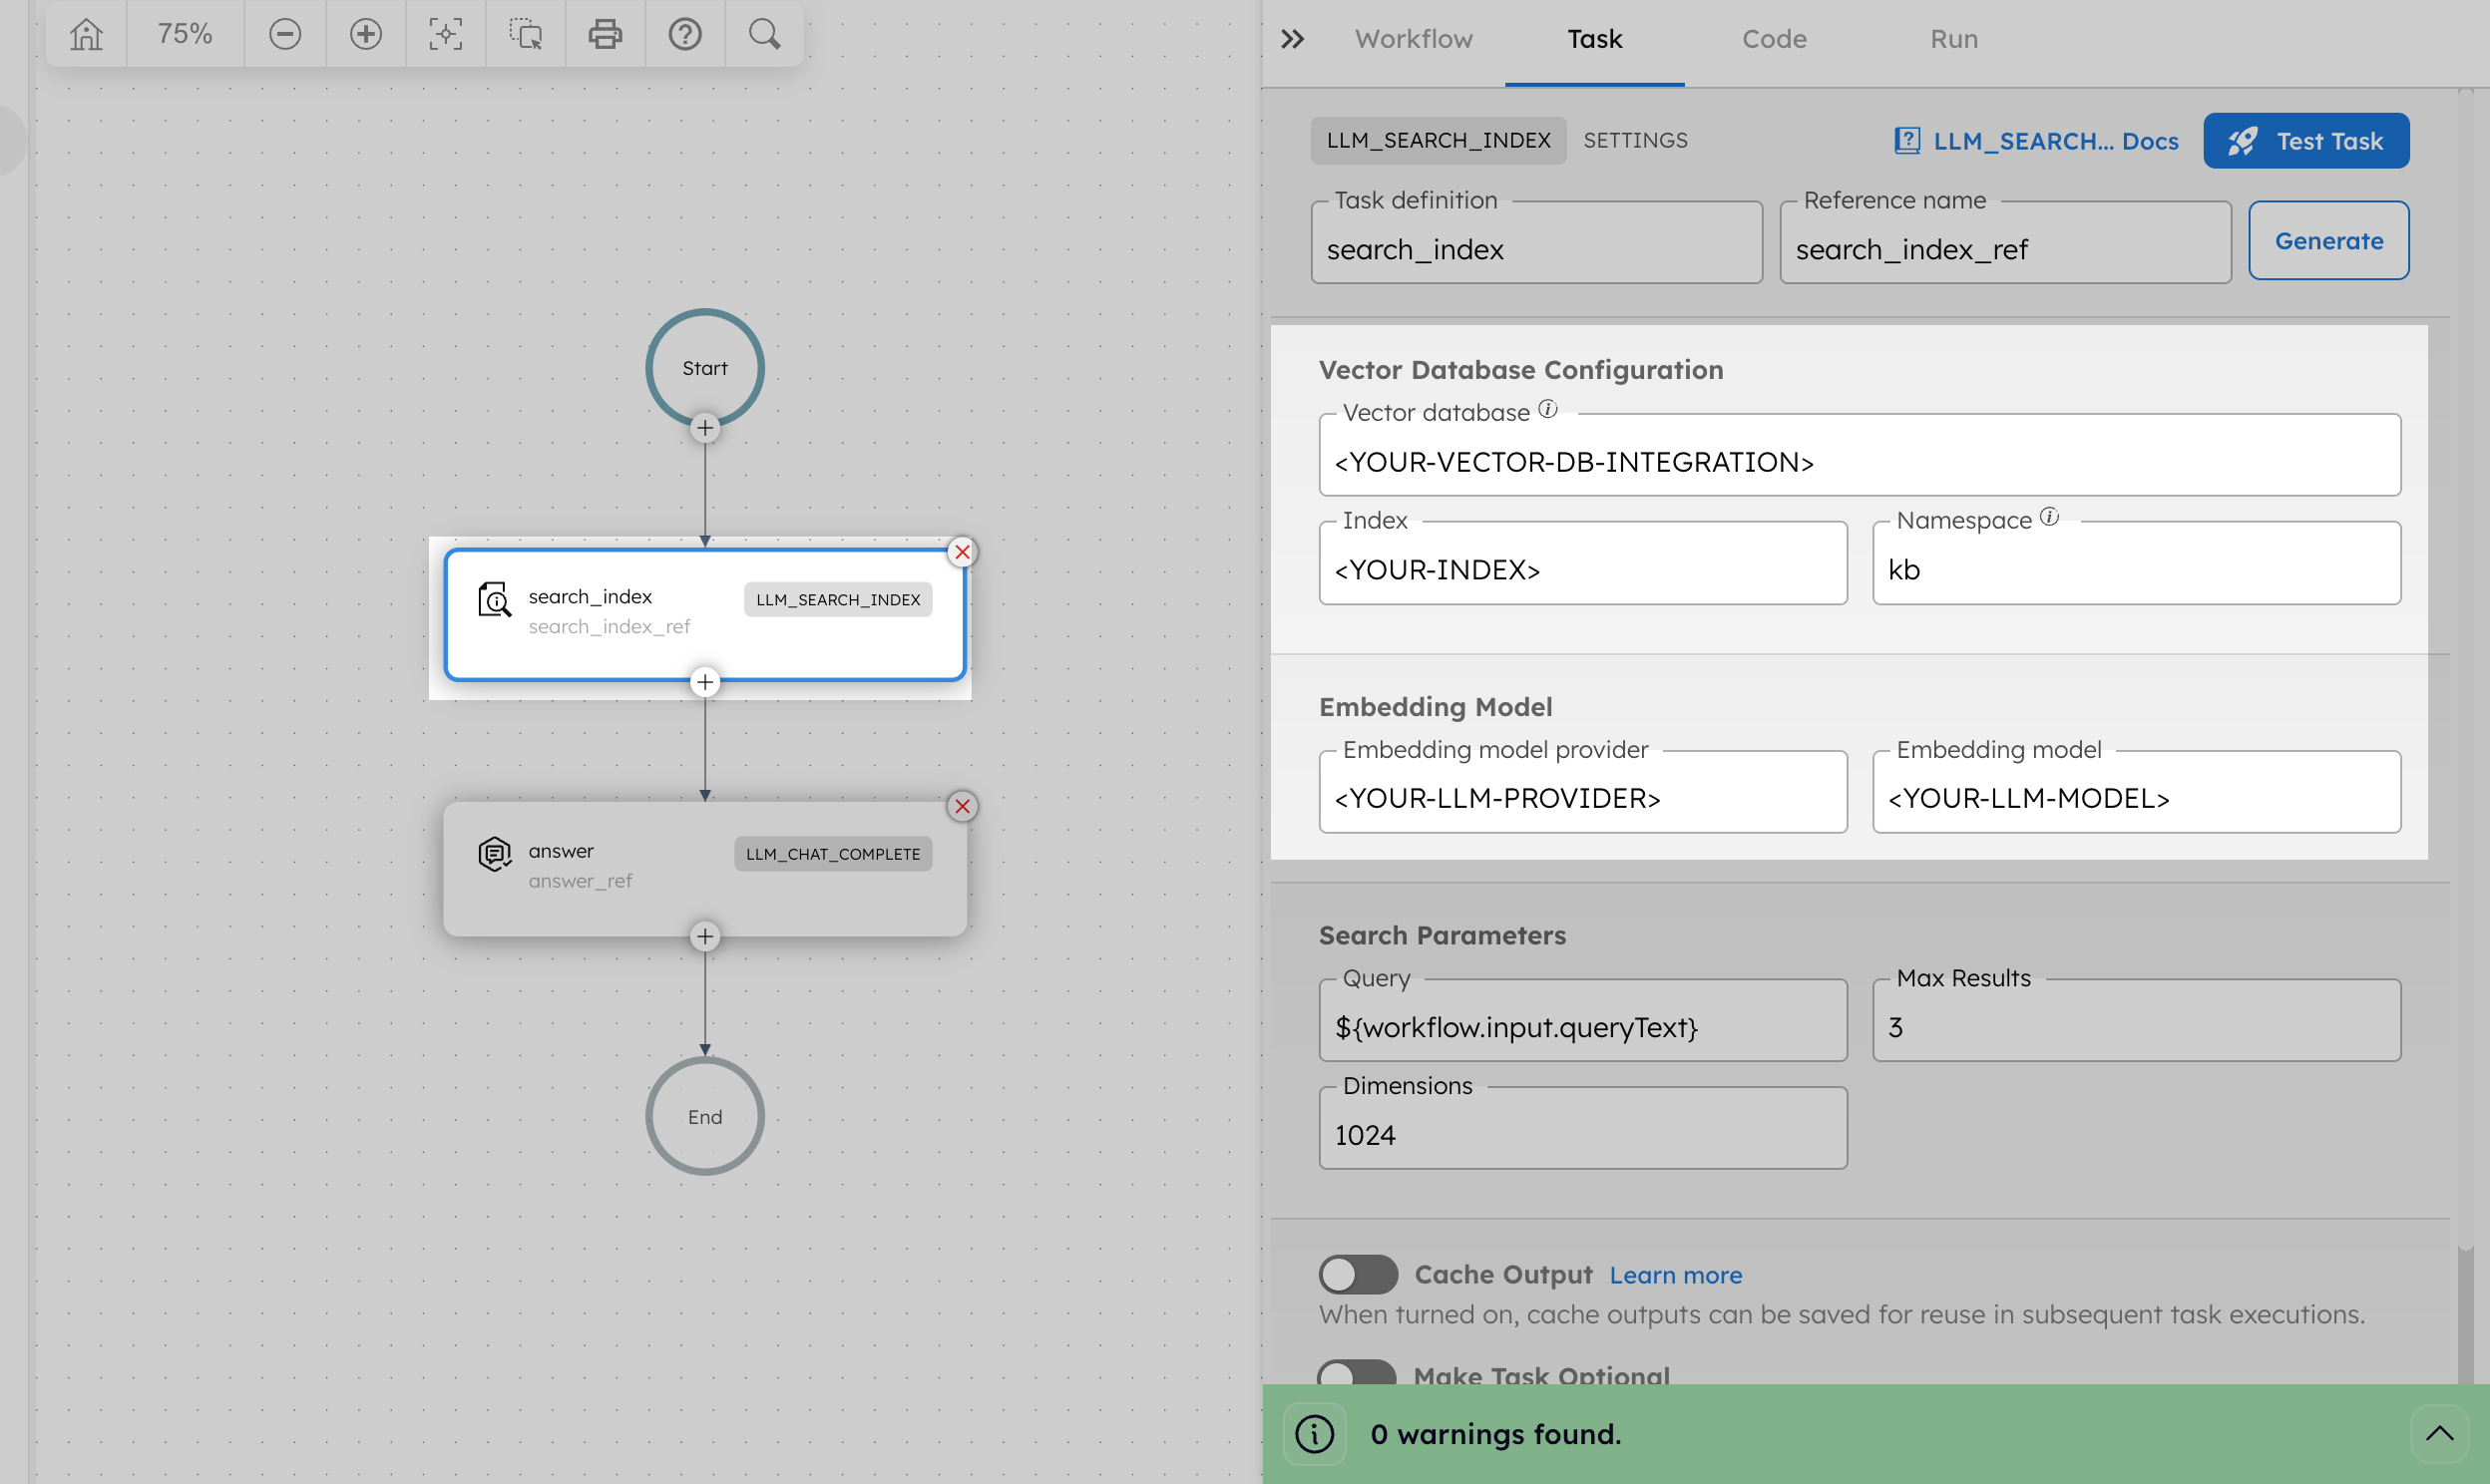
Workflow 2: Search indexed text and generate an answer
This workflow searches the previously indexed content and generates an answer using only the top search result.
Here is how the workflow looks like:
Workflow input
- queryText: The question or query used to search the knowledge base.
Workflow logic
- The workflow begins with an LLM Search Index task that converts the query into an embedding and performs a similarity search against the indexed content.
- An LLM Chat Complete task then generates an answer using only the text stored in the metadata of the top search result.
This ensures that the answer is grounded in indexed data.
Step 1: Integrate an AI model provider
Add an OpenAI integration to your Conductor cluster, then add the required model.
Add OpenAI integration
To add an OpenAI integration:
- Get your OpenAI API Key from OpenAI’s platform.
- Go to Integrations from the left navigation menu on your Conductor cluster.
- Select + New integration.
- Create the integration by providing the following mandatory parameters:
- Integration name: “openAI”
- API Key:
<YOUR_OPENAI_API_KEY> - Description: “OpenAI Integration”
- Ensure that the Active toggle is switched on, then select Save.
The OpenAI integration has been added. The next step is to add a specific model.
Add models
You will add two models to your OpenAI integration:
- text-embedding-3-large – Used to generate embeddings from the input text.
- gpt-4o – Used to generate an answer using the retrieved context.
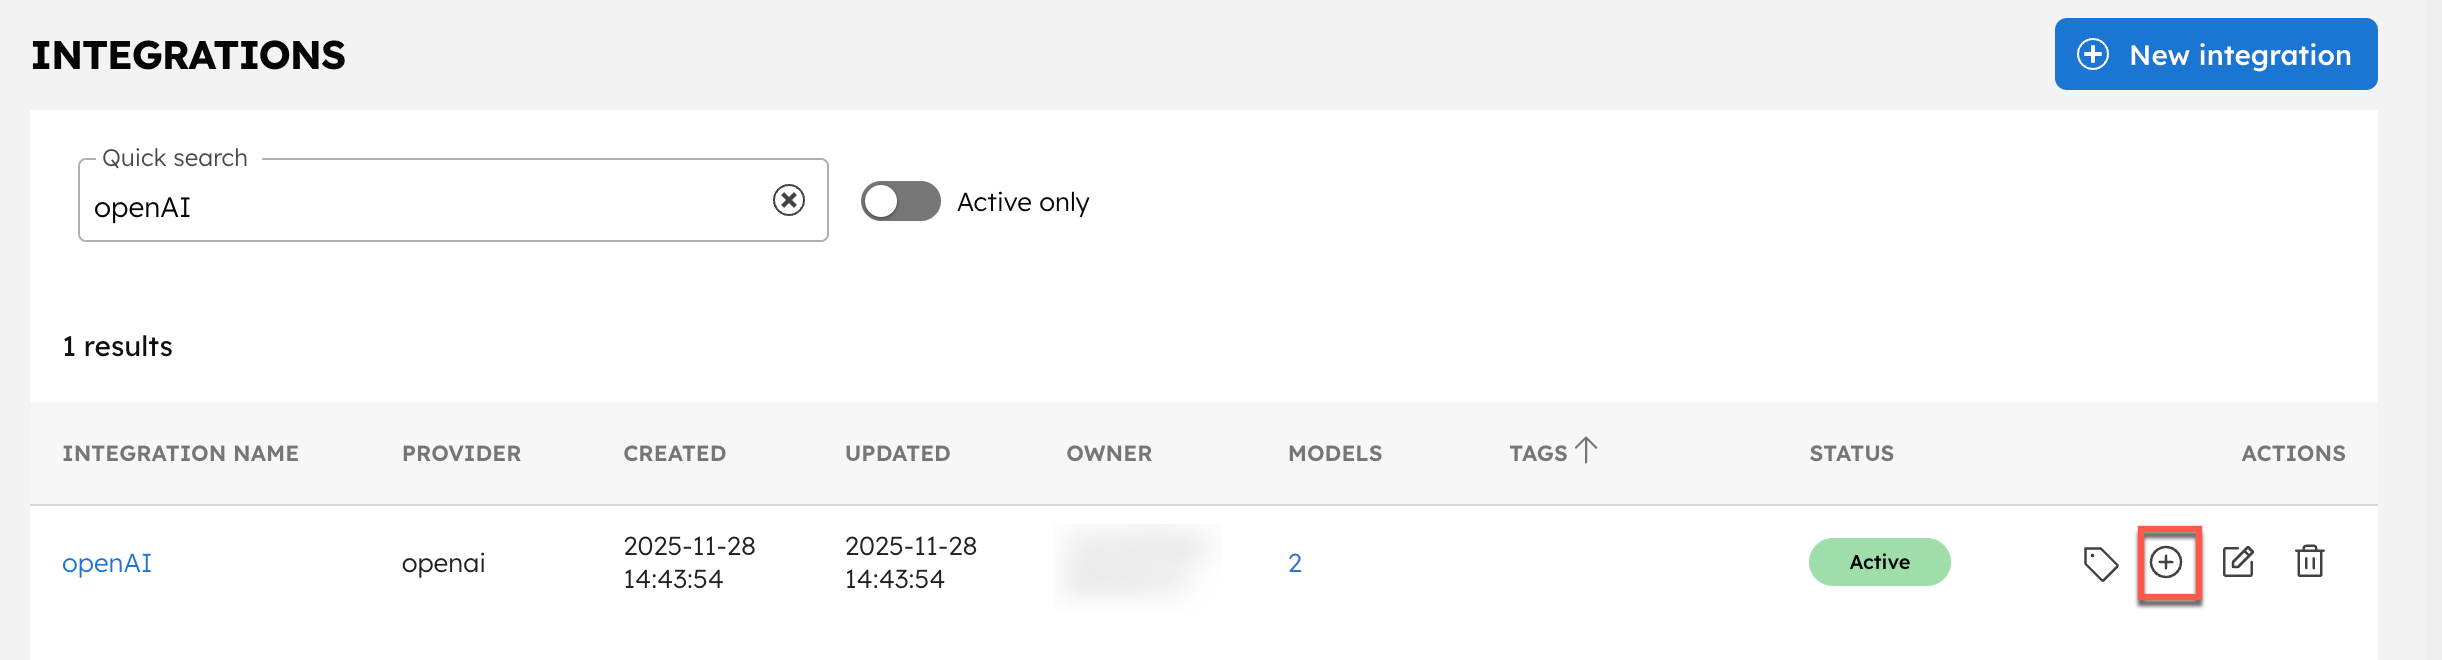
To add a model:
- In the Integrations page, select the + button next to your newly-created OpenAI integration.
- Select + New model.
- Enter the Model Name as “text-embedding-3-large” and an optional description like “OpenAI’s text-embedding-3-large model”.
- Ensure that the Active toggle is switched on and select Save.
Repeat the steps and create a model for gpt-4o.
Step 2: Integrate Pinecone as the vector database
The workflow uses Pinecone to store and retrieve embedding vectors. Add a Pinecone integration to your Conductor cluster and create the index required for this workflow.
Get credentials from Pinecone
To get your Pinecone credentials:
- Log in to the Pinecone console, and get the API key and project ID.
- Create an index, setting the Configuration to text-embedding-3-large and the Dimension to 3072.
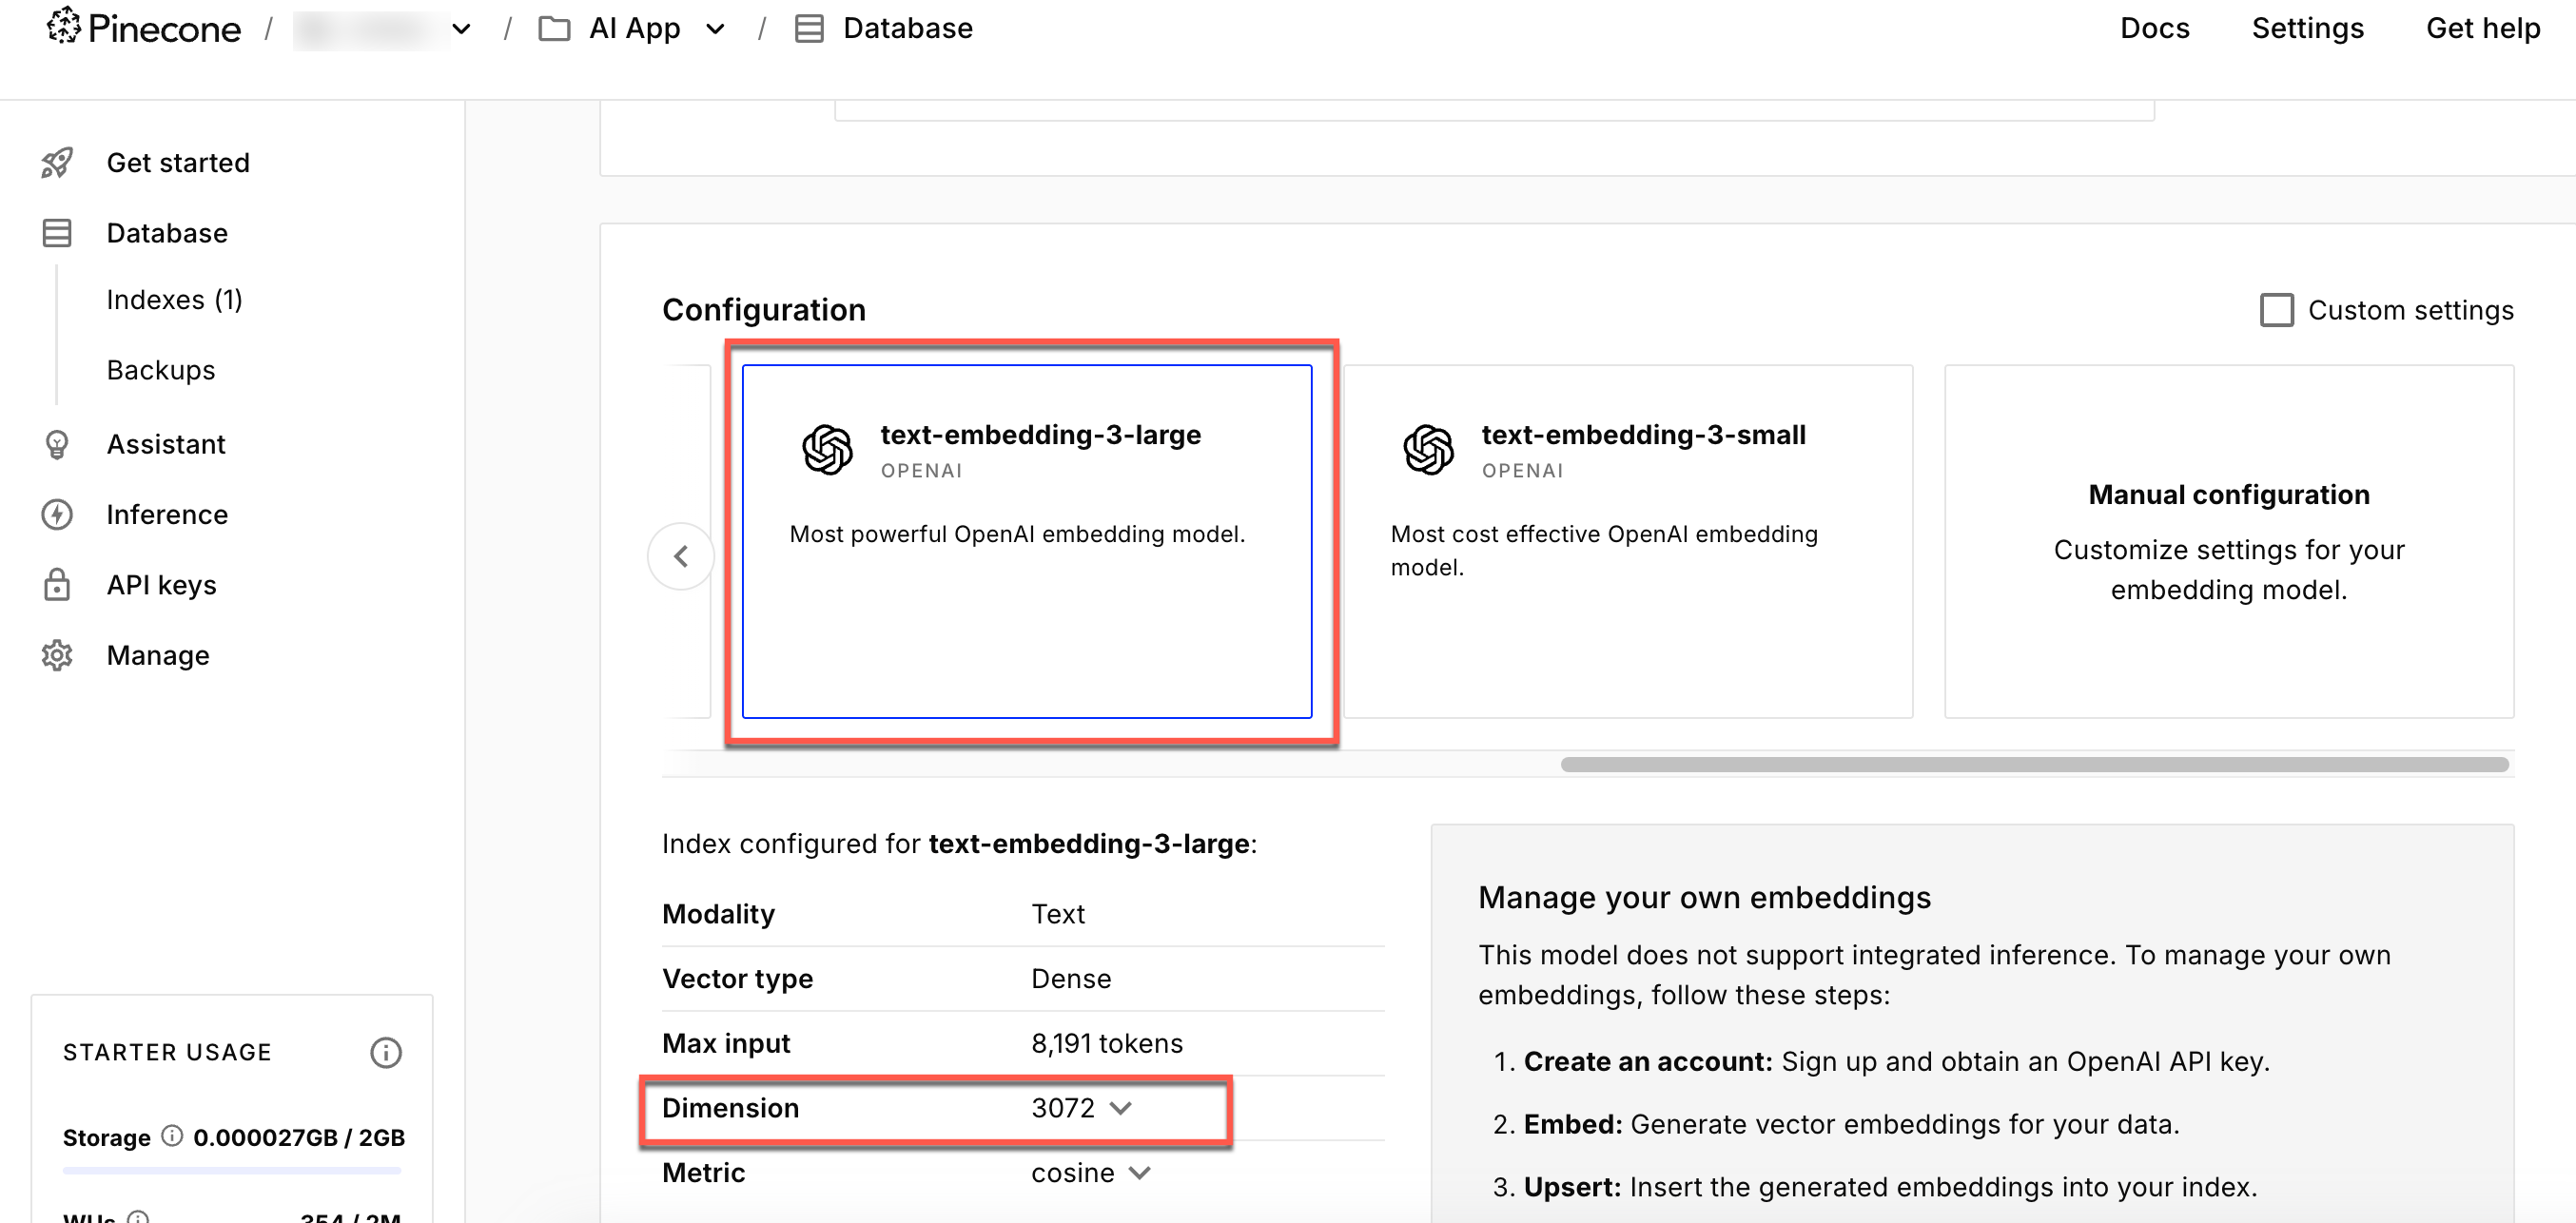
- Note the index name, as you will need to reference it when setting up the Pinecone integration in Conductor.
Your Pinecone index must be configured with this same dimension to store and query embeddings correctly. A mismatched dimension will cause Conductor workflow failures.
Add Pinecone integration
To create a Pinecone integration in Conductor:
- Go to Integrations from the left navigation menu on your Conductor cluster.
- Select + New integration.
- Create the integration by providing the following details:
- Integration name: Enter Pinecone.
- API Key:
<YOUR-PINECONE-API-KEY>. - Project name:
<YOUR-PINECONE-PROJECT-NAME>. - Environment: Your index’s region name.
- Description: An optional description.
- Ensure that the Active toggle is switched on, then select Save.
Add indexes
The next step is to add the index to the Conductor cluster.
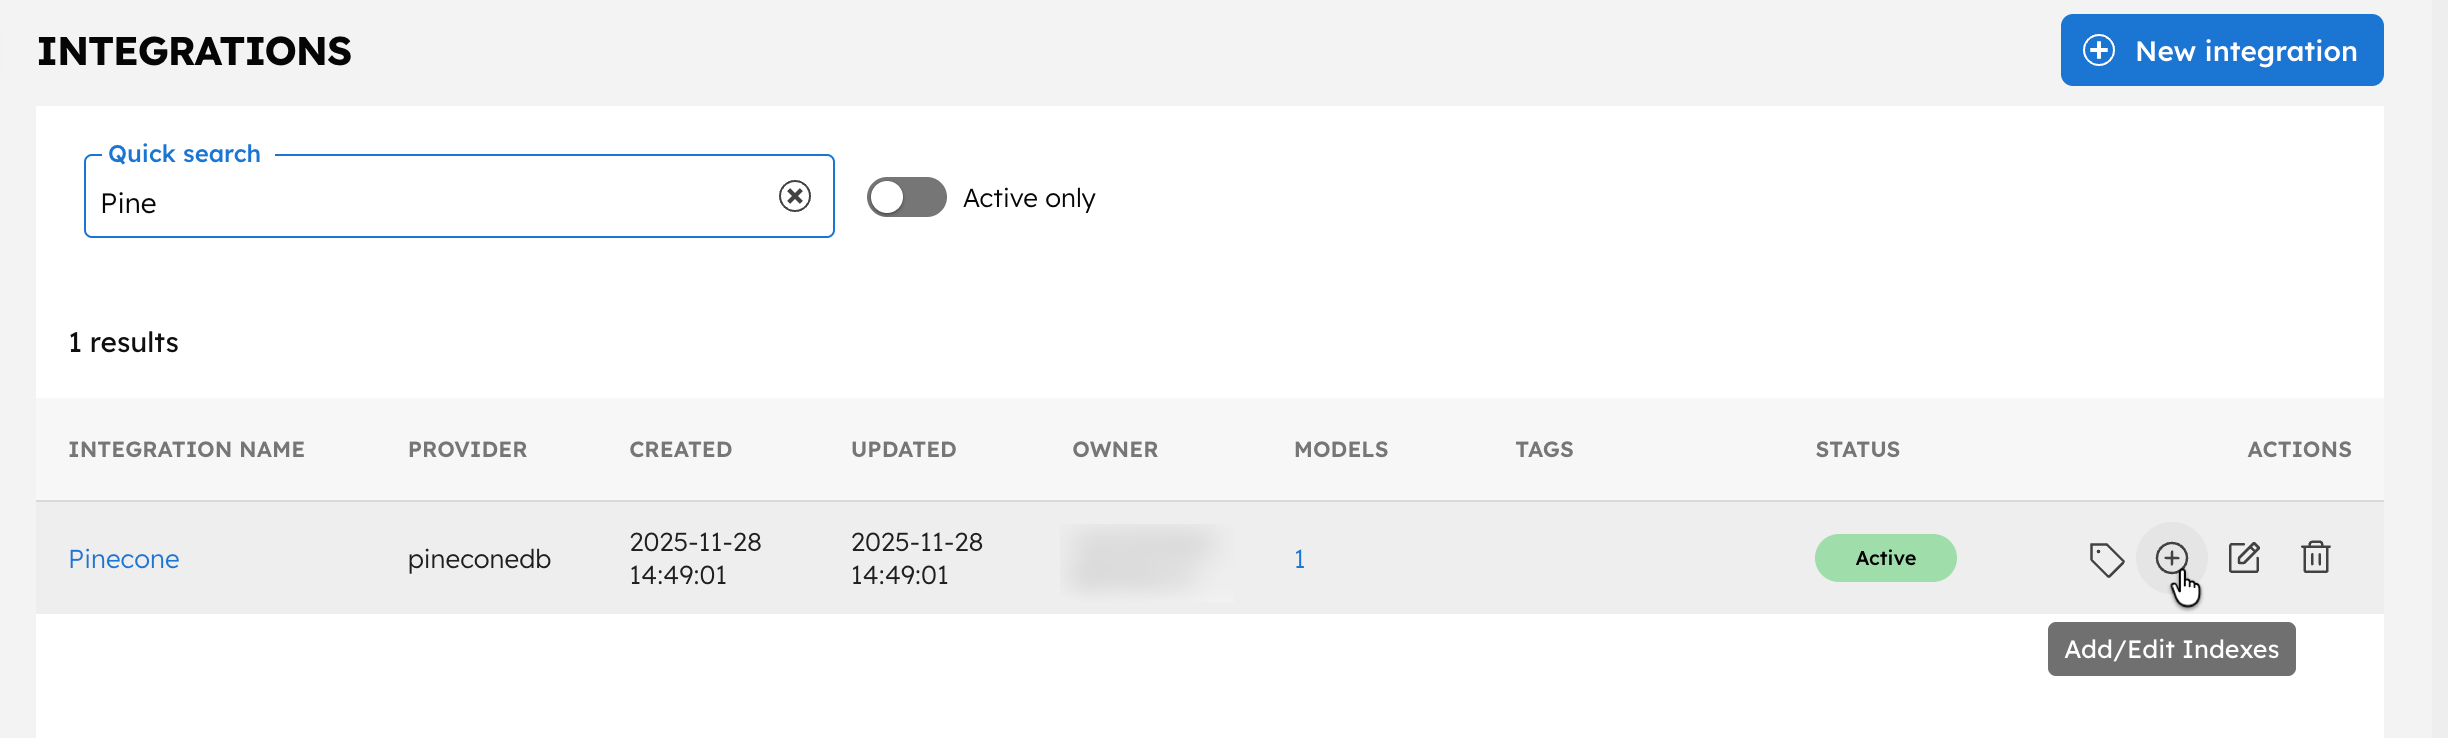
To add an index:
- In the Integrations page, select the + button next to your newly-created Pinecone integration.
- Select + New Index.
- Enter the Index name as
<YOUR-INDEX-NAME-IN-PINECONE>and a description. - Ensure that the Active toggle is switched on and select Save.
With the integrations ready, let’s create the workflow.
Step 3: Create the workflows
To create a workflow:
- Go to Definitions > Workflow and select + Define workflow.
- In the Code tab, paste the following JSON:
{
 "name": "KB_Index_Text",
 "description": "Indexes a single document into Pinecone using LLM_INDEX_TEXT.",
 "version": 1,
 "tasks": [
   {
     "name": "index_text",
     "taskReferenceName": "index_text_ref",
     "inputParameters": {
       "vectorDB": "<YOUR-VECTOR-DB-INTEGRATION>",
       "index": "<YOUR-INDEX>",
       "namespace": "kb",
       "docId": "${workflow.input.docId}",
       "text": "${workflow.input.text}",
       "embeddingModelProvider": "<YOUR-LLM-PROVIDER>",
       "embeddingModel": "<YOUR-LLM-MODEL>",
       "dimensions": 3072,
       "metadata": {
         "title": "${workflow.input.title}",
         "source": "${workflow.input.source}",
         "text": "${workflow.input.text}"
       }
     },
     "type": "LLM_INDEX_TEXT"
   }
 ],
 "inputParameters": [
   "docId",
   "text",
   "title",
   "source"
 ],
 "outputParameters": {
   "docId": "${workflow.input.docId}",
   "status": "${index_text_ref.status}"
 },
 "schemaVersion": 2
}
- Select Save > Confirm.
- After saving, update the LLM Index Text task with your actual values:

- In Vector database, replace
<YOUR-VECTOR-DB-INTEGRATION>with your integration name created in Step 2. - In Index, replace
<YOUR-INDEX>with your index name created in Step 2. - In Embedding model provider, replace
<YOUR-LLM-PROVIDER>with your OpenAI integration name created in Step 1. - In Model, replace
<YOUR-LLM-MODEL>withtext-embedding-3-large.
- Select Save > Confirm.
Create the second workflow using the following workflow definition:
{
 "name": "KB_Search_And_Answer",
 "description": "Search indexed content and answer using the top result only.",
 "version": 1,
 "tasks": [
   {
     "name": "search_index",
     "taskReferenceName": "search_index_ref",
     "inputParameters": {
       "vectorDB": "<YOUR-VECTOR-DB-INTEGRATION>",
       "index": "<YOUR-INDEX>",
       "namespace": "kb",
       "embeddingModelProvider": "<YOUR-LLM-PROVIDER>",
       "embeddingModel": "<YOUR-LLM-MODEL>",
       "dimensions": 3072,
       "query": "${workflow.input.queryText}",
       "maxResults": 3
     },
     "type": "LLM_SEARCH_INDEX"
   },
   {
     "name": "answer",
     "taskReferenceName": "answer_ref",
     "inputParameters": {
       "llmProvider": "<YOUR-LLM-PROVIDER>",
       "model": "<YOUR-LLM-MODEL>",
       "temperature": 0,
       "jsonOutput": false,
       "messages": [
         {
           "role": "system",
           "message": "Answer using only the provided context. If the context is missing, say you don't have enough information."
         },
         {
           "role": "user",
           "message": "Question: ${workflow.input.queryText}\n\nContext:\n${search_index_ref.output.result[0].metadata.text}"
         }
       ]
     },
     "type": "LLM_CHAT_COMPLETE"
   }
 ],
 "inputParameters": [
   "queryText"
 ],
 "outputParameters": {
   "answer": "${answer_ref.output.result}",
   "topMatch": "${search_index_ref.output.result[0]}"
 },
 "schemaVersion": 2
}
After saving, update the LLM Search Index task with your actual values:
- In Vector database, replace
<YOUR-VECTOR-DB-INTEGRATION>with your integration name created in Step 2. - In Index, replace
<YOUR-INDEX>with your index name created in Step 2. - In Embedding model provider, replace
<YOUR-LLM-PROVIDER>with your OpenAI integration name created in Step 1. - In Model, replace
<YOUR-LLM-MODEL>withtext-embedding-3-large.
Update the LLM Chat Complete task with your actual values:
- In LLM provider, replace
<YOUR-LLM-PROVIDER>with your OpenAI integration name created in Step 1. - In Model, replace
<YOUR-LLM-MODEL>withgpt-4o.
Save the workflow.
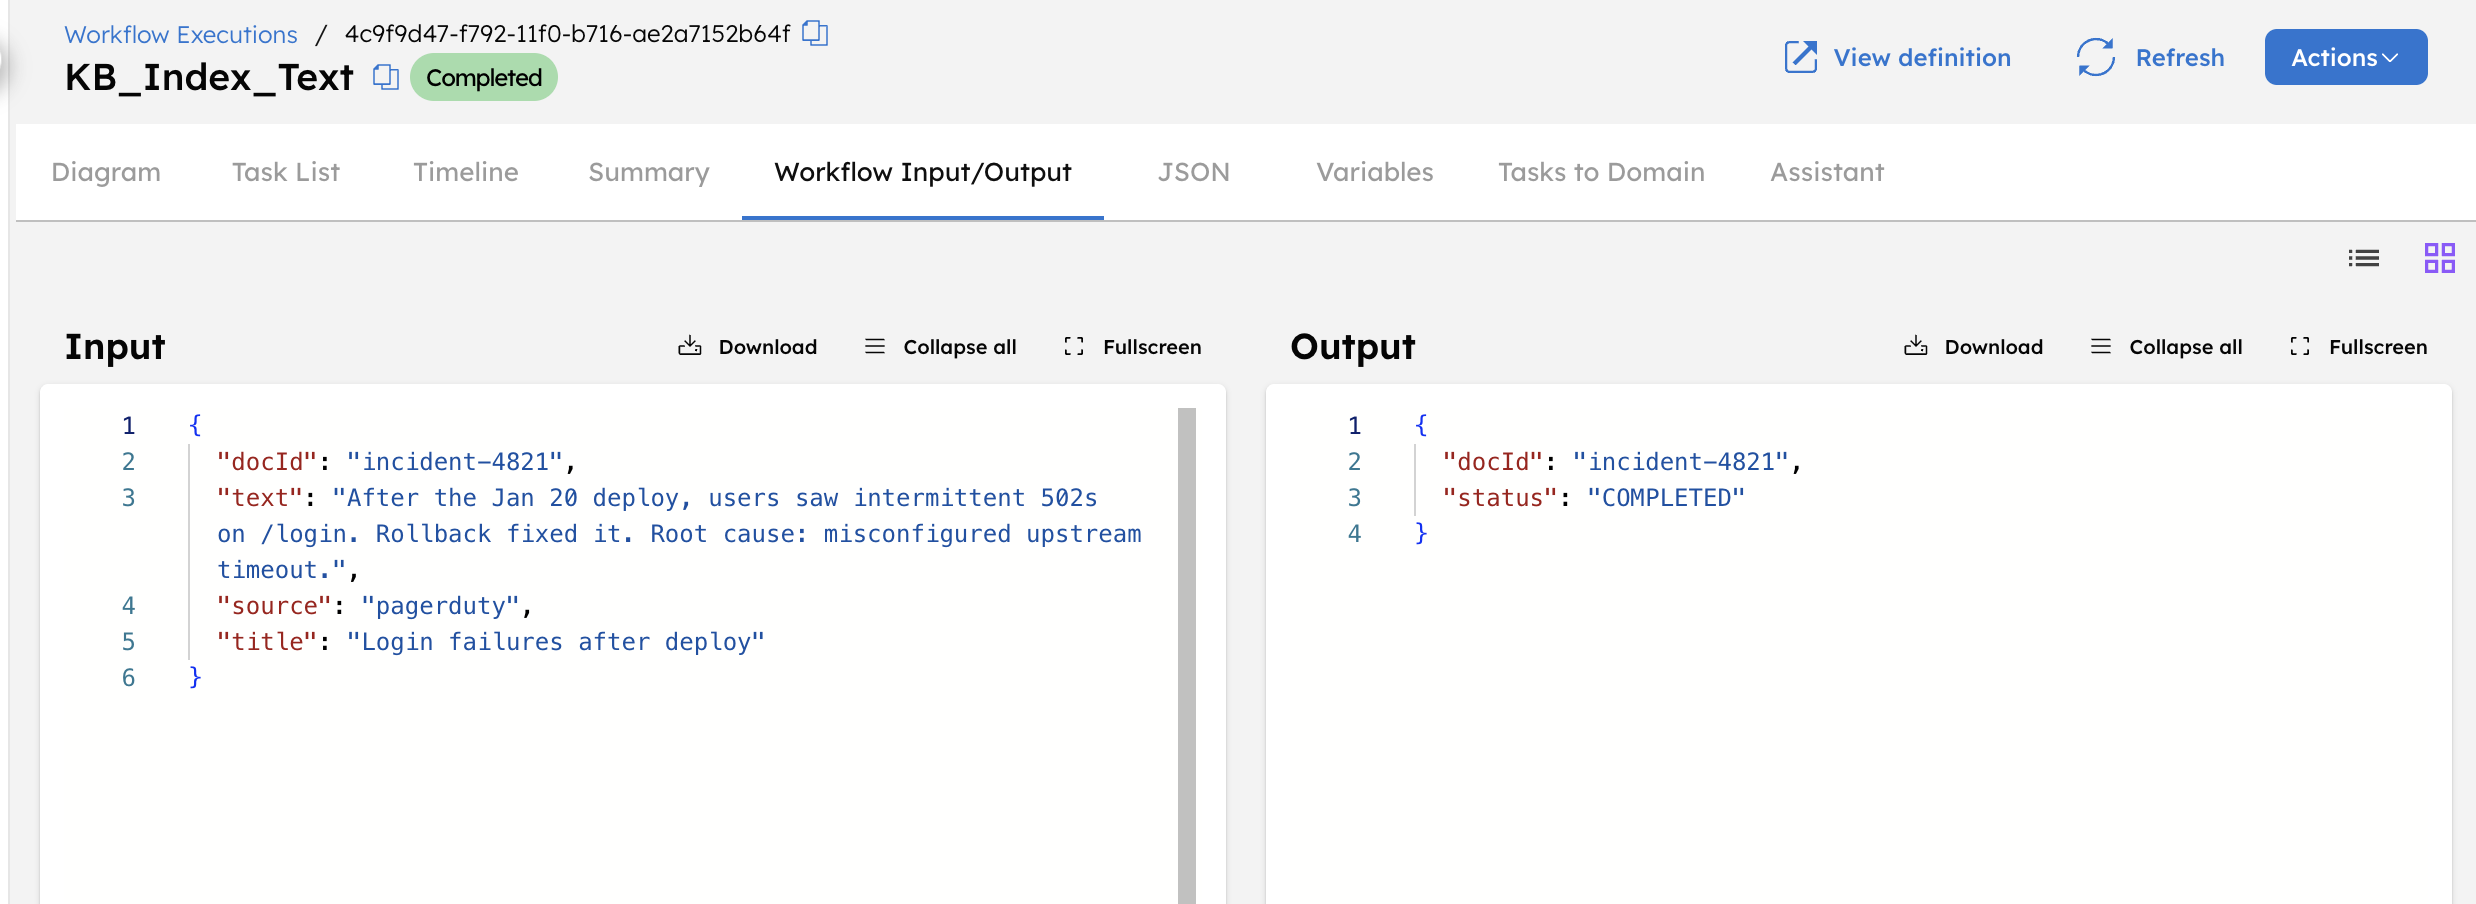
Step 4: Run the workflow
Run the KB_Index_Text workflow first to index your required details into the Vector database.
To run the workflow using Conductor UI:
- From your workflow definition, go to the Run tab.
- Enter the Input Params.
// example input params
{
 "docId": "incident-4821",
 "text": "After the Jan 20 deploy, users saw intermittent 502s on /login. Rollback fixed it. Root cause: misconfigured upstream timeout.",
 "title": "Login failures after deploy",
 "source": "pagerduty"
}
- Select Execute.
The workflow completes successfully, storing the text in the database.
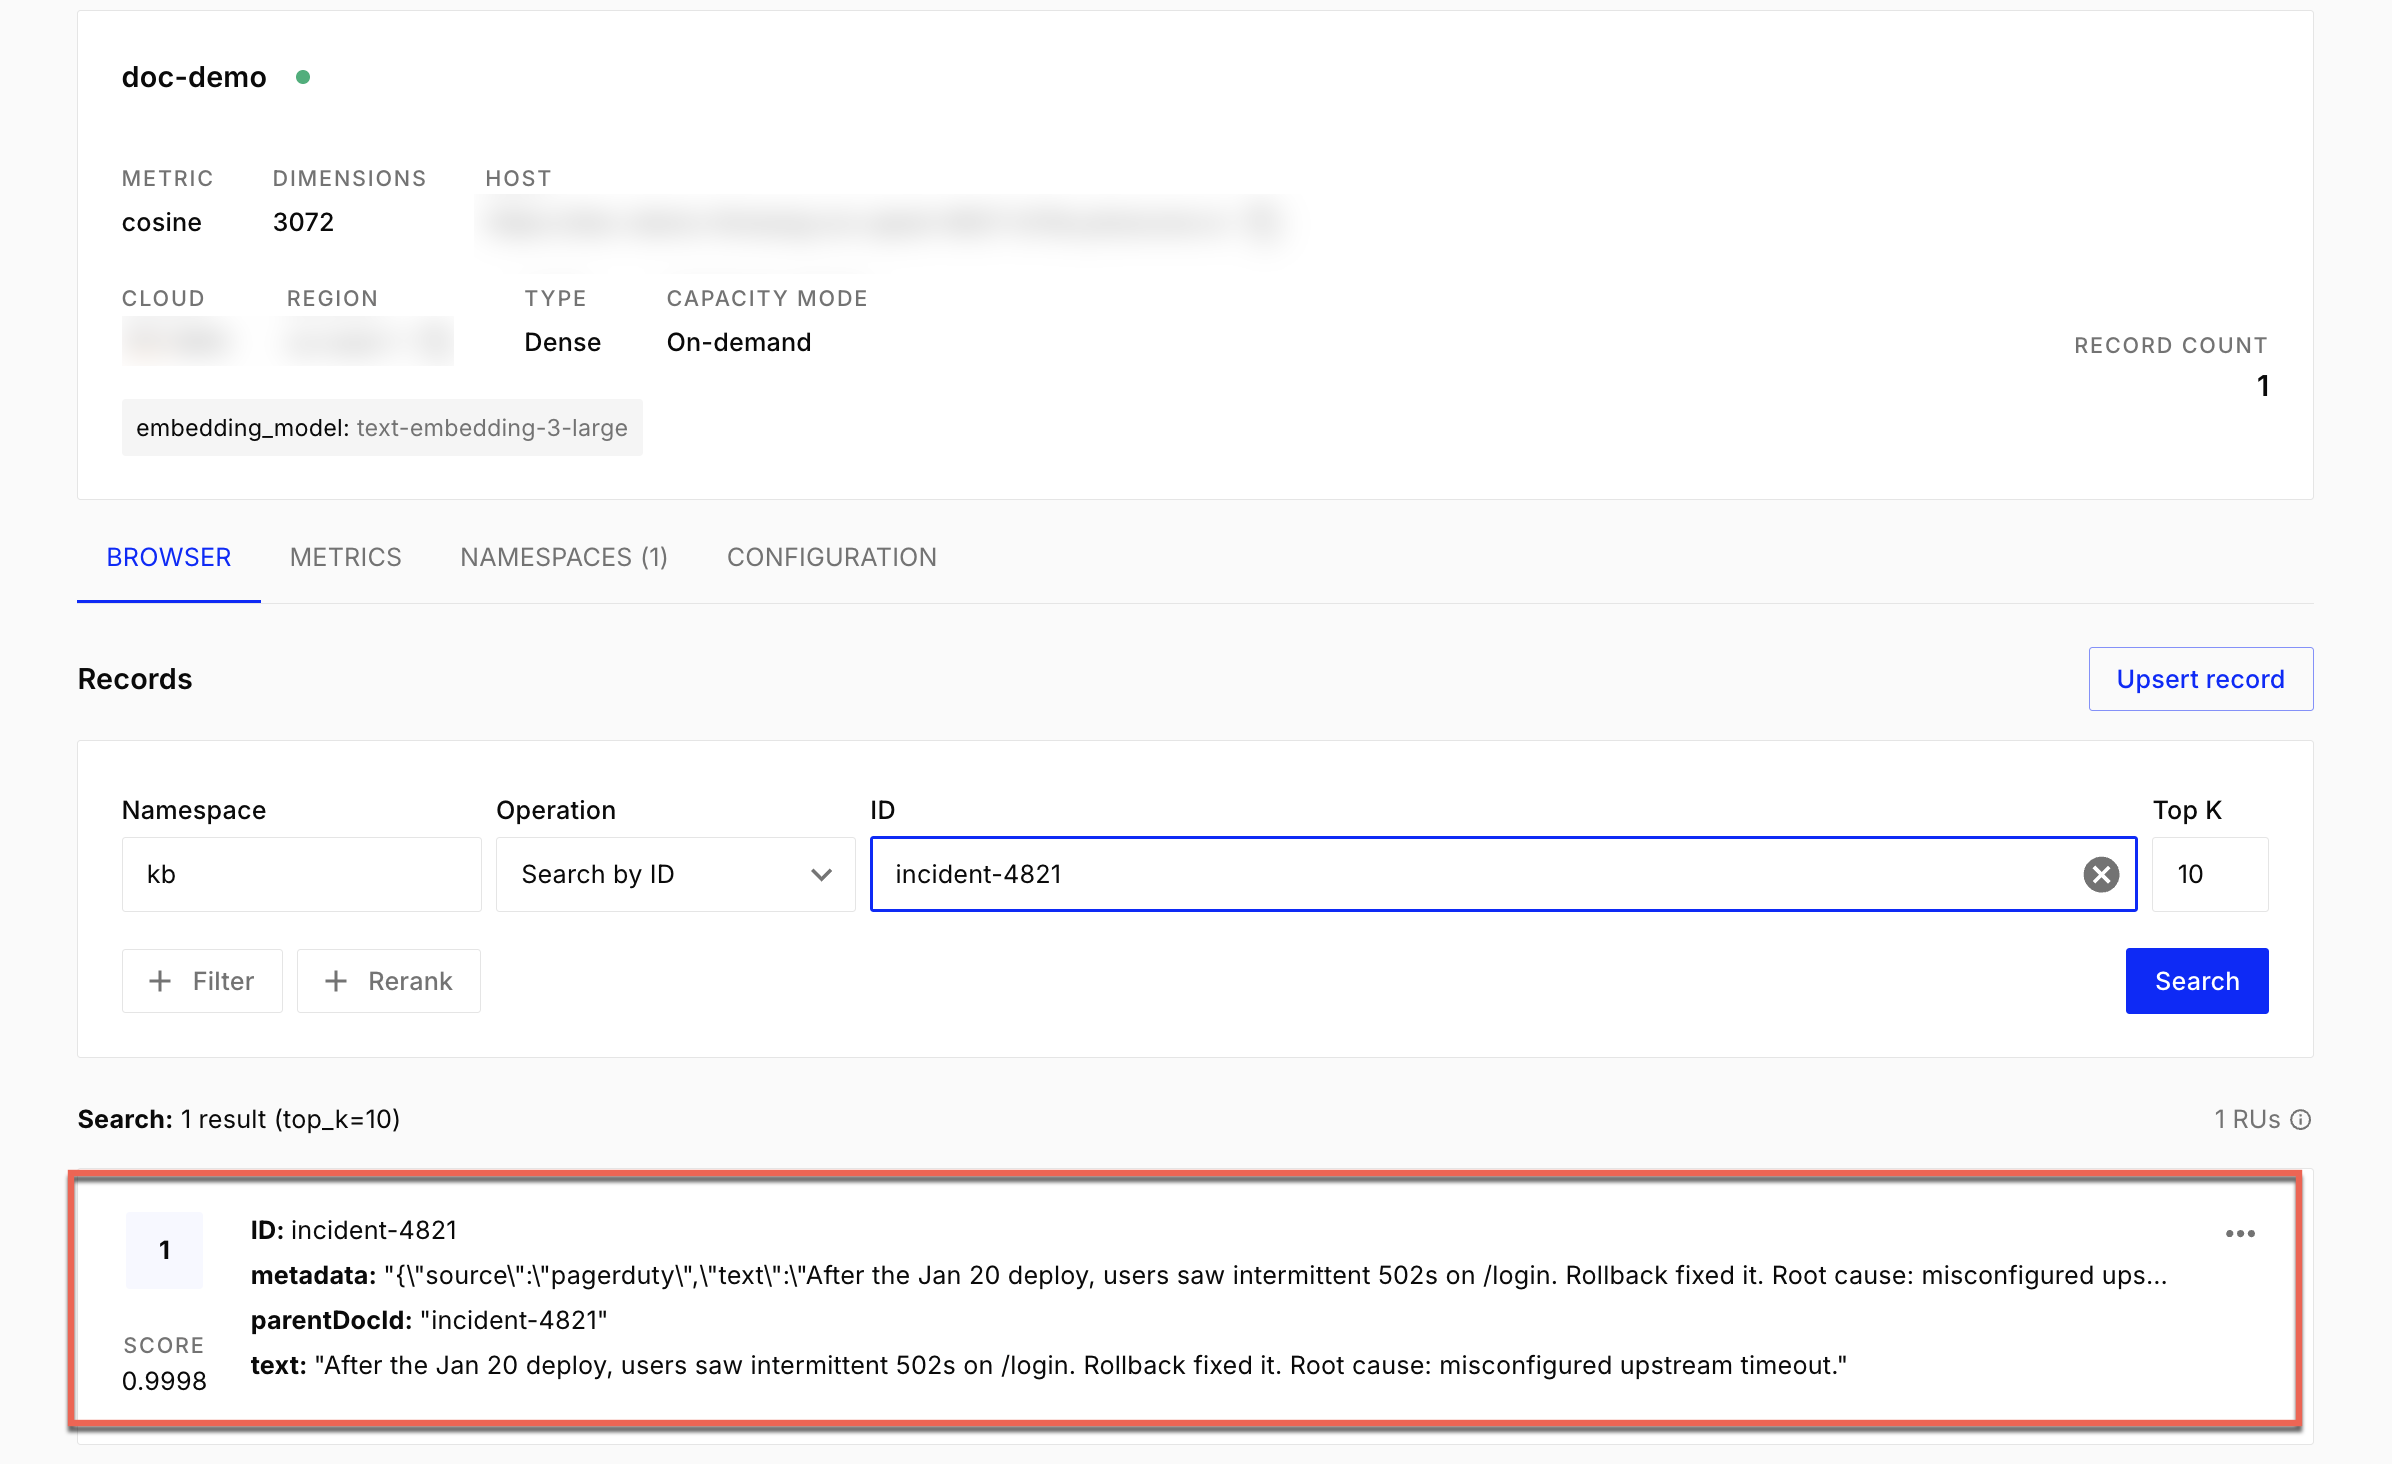
You can verify this from the Pinecone console.
Run the KB_Index_Text workflow multiple times with different inputs to index additional text entries into the knowledge base.
Another example input
{
  "docId": "incident-4913",
  "text": "API requests to /payments started timing out after a traffic spike. Increasing the connection pool size resolved the issue. No data loss was observed.",
  "title": "Payment API timeouts",
  "source": "pagerduty"
}
After indexing one or more text entries, run the KB_Search_And_Answer workflow to search the knowledge base and generate an answer.
To run the workflow using Conductor UI:
- From your workflow definition, go to the Run tab.
- Enter the Input Params.
{
 "queryText": "Why did /login start returning 502s after the deploy?"
}
- Select Execute.
After the workflow completes:
- Review the topMatch output to see the indexed text that matched the query.
- Review the answer output to see the response generated from the retrieved content.
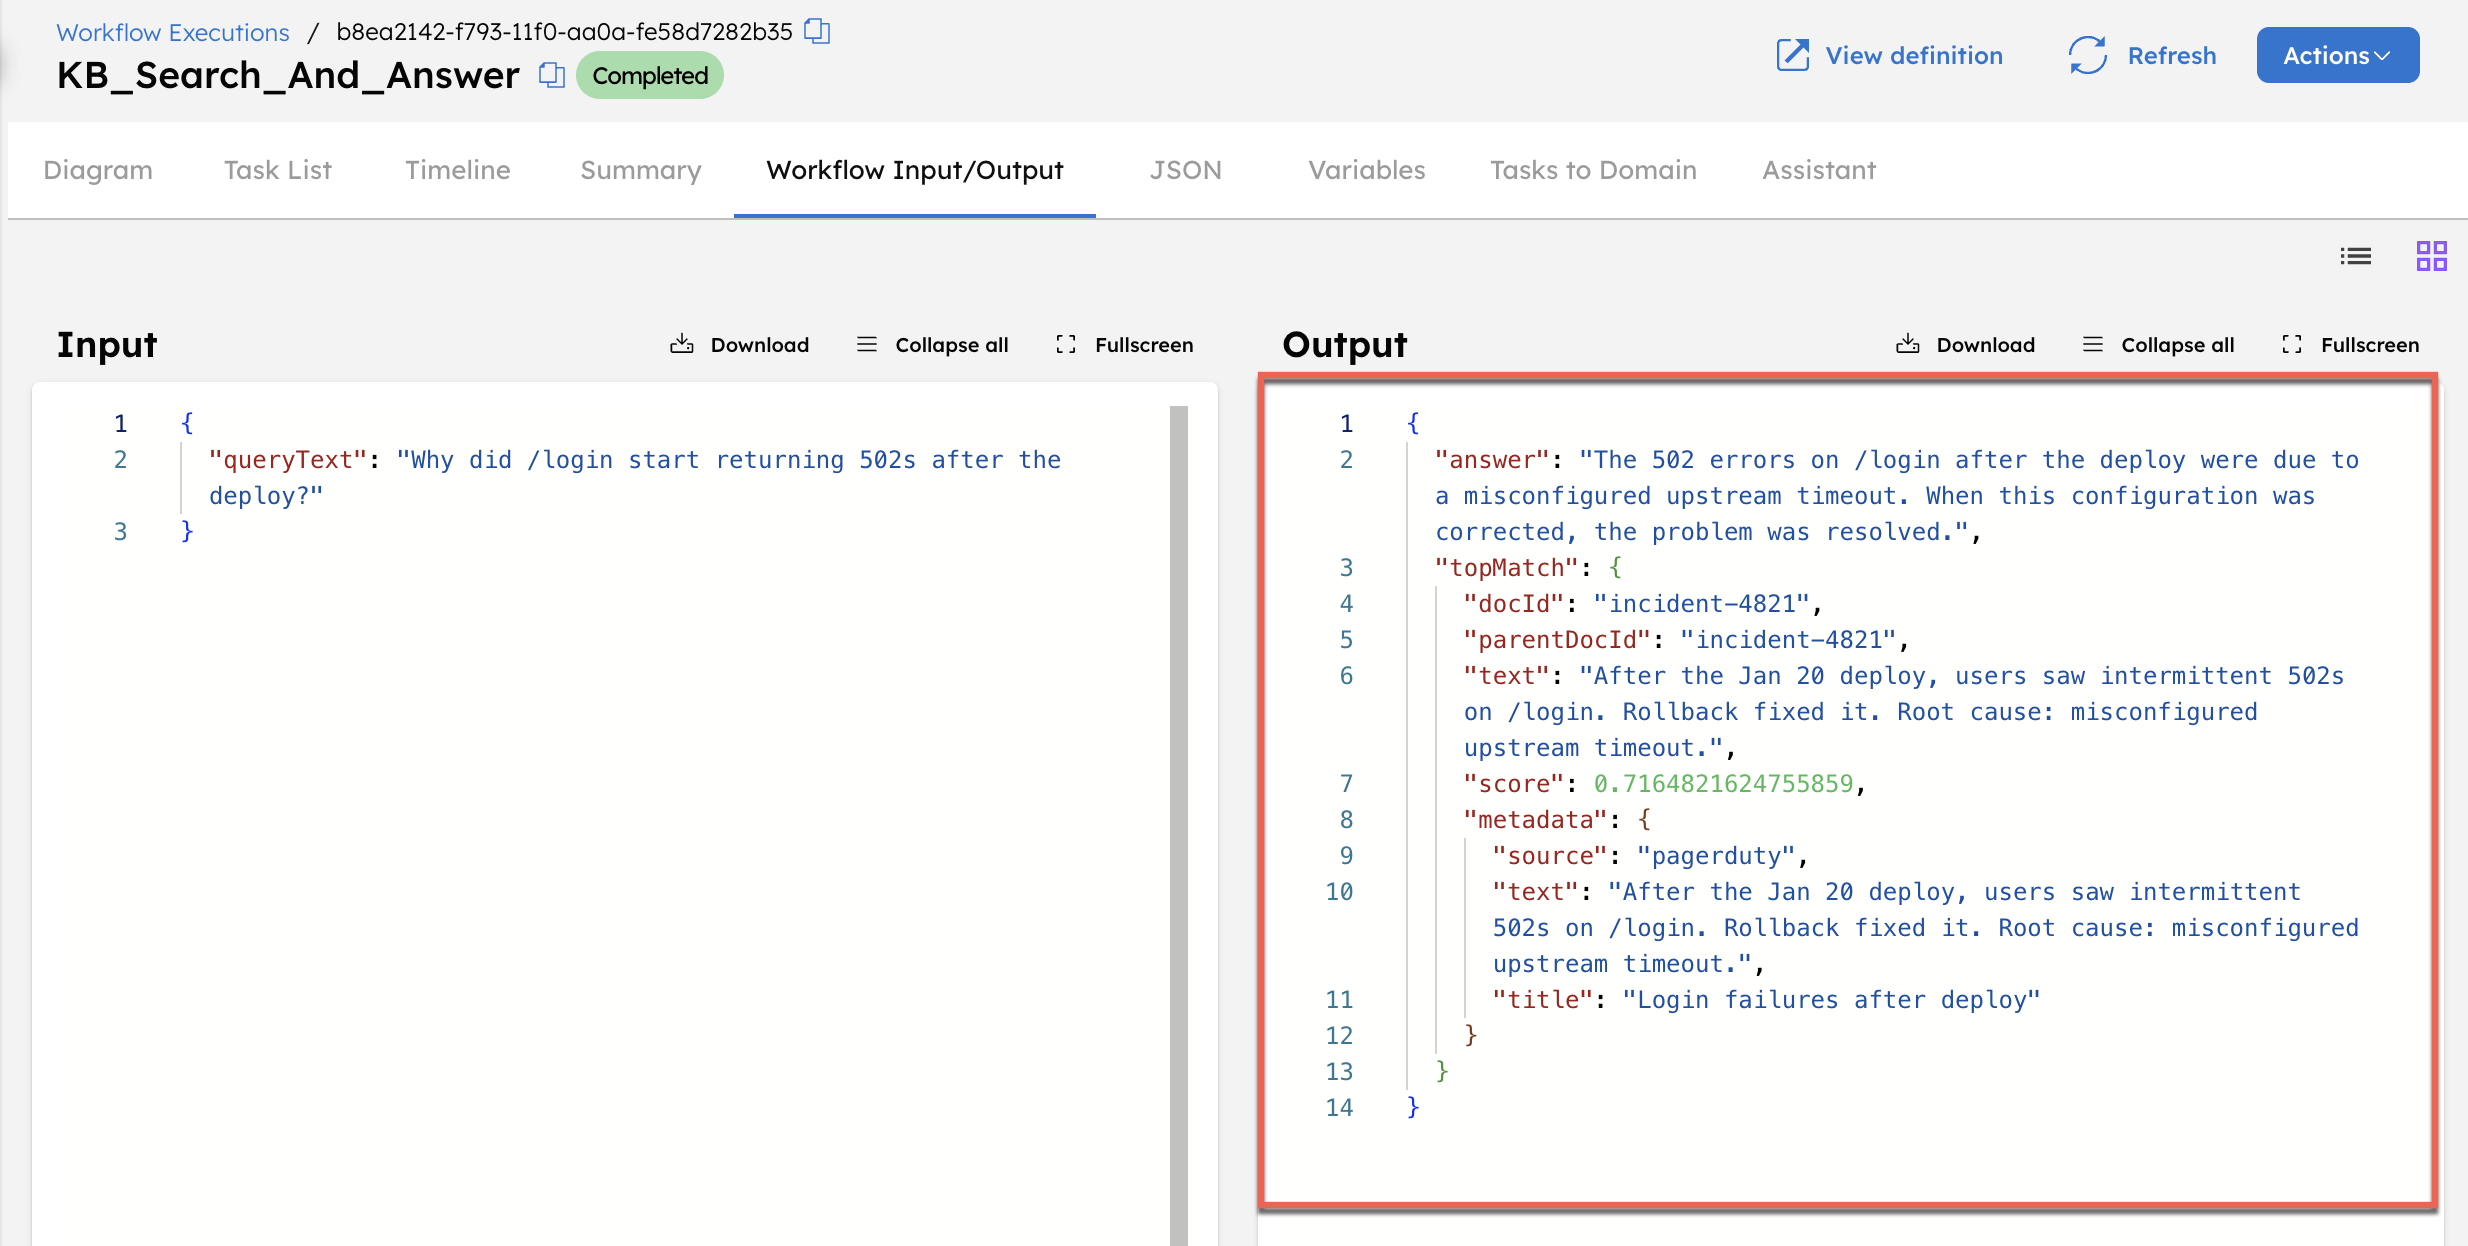
The returned answer is based only on the indexed text. This confirms that the workflow successfully retrieved and used content from the knowledge base.