Opsgenie
- v4.1.67 and later
- v5.1.10 and later
The Opsgenie task is used to send alerts to the alerting system Opsgenie.
Opsgenie utilizes metadata to populate alert details and notify the appropriate responders. The task parameters allow for customization of the alert, including the message, priority, and the users who can view and respond to the alert.
Task parameters
Configure these parameters for the Opsgenie task.
| Parameter | Description | Required/ Optional |
|---|---|---|
| inputParameters.alias | A custom identifier that will be generated in Opsgenie when alerts are triggered. Can support up to 512 characters. | Required. |
| inputParameters.description | Description of the alert, limited to 15,000 characters in Opsgenie. | Required. |
| inputParameters.visibleTo | Users in Opsgenie who can view the alerts. Can be a string, number, boolean, object/array, or null. | Required. |
| inputParameters.responders | Users in Opsgenie to be notified of the alert. Can be a string, number, boolean, object/array, or null. | Required. |
| inputParameters.details | Additional details for the alert. Can be a string, number, boolean, object/array, or null. | Optional. |
| inputParameters.message | Message to be displayed in Opsgenie, providing a quick overview of the alert. | Optional. |
| inputParameters.actions | Opsgenie actions to be executed on the alert. Can be a string or object/array. | Optional |
| inputParameters.priority | The priority of the alert. | Optional. |
| inputParameters.entity | Domain the alert is related to, such as the server's name or application. | Optional. |
| inputParameters.token | API token for integrating with Opsgenie. Refer to the official Opsgenie documentation to get the API keys. Tip: Save the token as a secret in the Conductor for enhanced security. | Required. |
| inputParameters.tags | Tags to be added to the alert in Opsgenie. Can be a string or object/array. | Optional. |
The following are generic configuration parameters that can be applied to the task and are not specific to the Opsgenie task.
Caching parameters
You can cache the task outputs using the following parameters. Refer to Caching Task Outputs for a full guide.
| Parameter | Description | Required/ Optional |
|---|---|---|
| cacheConfig.ttlInSecond | The time to live in seconds, which is the duration for the output to be cached. | Required if using cacheConfig. |
| cacheConfig.key | The cache key is a unique identifier for the cached output and must be constructed exclusively from the task’s input parameters. It can be a string concatenation that contains the task’s input keys, such as ${uri}-${method} or re_${uri}_${method}. | Required if using cacheConfig. |
Task configuration
This is the task configuration for an Opsgenie task.
{
  "name": "ops_genie_task",
  "taskReferenceName": "ops_genie_task_ref",
  "inputParameters": {
    "alias": "${workflow.input.opsGenieAlias}",
    "description": "${query_processor_ref.output.result.workflowsUrl}",
    "visibleTo": "${workflow.input.opsGenieVisibleTo}",
    "message": "Failed Worklows detected",
    "responders": "${workflow.input.opsGenieResponders}",
    "details": {
      "key": "value"
    },
    "priority": "${workflow.input.opsGeniePriority}",
    "entity": "${workflow.input.opsGenieEntity}",
    "tags": "${workflow.input.opsGenieTags}",
    "actions": "${workflow.input.opsGenieActions}",
    "token": "${workflow.secrets.OPS_GENIE_TOKEN}"
  },
  "type": "OPS_GENIE"
}
Task output
The task returns a response with headers containing alert details such as alert ID, status, message, created/updated time, and so on.
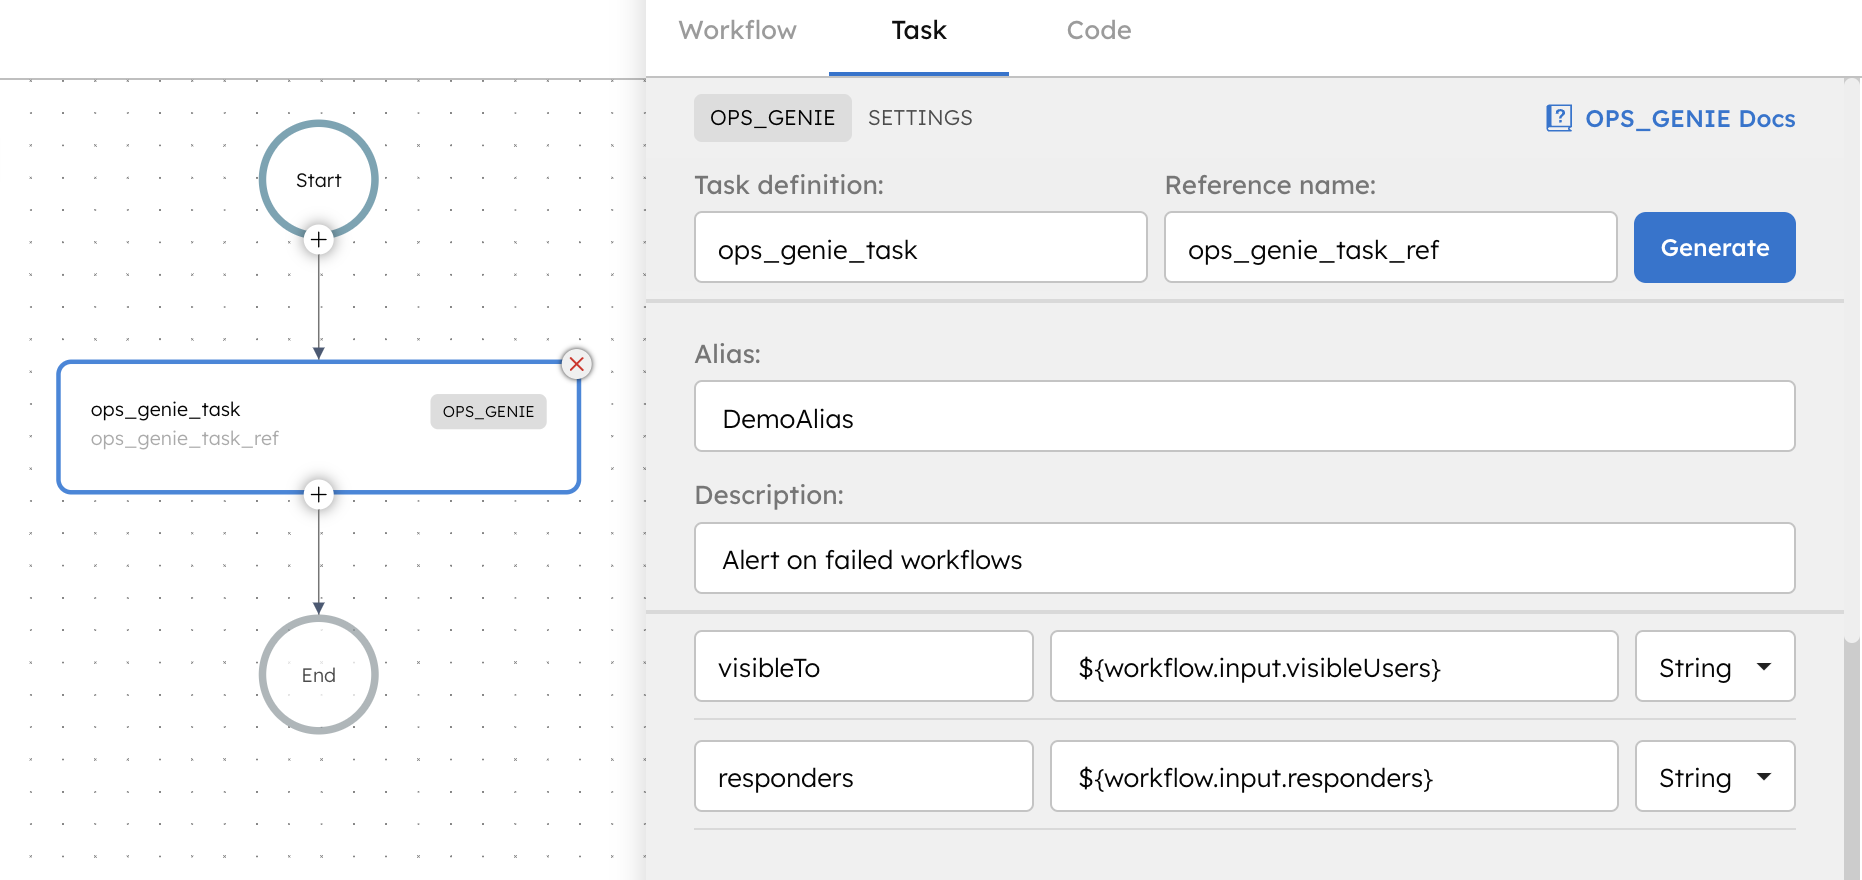
Adding an Opsgenie task in UI
To add an Opsgenie task:
- In your workflow, select the (+) icon and add a Opsgenie.
- Enter the Alias and Description.
- Set the respective user IDs in visibleTo and responders fields.
- (Optional) In Details, add any additional details for the alert.
- Set the following Opsgenie parameters:
- Message—Message to be displayed in Opsgenie.
- Actions—Action to be carried out on receiving the alert.
- Priority—Set the priority of the alert.
- Entity—Add the domain to which the alert is related to.
- Tags—The tags to be added to the alert.
- Token—The API token for integrating with Opsgenie. Refer to the official Opsgenie documentation on how to get the API keys.
