Using AI Models or LLMs
In this guide, you will learn how to leverage the power of Orkes Conductor and AI models, such as large language models (LLMs) or embedding models, in your applications. Here is an overview of using AI models in Orkes Conductor to build an AI-powered application:
- Choose an AI model for your use case.
- Integrate your chosen AI model with your Orkes Conductor cluster.
- (If required) Create an AI prompt if your workflow uses text or chat completion tasks.
- (If required) Integrate a vector database if your workflow uses embedding or search tasks.
- Set access limits to govern which applications or groups can use the model, prompt, or vector database.
- Add an AI task to your workflow and configure it for the chosen model and prompt template.
Step 1: Choose an AI model
The AI models offered by different providers have a wide range of applications, such as:
- Text generation and completion
- Text summarization
- Language translation
- Sentiment analysis
- Text classification
- Embedding generation
Not all models are suitable for all these use cases, as some models are better at specific tasks due to their architecture and training. For example, OpenAI offers models such as "text-embedding-ada-002" designed specifically for generating embeddings.
Available model providers
The following model providers are available for integration with Orkes Conductor:
- Ollama
- Azure + OpenAI
- OpenAI
- Perplexity
- Grok
- Cohere
- Mistral
- Anthropic Claude
- Google Vertex AI
- Google Gemini AI
- Hugging Face
- AWS Bedrock Anthropic
- AWS Bedrock Cohere
- AWS Bedrock Titan
Review the model provider’s official documentation to determine which models suit your use case.
Step 2: Integrate an AI model
Before using an AI model in a workflow, you must integrate it with your Orkes Conductor cluster.
To integrate an LLM:
-
Go to Integrations from the left menu on your Conductor cluster.
-
Select + New integration.
-
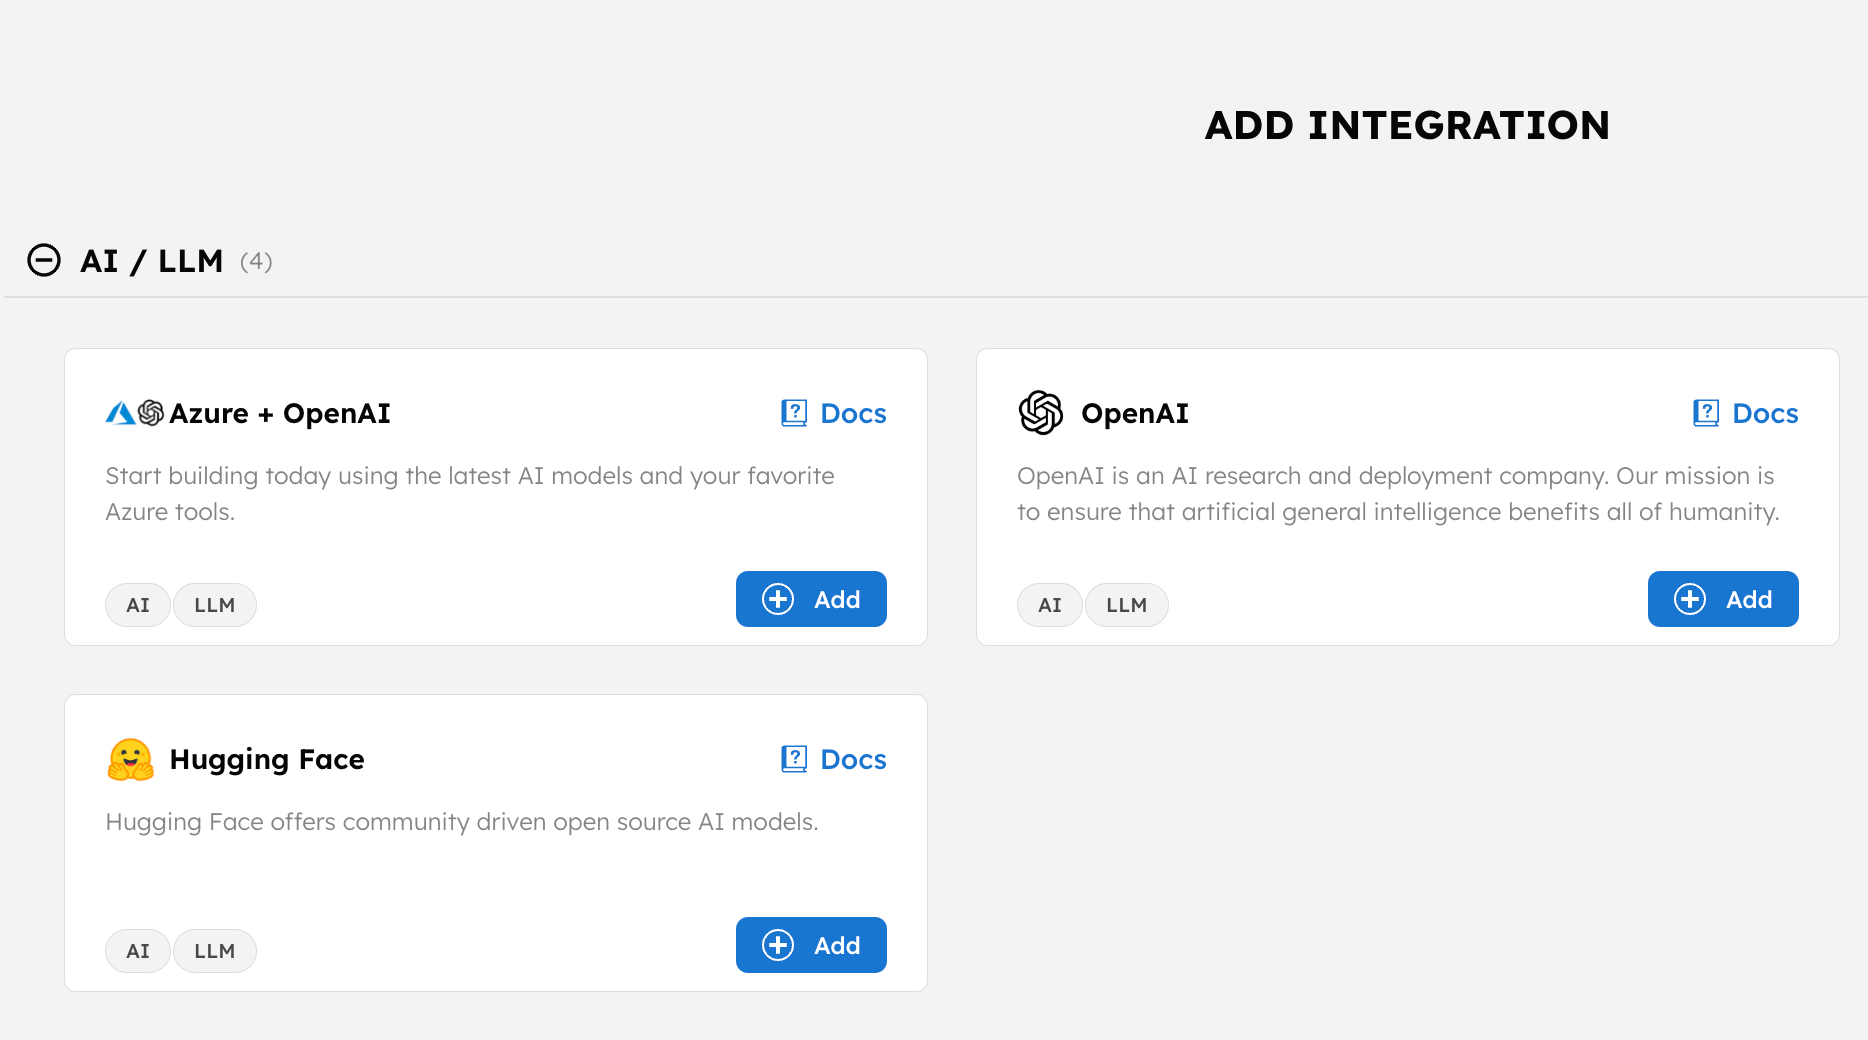
In the AI/LLM section, select + Add to integrate your preferred model provider.
-
Enter the required parameters for the chosen provider.
noteThe integration configuration differs with each model provider. For detailed steps on integrating with each provider, refer to AI/LLM Integrations.
-
(Optional) Toggle the Active button off if you don’t want to activate the integration instantly.
-
Select Save.
Add the preferred models
Once the AI/LLM integration is added, you can begin adding models from the provider. Review the supported models for each provider before adding them to your cluster.
List of models
To add a model:
- In Integrations, select the + icon next to your newly-created integration.
- Select + New model.
- Enter the model name and an optional description for the model.
- (Optional) Toggle the Active button off if you don’t want to activate the model instantly.
- Select Save.
Step 3: Create an AI prompt
If you are using an LLM Text Complete task, an AI prompt is required. For LLM Chat Complete, a prompt is optional. You can create a prompt in the AI Prompt Studio to be used with AI tasks in a workflow. Refer to Using AI Prompts for more information.
Step 4: Integrate a vector database
You must also integrate a vector database if you are using one of the following AI tasks:
Refer to Using Vector Databases for more information.
Step 5: Set access limits
As best practice, use Orkes’ RBAC feature to govern which applications or user groups can access the AI models, prompts, and vector databases.
To provide access to an application or group:
-
Go to Access Control > Applications or Groups from the left menu on your Conductor cluster.
-
Create a new group/application or select an existing one.
-
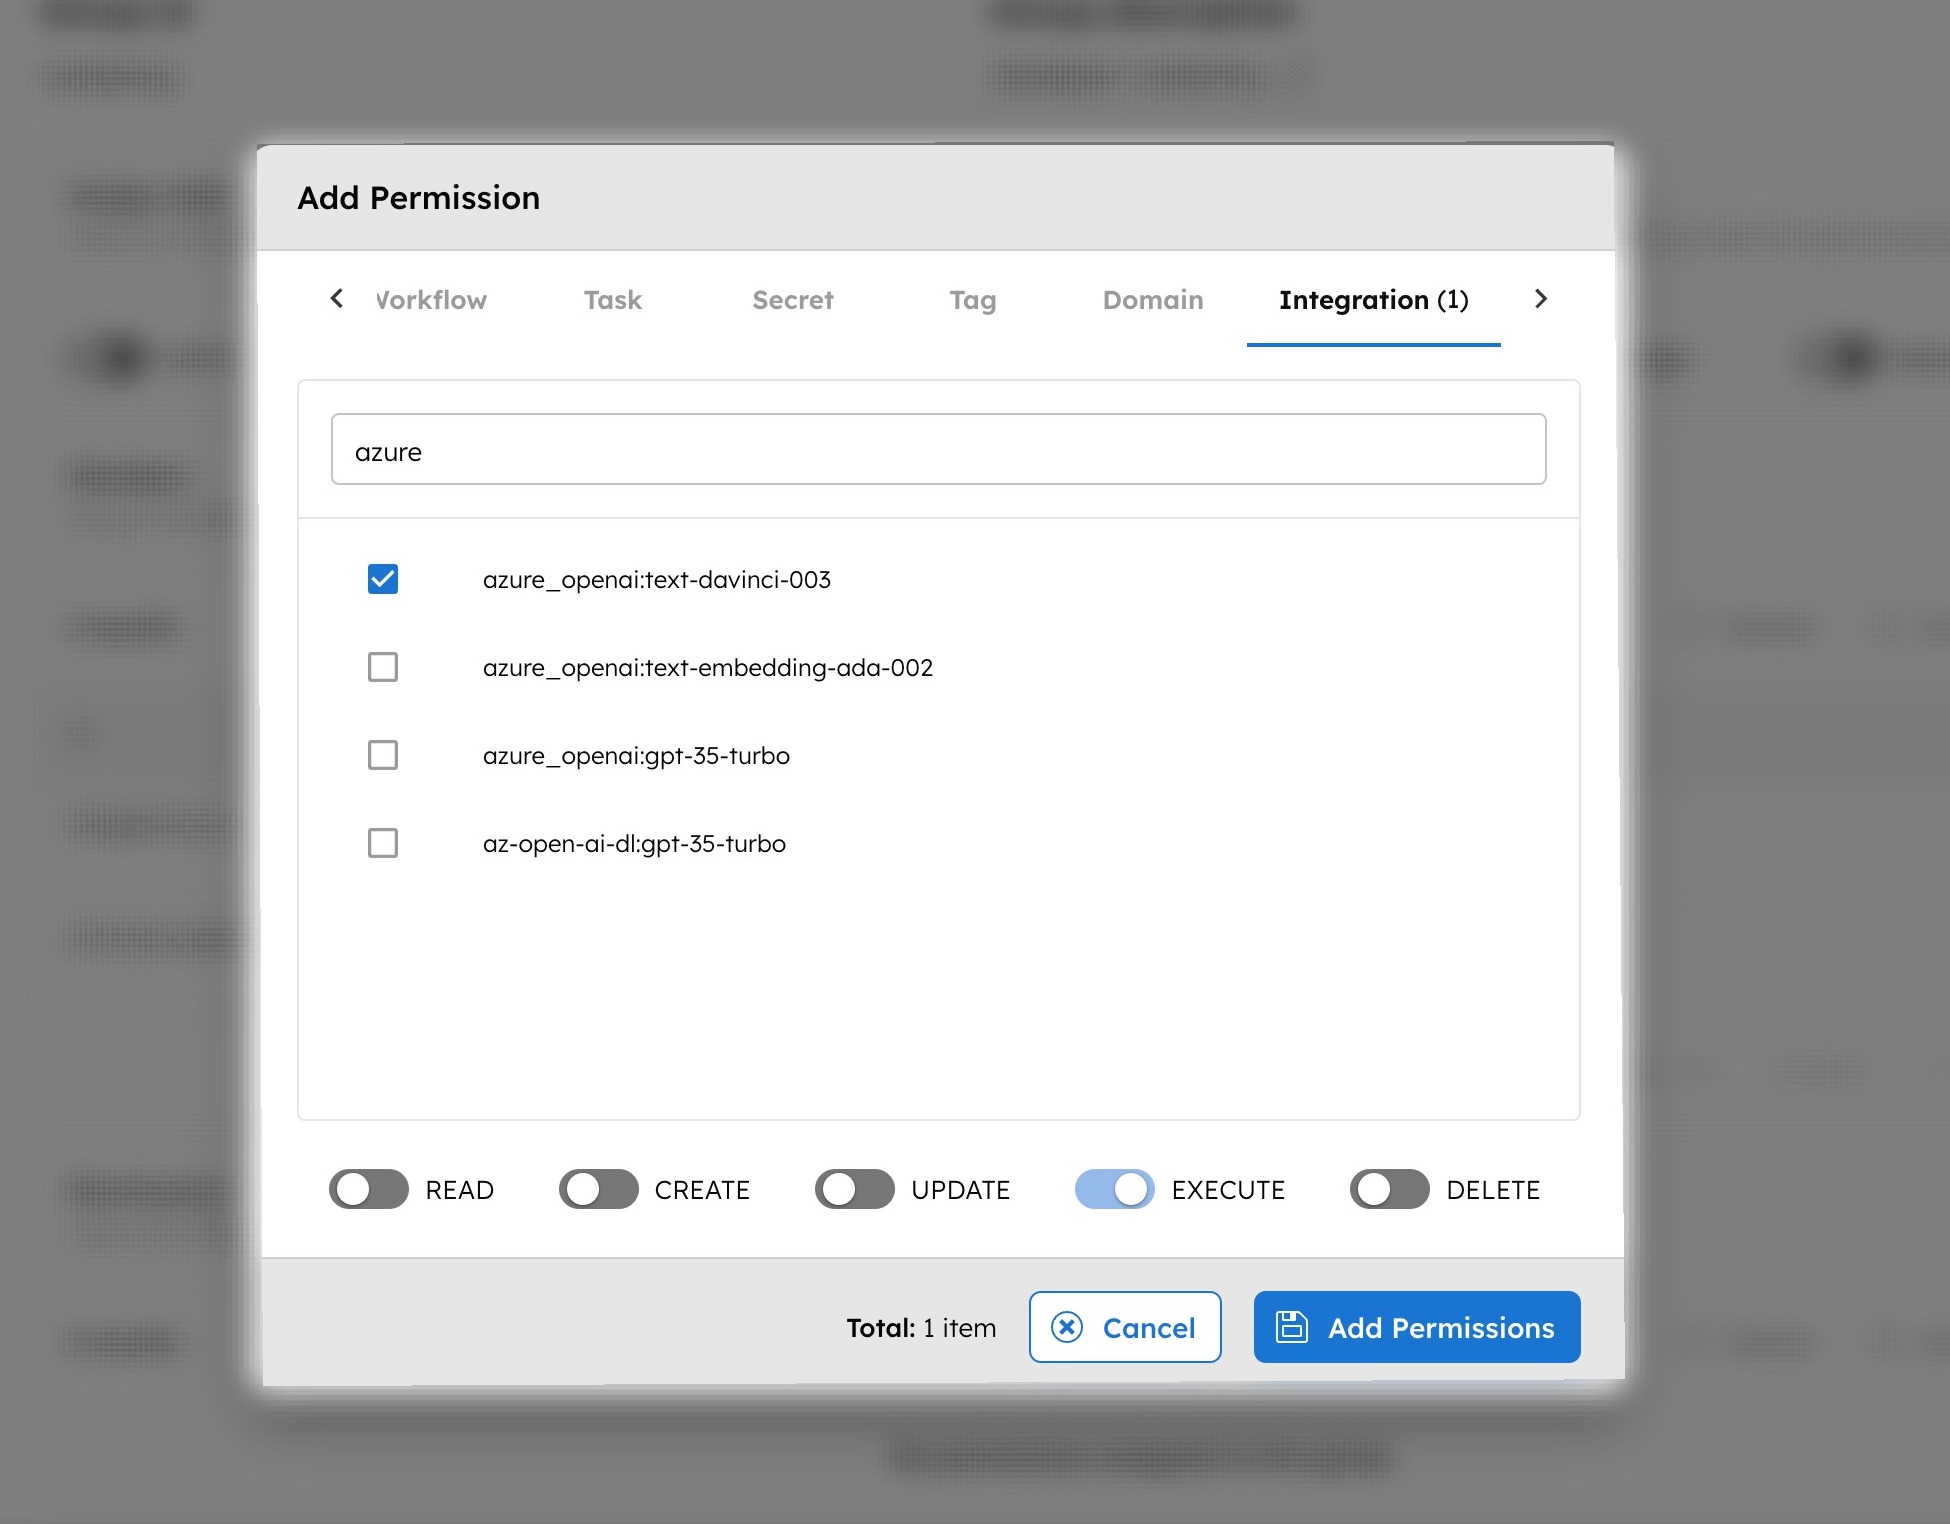
In the Permissions section, select + Add permission.
-
In the Integration tab, select the required AI models and/or vector databases and toggle the necessary permissions.
-
In the Prompt tab, select the required prompt and toggle the necessary permissions.
-
Select Add Permissions.
The group or application can now access the AI resources according to the configured permissions.
Step 6: Add an AI task to your workflow
With the AI/LLM integration and AI prompt ready, you can add an AI task to your workflow and configure the task for the chosen model and prompt.
To add an AI task:
-
Go to Definitions > Workflow from the left menu on your Conductor cluster.
-
Create a new workflow or select an existing workflow.
-
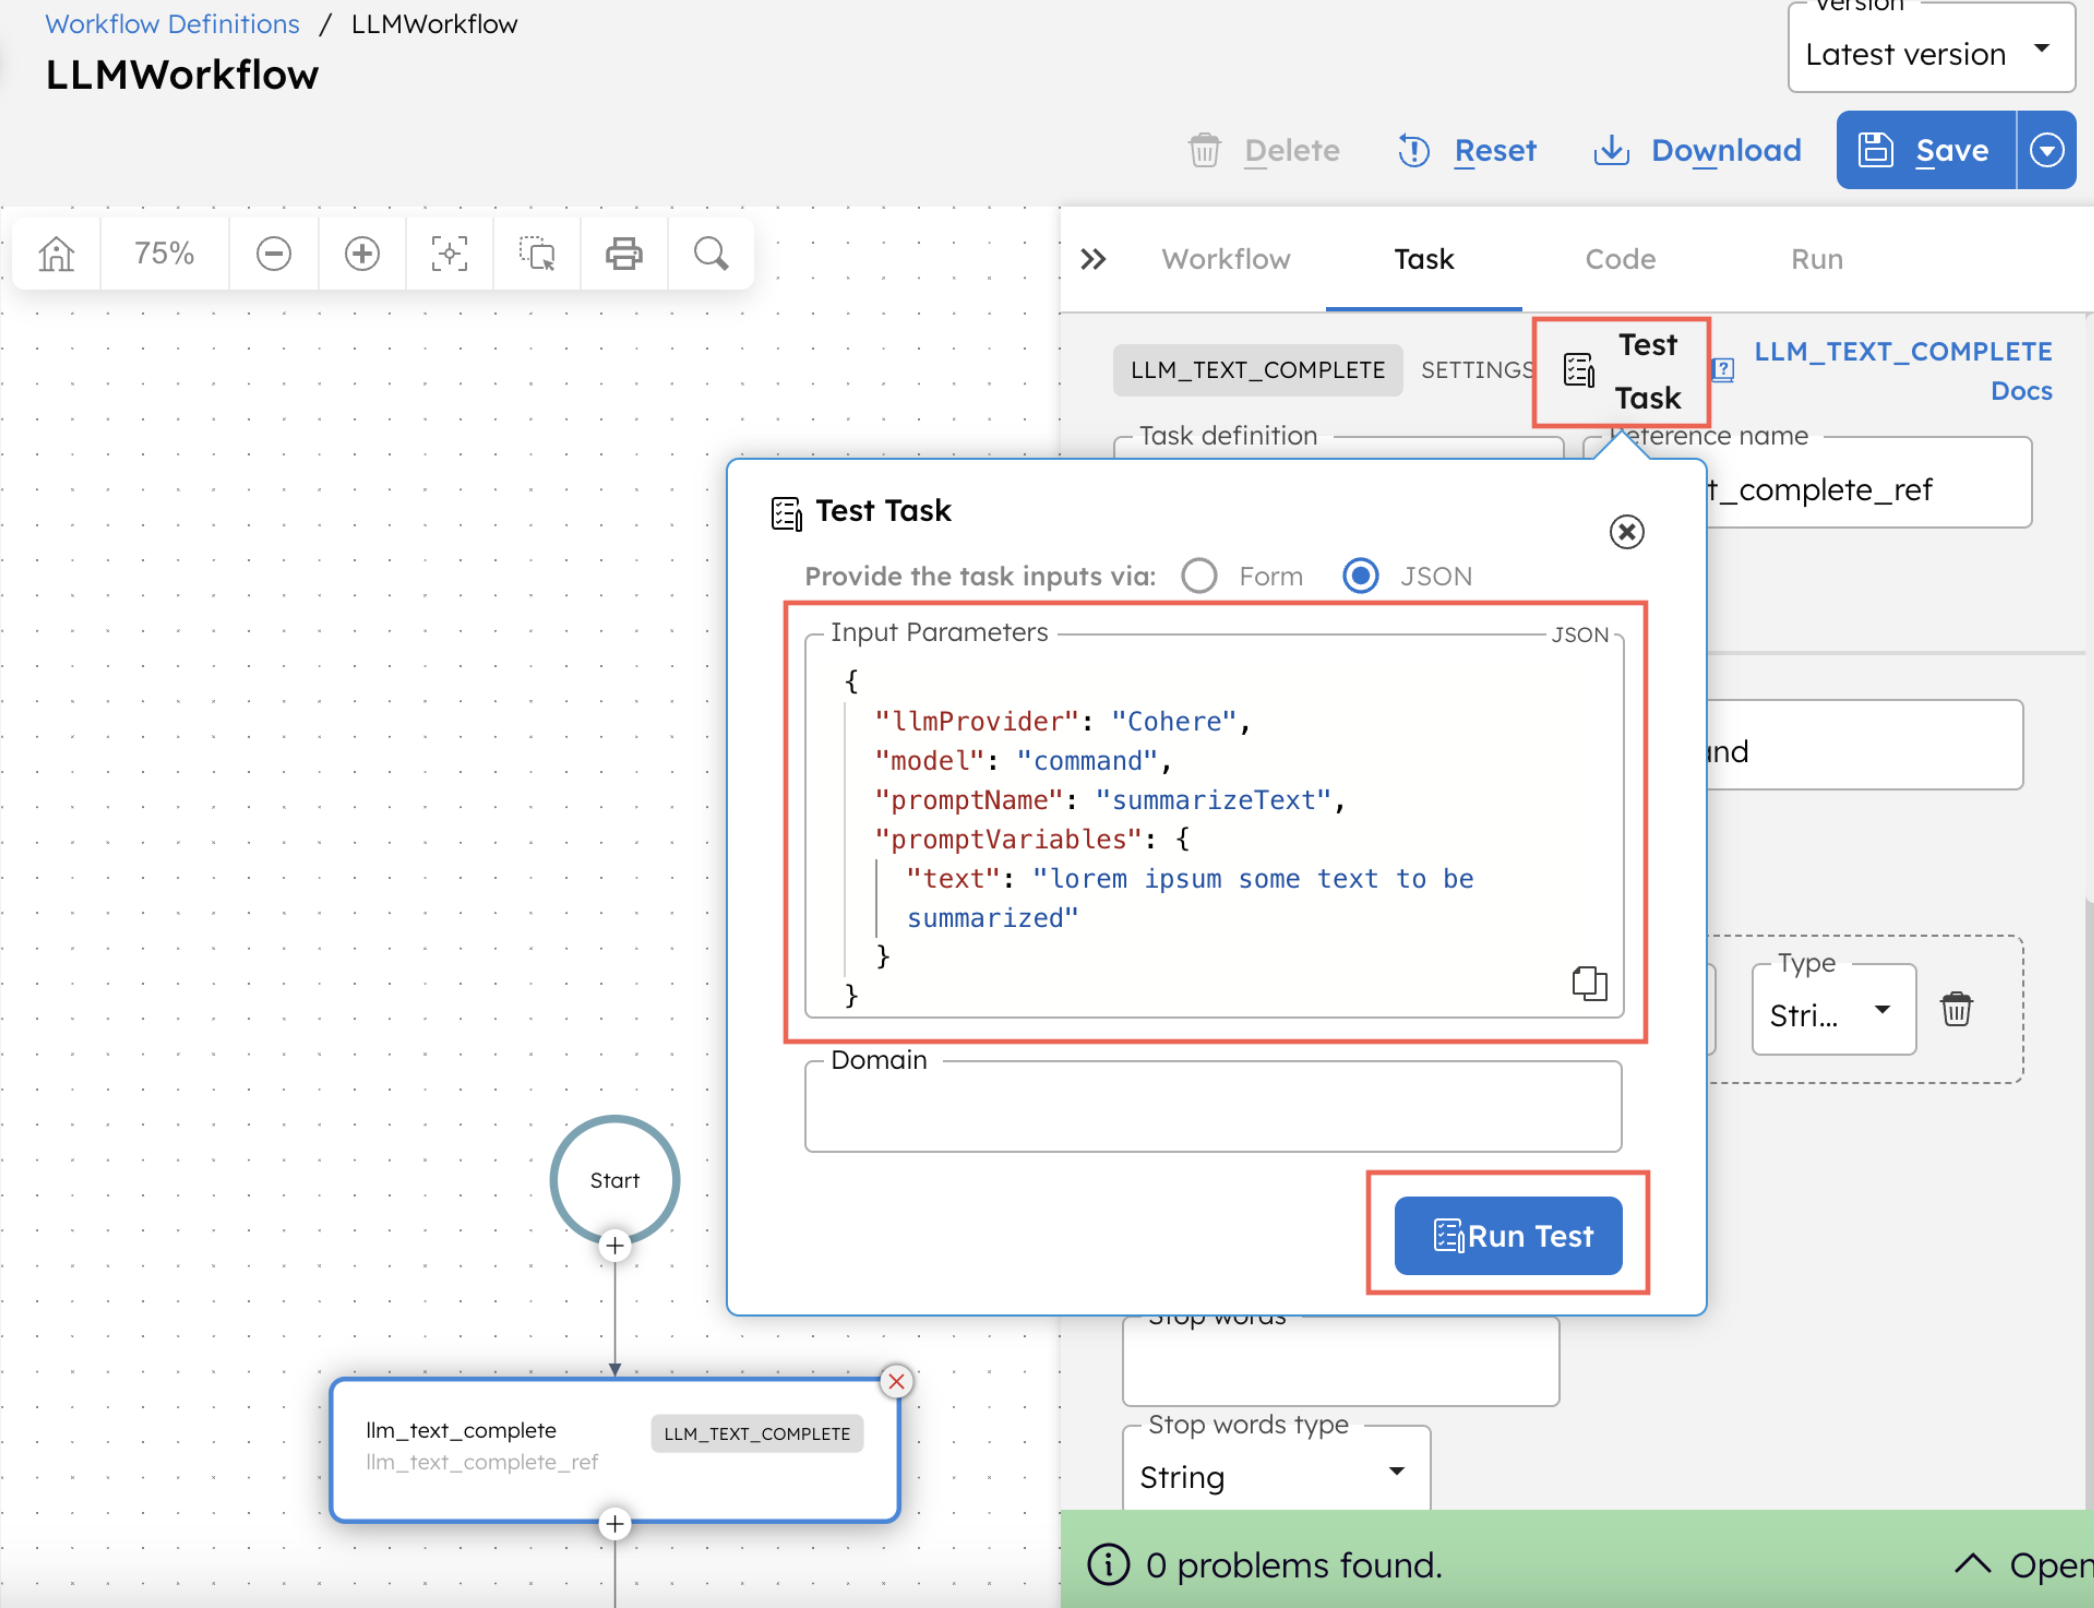
Add an AI task and select the desired model provider and model.
-
Configure the remaining task parameters. If you are using an LLM Text Complete or LLM Chat Complete task, you can select the prompt template from the dropdown based on the chosen model.
noteRefer to the AI Task Reference for more details on configuring the task parameters.
-
Save the workflow.
Once the workflow is saved, you can test the newly added AI task or run the workflow.
Examples
Agentic research assistant
Check out the quickstart template on Developer Edition for building an agentic research assistant that uses multiple prompts.
AI tutorials
Explore the AI tutorials section for step-by-step, end-to-end examples that use different AI tasks and integrations.